Today I would like to share with you a beautiful card with three layers using the new Pale Papaya card stock. This is just one of the new 2021-2023 In-Colors which will be in the new Annual Catalogue as of May 4th. Although I am not a fan of eating Papayas, I really like the soft colour.
While this card is rather simple to make, it is also a bit tricky and not without it’s challenges. It is also one of my favourite card layouts because I love how it all comes together in the end to make an interesting card you won’t find in any store.
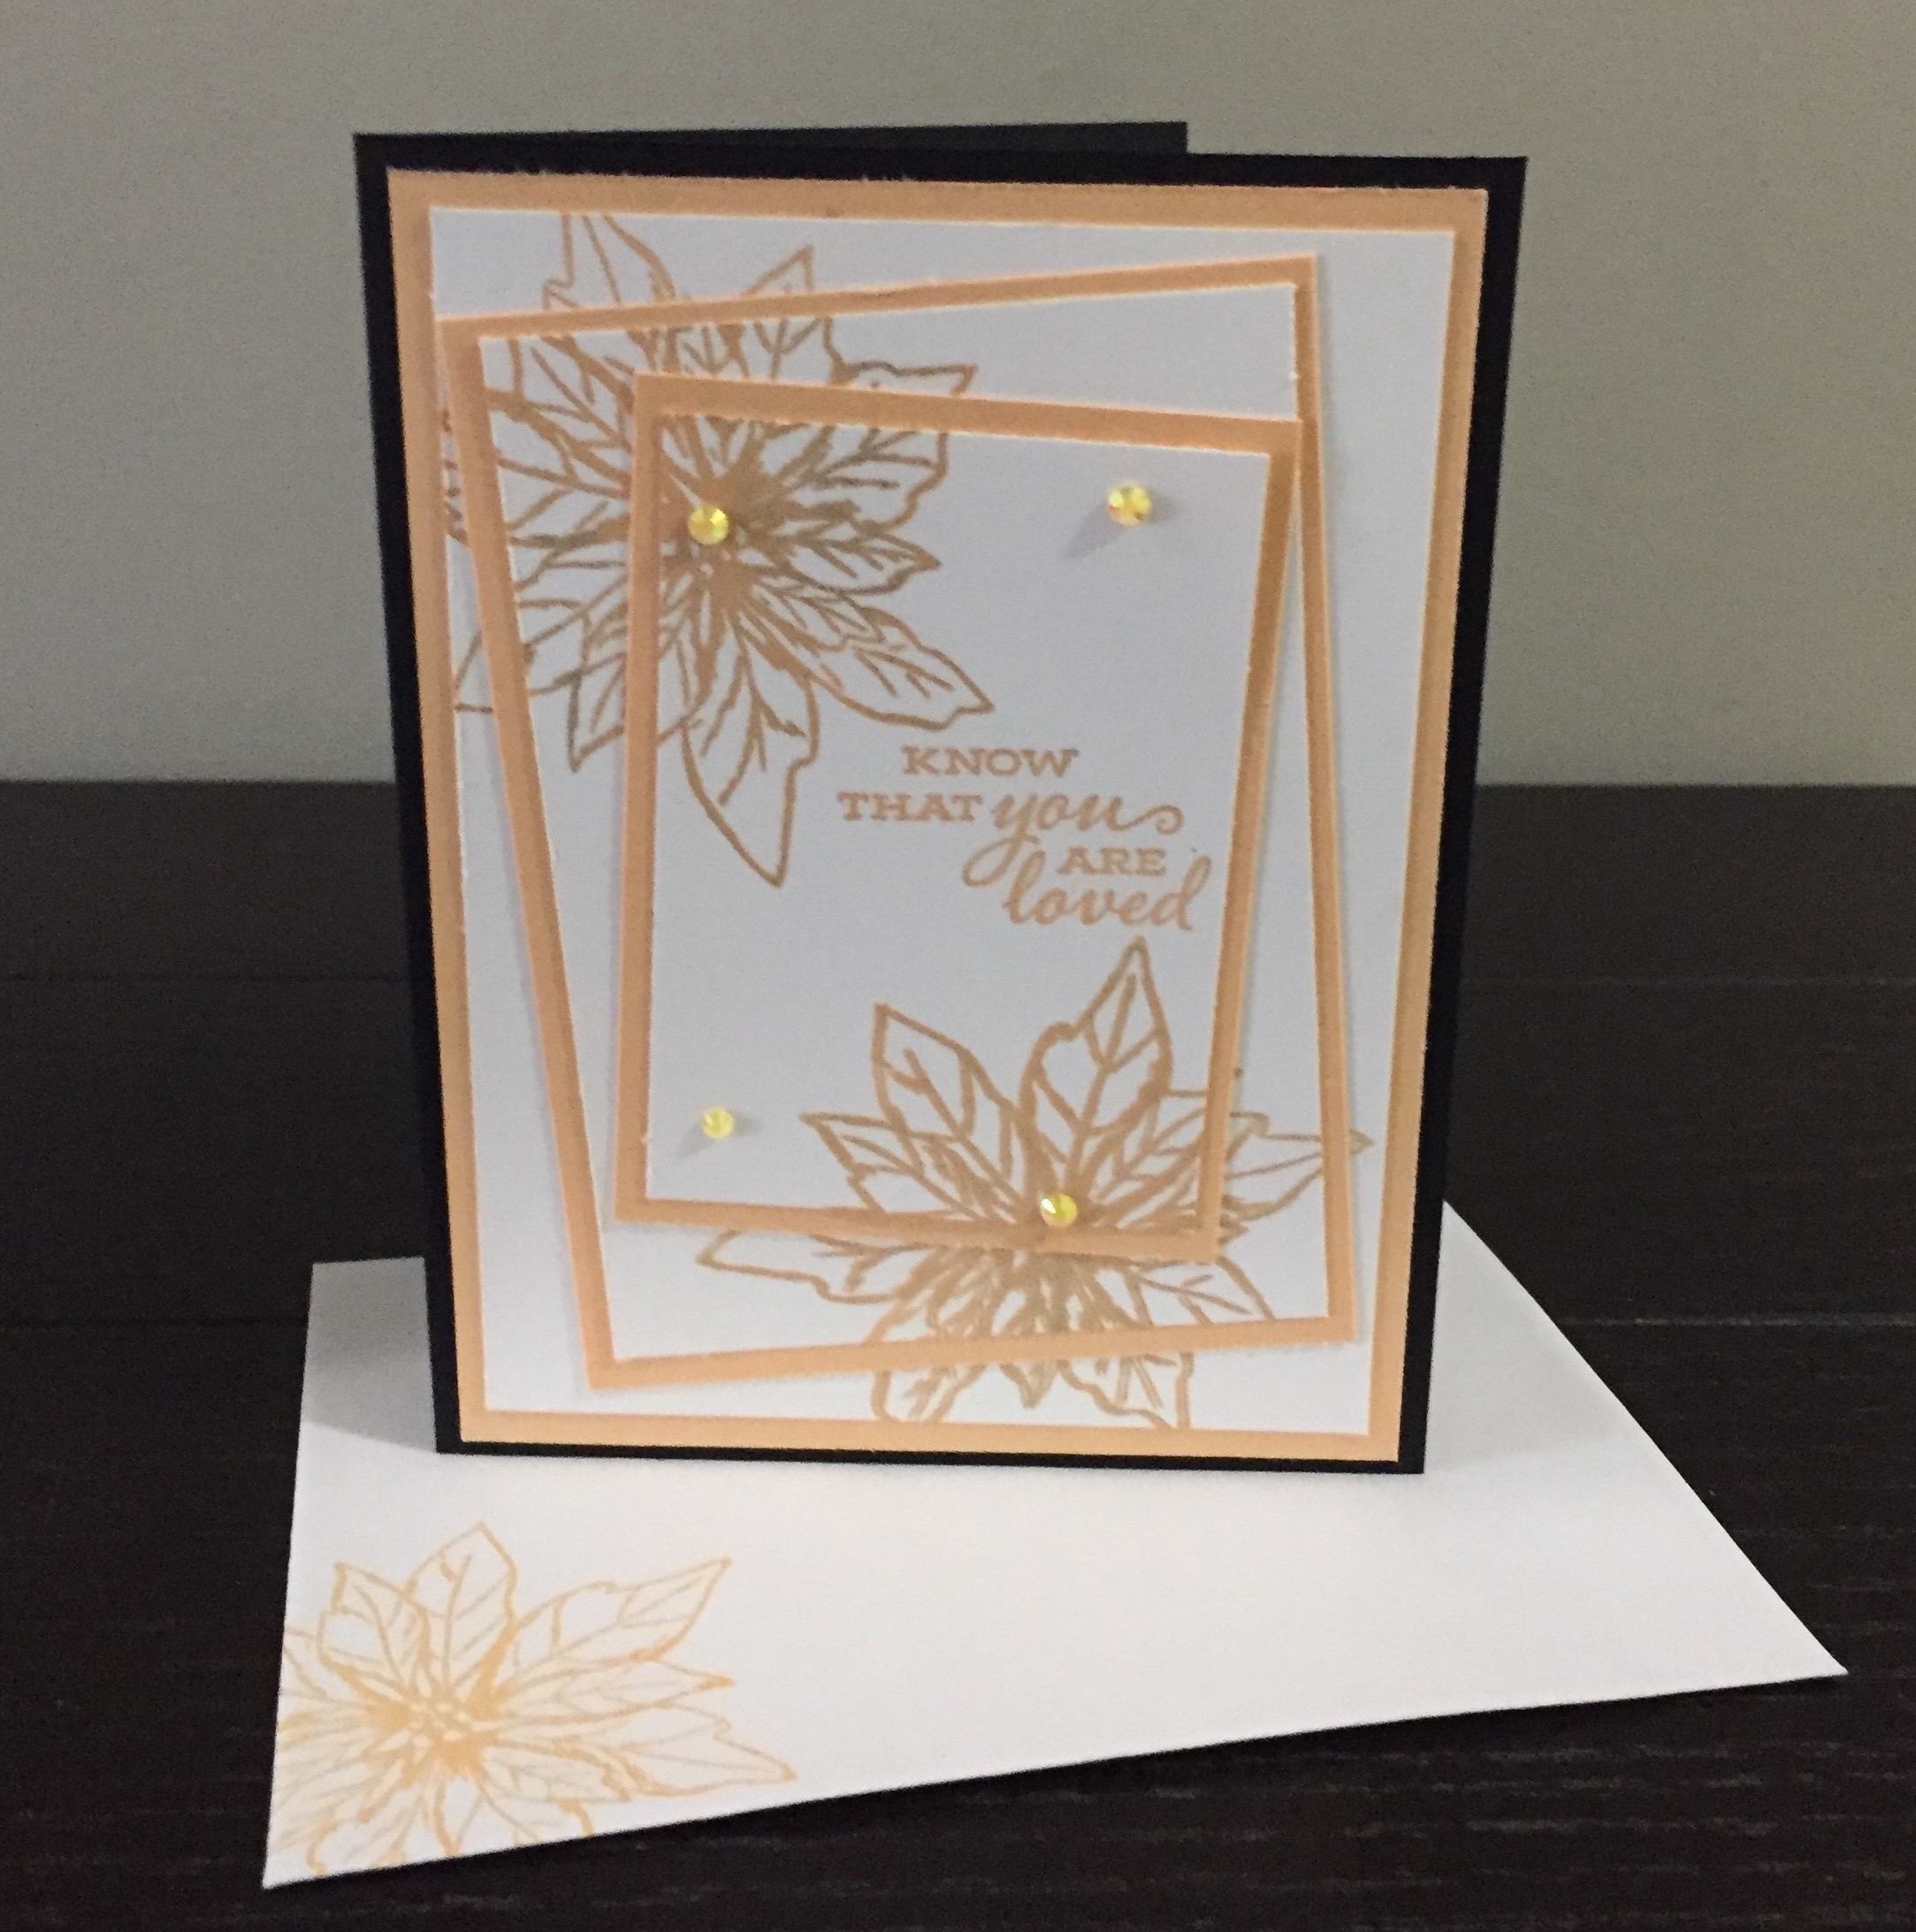
To make this card

Take your White pieces and place them on your work table and line them up at angles to get an idea of how you want the finished piece to look. I chose to angle each layer but you could make all the layers straight as well. Make sure you leave room for the Pale Papaya matting.
Once you are happy with your layout, remove the top layer and add glue dots to the top and bottom then replace it on your layout. Do the same with the second layer so all three pieces become one.
The glue dots will hold your pieces in place so they won’t move. You can easily remove the glue dots later.
I recommend you use a Stamparatis to make this card but you can hand stamp it as well. Line up your stamp making sure it is large enough to overlap onto all three layers. I used the Poinsettia Petals flower because I don’t believe Poinsettias are just for Christmas time.

Close the cover over the image to pick it up, then ink it up. This is where it gets tricky. You will need to press down really hard and hold it there for several seconds, to make sure the ink goes through all three layers. If you missed any spots, you can re-ink and stamp again. I love the Stamparatus for that reason. Once you are happy with your stamped image, clean off the stamp and reposition it, again making sure it overlaps the layers. Ink and stamp until you are happy with your stamped images.
TIP: In hind sight, I should have stamped my sentiment first on the top layer, ensuring it is straight, then arranging my image around it. When making this card, I didn’t stamp my sentiment until the very end and could easily have messed up my completed card front.


You can stamp as many images as you like but I chose to do just the top and bottom corners.
Now separate the layers and adhere the matting to the layers.
It should look like this. Not to pretty yet but we’ll get there.

Take the top layer and add liquid Multi purpose glue to the back then line up the images with the middle layer. The liquid glue will give you a little wiggle room to move it around. Do the same with the middle layer to line it up with the bottom layer. See how it all comes together? The matting will also hide any white edges you might have missed when stamping

Go ahead and adhere to your card base. Once your card front is completed, Stamp your sentiment and any images to the inside piece and adhere to the inside of the card. Don’t forget to stamp the envelope as well. It just completes the card. Add any coloured gems to the card front and your card is complete.
Easy peasy right? You now have an interesting card that looks a lot harder to make than it is.
Supplies used
- Basic Black Card Stock
- Card Base – 8 1/2″ x 5 1/2″
- Pale Papaya Card Stock
- Bottom Layer- 5 1/4″ x 4″
- Middle Layer – 4 1/2″ x 3 1/4″
- Top Layer – 3 1/2″ x 2 1/2″
- Basic White Card Stock
- Bottom Layer – 5″ x 3 3/4″
- Middle Layer – 4 1/4″ x 3″
- Top Layer – 3 1/4″ x 2 1/4″
- Inside card – 5 1/4″ x 4″
- Pale Papaya Ind Pad
- Mini glue dots
- Liquid Multi Purpose glue
- Stamp – Poinsettia Petals

Sunflower seeds, bleacher benches, and a hot summer day—it’s time to play ball! With all-star stripes, a timeless “throwback” theme, and a stamp set fit for an MVP, the Batter Up! Paper Pumpkin Kit is a triple threat made for celebrating the men, sport-lovin’ ladies, and baseball fanatics in your life. With this beloved baseball kit, there’s no “batter” way to root, root, root, for your home team!
It’s your turn to go to bat for all the people who’ve gone to bat for you. This month’s kit contains enough grand slam supplies to create nine cards—and coordinating envelopes—packed with classic colors, pinwheel and pinstripe patterns, and vintage-washed paper pieces. Plus, the Batter Up! kit includes a couple sticks of the sport’s chewy staple—bubble gum! Chew while you craft, slide a piece into a card, or save it for later.
What better way to stay in touch but to mail out those cards to friends, school mates, and family members. Can you imagine their surprise when they receive a card for no reason but to say “Hello, I am thinking of you” To receive this kit, subscribe by May 10th and you’ll be crafting in no time. Just click here to subscribe. You are under no obligation and can cancel, without penalty, at any time
Hurry, Hurry! A selection of items have been added to the clearance rack with discounts up to 60%. Supplies are limited and products will go quickly. To check it out, click here. Don’t forget! All orders placed in April using my monthly Host code 69DMREB2 will automatically be entered into my monthly dray
I hope you have enjoyed this post, please like and follow my blog to see future posts.
As always, I welcome your feedback and would love it if you left a comment. I invite you to try your hand at making this card and I would love to see a picture of your creation.
Would you like to be added to my email newsletter? please provide your contact information here
In the meantime, Happy Crafting
Sue


")