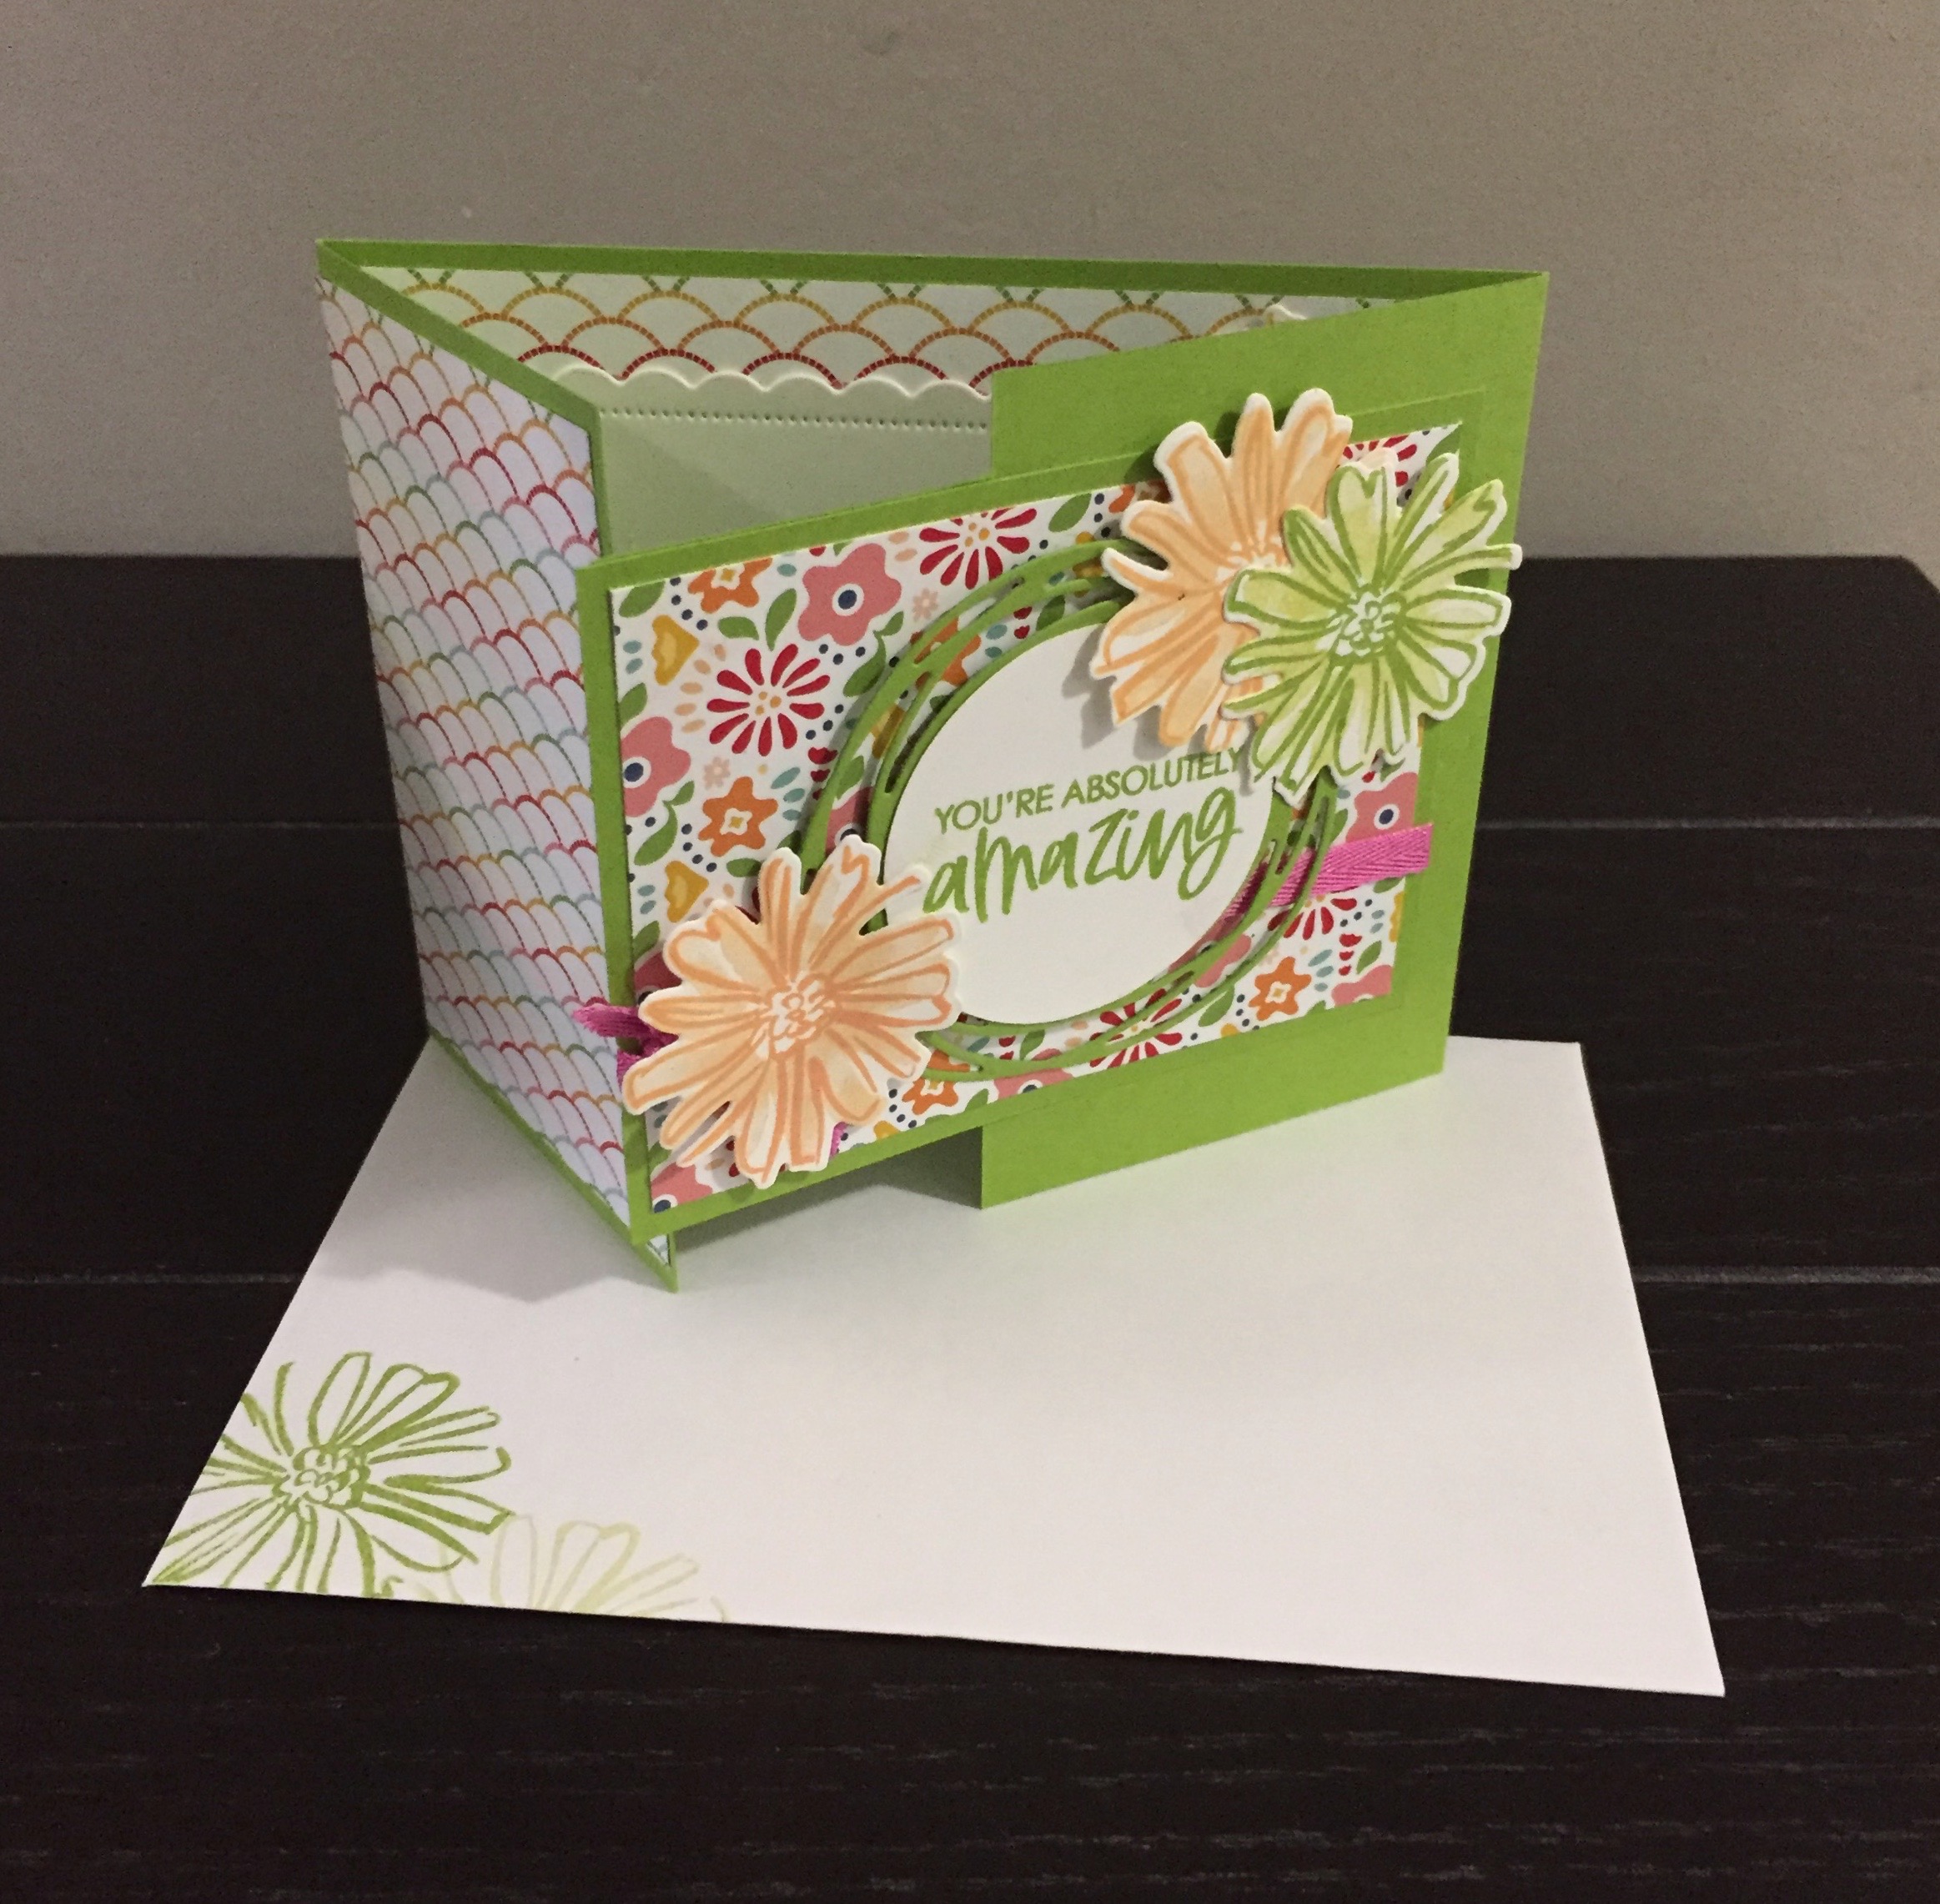
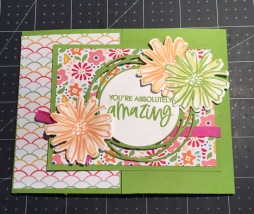
Can you believe April is almost over? This month has just flown by and there is so much news to share. Before I do that, I would first like to share with you this double fold card or at least that is my name for it. This is such an easy card to make and is a perfect card for beginners or avid crafters alike. I love how the two different patterns work so well together.
To Make this card

On the long side of your card base, score at 2 3/4″ and 8 1/4″. Fold the two panels towards each other and crease the folds with your bone folder.
Adhere the 4″ x 2 5/8″ DSP (pattern A) to the left front panel. Go ahead and adhere the 5 1/4″ x 4″ DSP (Pattern A) to the inside of the card as well and set aside for now.
Now for the front right panel, first adhere the 4″ x 3″ DSP (Pattern B) to the 4 1/4″ x 3 1/4″ Granny Apple Green mat. Wrap ribbon around this piece about 1″ or so from the bottom and tie a knot (or bow) near the left side edge and secure in place. Adhere only the overlap part of this piece to the front right panel ensuring it is evenly spaced between the top and bottom of the card base. Make sure you glue only the part that will be overlapping so you don’t accidentally glue the card closed.
TIP: A couple of glue dots will help keep the ribbon in place and is less messy than adding glue to the back of the ribbon
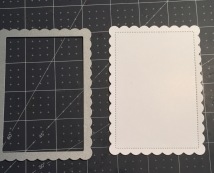
Using the 2nd largest scallop contours die, die cut your inside greeting piece. I have to say I love how the scalloped edge also has a stitch line around the paper for added interest.
Once you have cut that out, you can stamp your greeting and adhere to the inside of your card, centering it with your DSP.
TIP: The stitching around the scalloped edge also makes for a great guide if you wanted to use this die as a mat on another project.
Now to decorate the front. I first die cut the Granny Apple Green Mat from the Painted Labels dies. I then Punched out a circle from my 2″ circle punch (retiring) and stamped my greeting from the Colour and Contours stamp set and adhered it to the mat. I added dimmensionals to the back and positioned it to the right front panel.

I stamped three floral images from the same stamp set, first the coloured floral background and then the more pronounced floral outline in a contrasting colour. For the green flower I used Lemon Lime twist (retired) for the background and the floral outline in Granny Apple Green. For the Yellow flowers I used So Saffron for the background and Daffofil Delight for the floral outline. I also stamped just the floral outline twice, for the inside of the card. I stamped one in Magenta Madness and one in Daffodil Delight. I die cut the flowers and adhered them to the front and the inside of the card. I love these flower images and can see myself using them a lot. Your card is now finished but before I put everything away I also stamped my envelope in the bottom corner and on the flap line in the back (like a stamped seal).
TIP: When cutting out images, if you don’t like that little bit of white around the image, take a sponge dauber and lightly sponge around the edge in the coordinating colour to hide it. You could also just run a blender pen around the edge as well but I prefer the sponge method when I do it.
Supplies required
- Granny Apple Green card stock
- 11″ x 4 1/4″ – Card base
- 4 1/4″ x 3 1/4″ – Front Mat
- 3 1/2″ x 3 1/2″ – Greeting mat
- Basic White card stock
- 4 3/4″ x 3 1/2″ – Inside card
- 2 1/2″ x 2 1/1″ – Greeting
- Scrap paper for stamping floral images
- Pattern Party Designer Series Paper
- 4″ x 2 5/8″ – Left Flap front (Pattern A)
- 5 1/4″ x 4″ – Inside (Pattern A)
- 4″ x 3″ – Right Flap front (Pattern B)
- Stamp set – Colour and Contour – Sentiment and flowers
- Scallop contours Dies – Inside greeting
- Painted Labels Dies – Front mat
- Ribbon – Magenta Madness (retiring May 3)
- 2″ Circle Punch (Retiring May 3)
Now to share some news with you
First of off, this is just a reminder that the Last Chance products will be disappearing on May 3rd or as they sell out. After that, they are gone for good.
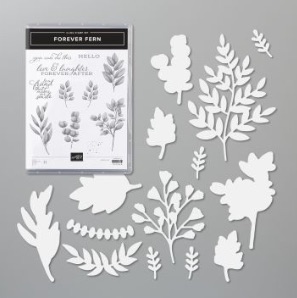
Existing bundled savings of 10% could also disappear as new bundles are introduced. This is just one example; This lovely bundle includes all sorts of folliage stamps and dies to enhance your cards or paper projects.
Although The Forever Fern stamp and Die bundle (savings of 10%) is carried over into the new catalogue, they will be sold separately so that savings will be lost.
So that being said, if you want to purchase one of the many bundles available, do so before May 3rd so you don’t loose out on the 10% savings. You can visit my online store to see all the bundles by clicking here. Today is the last day to use my April host code 69DMREB2 when placing an order and you will automatically be entered into my April Draw. I will have a new host code on May 1 which will be posted on my blog
You already know the new 2021-2022 Stampin’ Up! Annual Catalog sales period starts May 4. I cannot wait to get my hands on a few of them to try them out. My wish list is long and grows every time I flip though my catalogue.

May it also a fabulous time to join my team of “Canadian Stampers” as a demonstrator. Whether you just want to craft as a hobby or start a home business, that choice is yours. You will still enjoy all the benefits of being a demonstrator. New team members get even MORE FREE products in their customizable Starter Kit. From May 4- May 31, new team members can choose $206.00 worth of products for just $135.00. That is an additional $71.00 of new products. What a way to stock up on all the new Stampin’ Up! crafting supplies. You will also get free shipping and free business supplies plus you will be able to join in on all the fun of being Stampin’ Up! demonstrator. When you receive your started kit, it will feel like Christmas morning!
By purchasing the Starter Kit, there is no obligation to purchase anything more, no requirement to sell or hold events/parties, and no penalty if you decide to stop being a demonstrator, so what is stopping you?
For just $135.00 – Additional benefits
- A new demonstrator can select $206.00 worth of Stampin’ Up! products (during the May promotion)
- You will save/earn 20% (or more) on all your future orders.
- Your Starter Kit also includes a FREE past Paper Pumpkin kit.
- Enjoy more Stampin’ Rewards when you are your own “Host/Hostess!” – the best of both worlds.
- Free catalogs!
- Opportunities to preview and pre-order new products before they are released to the public.
- In addition to the amazing added value to your Starter Kit, when you join Stampin’ Up! you get to be a part of our amazing community of crafters.
- You get to enjoy sharing simple and fun crafting experiences with others, early access to products, and exclusive access to training events.
- Enjoy demonstrator perks throughout the calendar quarter you sign up in, AND an additional full calendar quarter with no obligation to sell/purchase anything more beyond the starter kit! To enjoy the perks longer, submit $300 in sales/purchases each calendar quarter (that is just $100/month) to stay active.
- As part of my team, I will support you 100% of the time with your crafting and/or home business

NEW May Host Promotion; Connect, Craft & Collect. When you host a minimum $200 party between May 4 and June 14, you’ll get an additional $25 in Stampin’ Rewards. We all like Free right? You can have fun with friends, do some crafting, and get more product FREE with your Stampin’ Rewards! There are even special stamps just for hosts. You can hold your party at your house, or online – whatever is easiest for you. Crafting is a great way to socialize together.
You can even use your Stampin’ Rewards toward a starter kit if you choose to take advantage of the Join+ Promotion. Contact me to create your own personal host code and schedule a party.
If you don’t want to host a party, no problem, Stampin’ Rewards are available to those who place individual orders that meet the order totals as well.
I hope you have enjoyed this post, please like and follow my blog to receive notifications of future posts. I invite you to try your hand at making this card and I would love to see a picture of your creation.
Would you like to be added to my email newsletter? please provide your contact information here.


