Have you ever had one of those days where you just need to treat yourself with a coffee, some chocolate or a cookie (or three)? Maybe even a cocktail, just because? Well by the time I completed this card I was ready for a cocktail. We all see beautiful cards made my others which inspire us, but what we don’t see is that card making process, which doesn’t always go smoothly. So today I want share with you a story of when things DON’T go as planned.
When I first pulled this set out, I was determined to make a card using all these lovely elements, but despite that, I sort of went blank for a card design (that should have been my first clue) Does that happen to you? I cannot be the only one. Well I decided to just get on with it, and make ….. something! So here we go, I am sharing what I went through with you today because I want you to know that if this ever happens to you, you are not alone.


I love all the possible sentiments you can use with the Nothing’s Better Than (158295) stamp set and the Love You More (152698) dies should help to create fun light hearted cards to give to friends or family.
To make this card.
Take your card base and score on the long side at 4 1/4″. Crease with your bone folder to give it a nice clean fold. You can put aside for now. So far so good right?
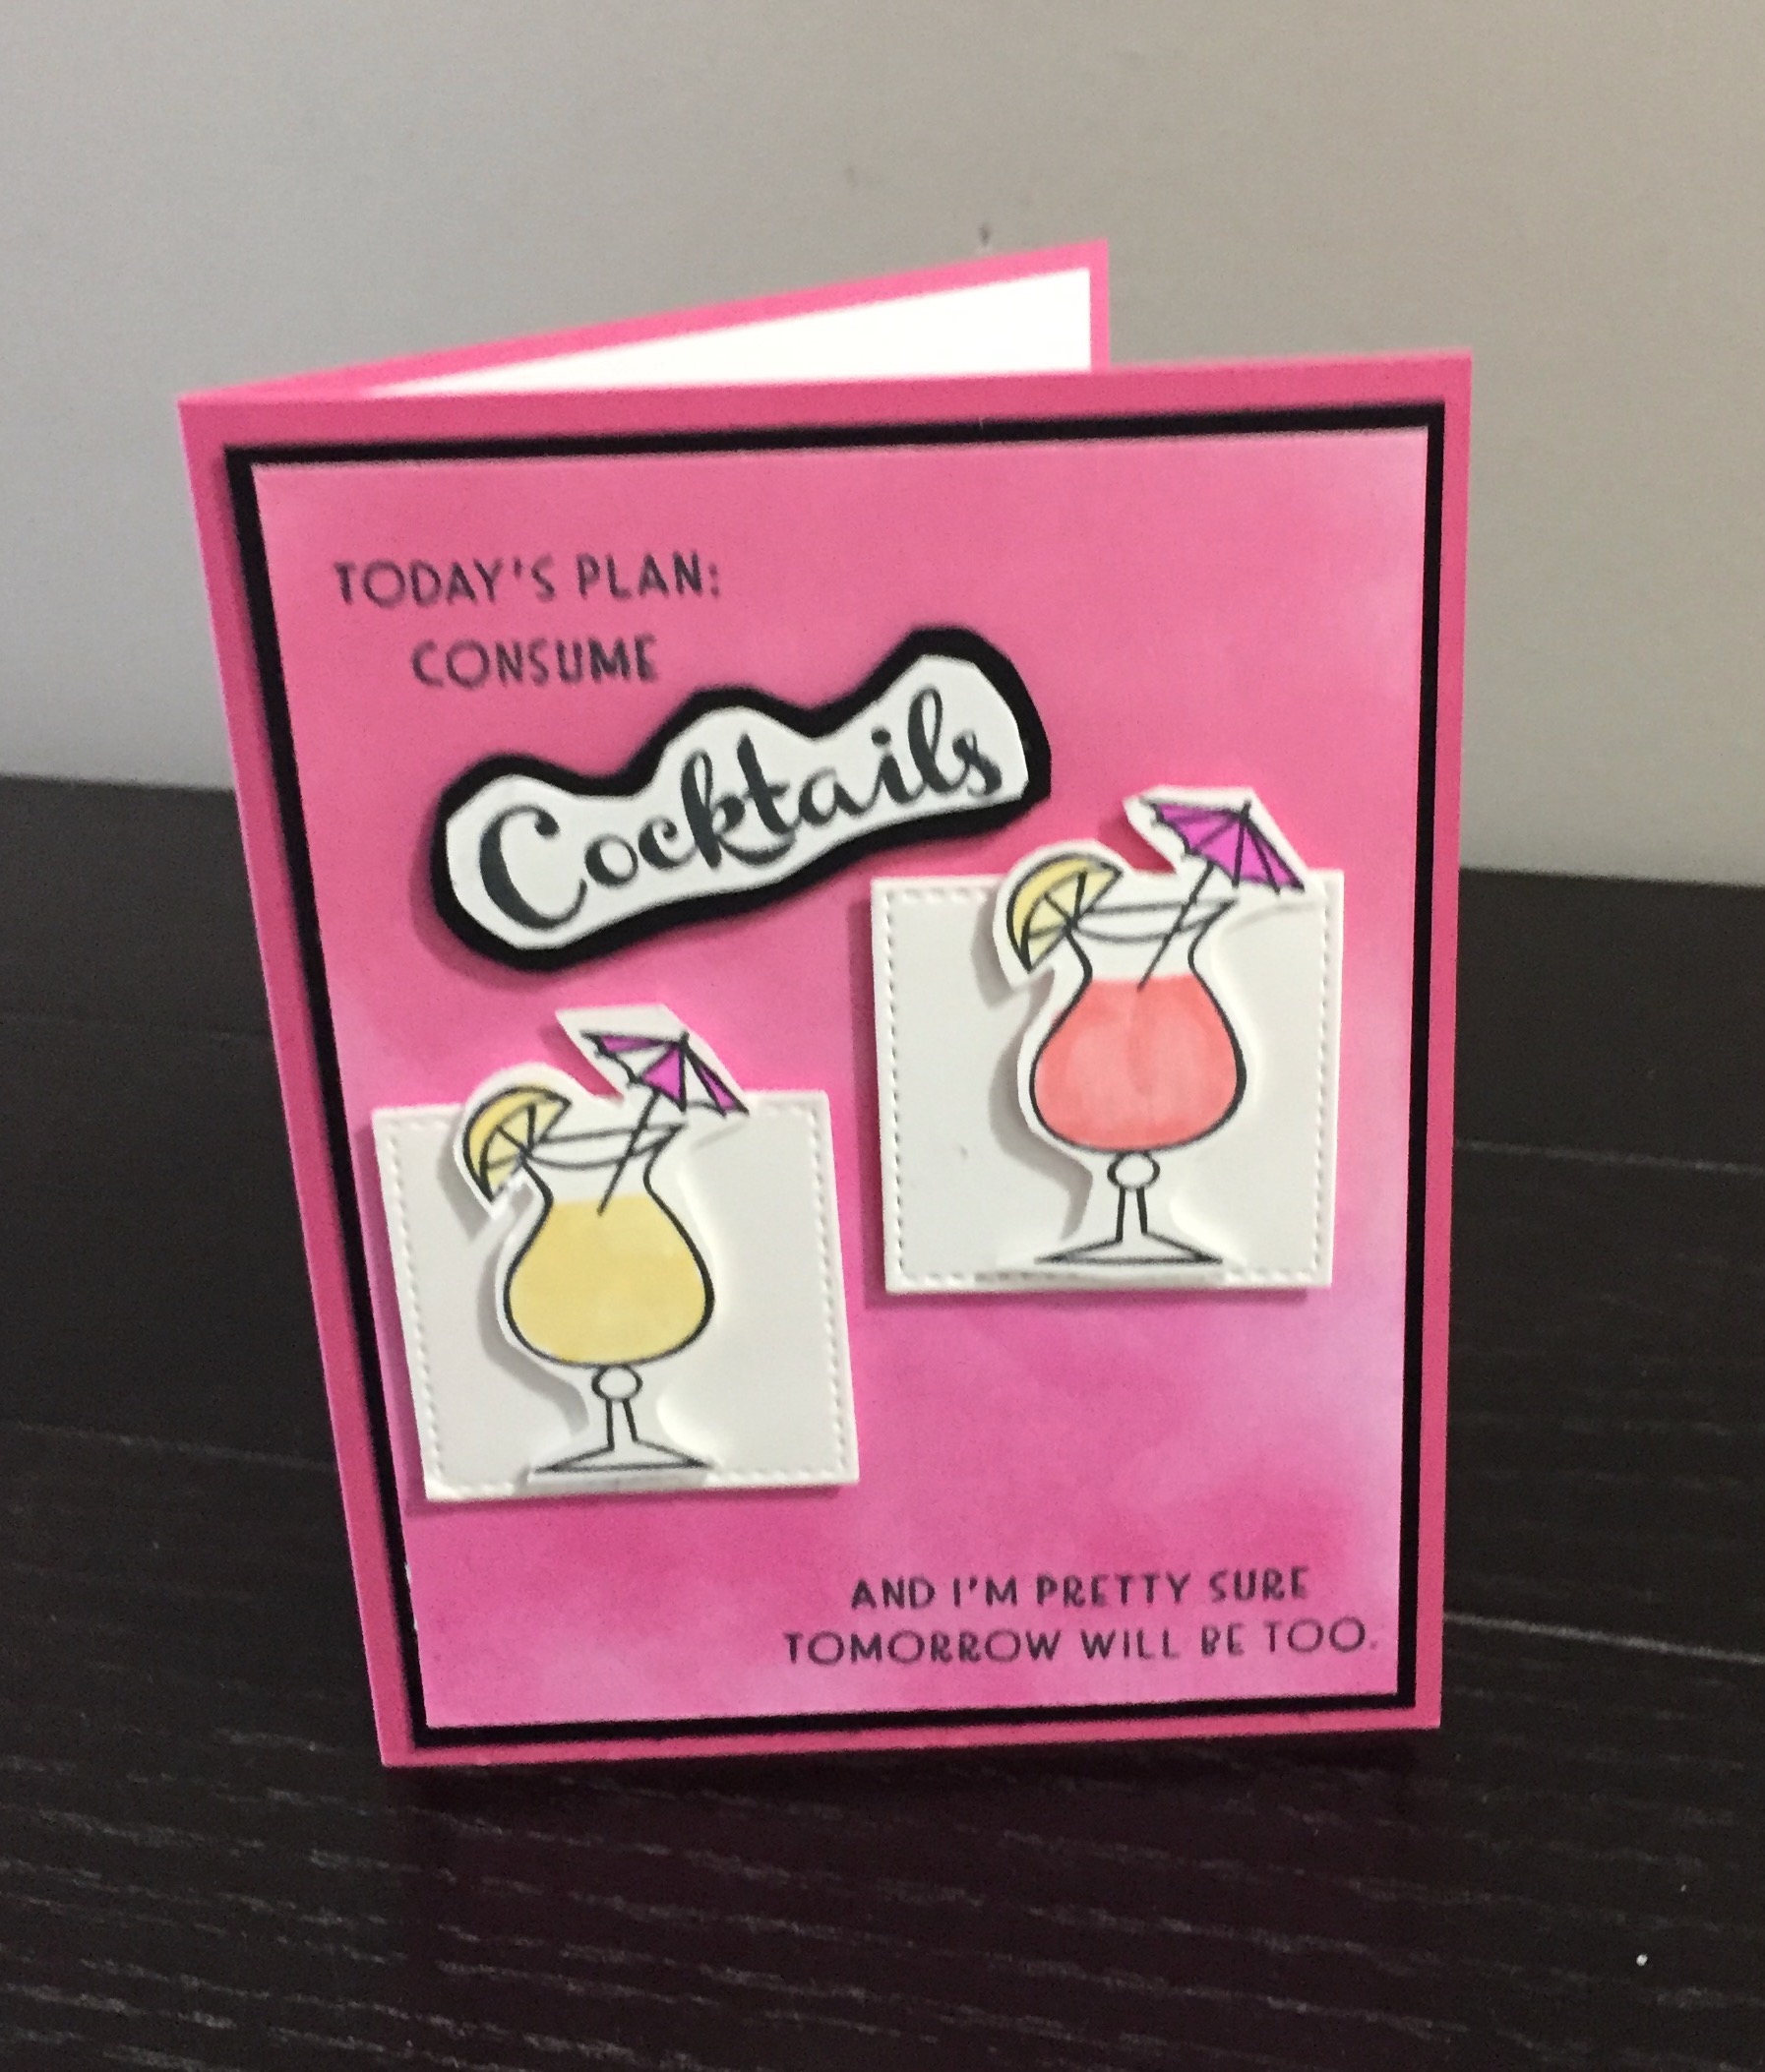
For the card front, I used my blending brushes across the card front. I overdid it and you can barely see the two colours I used. Maybe I should have picked one of the gorgeous Designer Series Papers Stampin’ Up! has available for the card front. Oh well, moving on. I glued it to the Basic Black mat and then onto the card front. Ok, it doesn’t look that bad, now what do I do? So after looking at the stamp set again, I decided to stamp the two sentiments on the front top and bottom. By now, I sort of have an idea in mind.
I die cut two white stitched squares (retired now) to add some white contrast to the card front. It’s a lot of pink after all so I wanted to break it up a bit.
TIP: Shape dies can be used over and over again on cards and scrapbooking projects. I highly recommend purchasing them when they are available. I love all my shape dies; circles, ovals, squares and rectangles and I use them all the time.
I originally cut three stitched squares (love the stitched detail) but then decided to use only two. I also wanted to die cut the word “Cocktails” in black cardstock with adhesive sheets on the back so I could easily add it to my card. Do you think I could find my dies? I KNOW I bought them and they are not where they should be. Oh well, I will look for them later (maybe do some organizing too… sigh!). Not wanting to stop and look for them, I stamped the word on basic white card stock and decided to just fuzzy cut the word. I then glued the word Cocktails to some scrap black cardstock and fuzzy cut it out again. I didn’t really take the time to do a great job of fuzzy cutting so it’s not super neat. I added dimensionals to the back and attached it to my card front. I call this creative license when things don’t go as planned and you do something else instead.
I then stamped two cocktail glasses on basic white cardstock and coloured the glasses with blender pens. I then fussy cut them out (no dies in sight). I added mini dimensionals to the back of the cocktail glasses and attached them to the squares. Of course after doing so, I discovered the little stamp showing the liquid inside the cocktail glass with the ice cubes. ACK! At this point, colour me frustrated LOL!I added dimensionals to the stitched squares and placed them on the card front.
TIP: When you purchase a stamp set, take the time to really look at all the smaller stamps so you know what you have.


For the inside of the card I stamped “Because Adulting is hard” (and so is card making today LOL).
I then stamped the cocktail glass in the bottom corner and this time I used that little stamp holding the ice cubes (so cute) which made me want to rip off the front cocktail glasses and redo them. I also forgot to add the black mat to the inside of the card (sigh)
Well my card is finished despite all the little things that didn’t work well. Overall it turned out ok and I will keep it in my prototype file for reference. so now I am ready to enjoy a much needed cocktail. Tomorrow I will do some organizing and locate my dies.
Hmm…. I am thinking coffee, chocolate or cookies for my next card…. What would you make?
Supplies required
- Polished Pink card stock
- Card Base – 8 1/2″ x 5 1/2″
- Basic Black card stock
- Card front/inside Mat – 5 1/4″ x 4″ (cut 2)
- scrap for Mat sentiment
- Basic white card stock
- Card Front/inside – 5″ x 3 3/4″ (cut 2)
- Scrap for stamping
- Stamp – Nothing’s Better Than
- Missing Dies (Love you more)
- Adhesives
- Dimensionals
- Stampin’ Seal
- Blender Pens – Daffodil Delight, Polished Pink
- Ink Pad – Memento Tuxedo Black, Polished Pink

Why Paper Pumpkin you ask? Paper Pumpkin introduces you to an impressive collection of Stampin’ Up! products, from our one-of-a-kind ink pads to our eye-catching embellishments. This is an easy and exciting way to stock up on supplies, and you can create small-batch projects for occasions of any kind. With Paper Pumpkin, it’s simple: share what you love, and help others find joy through creativity! To subscribe, click here by June 10th and you will be crafting in no time.
Details
- Kit contains enough supplies to create 9 cards (3 each of 3 designs) along with coordinating envelopes. This all-inclusive kit includes printed card bases, die-cut paper pieces, embellishments, adhesive, and more!
- Card size: 4-1/4″ x 5-1/2″ (10.8 x 14 cm)
- Envelope size: 4-1/2″ x 5-3/4″ (11.4 x 14.6 cm)
- Coordinating colours: Bumblebee, Evening Evergreen, Fresh Freesia, Polished Pink
- This month’s kit features an exclusive stamp set. But, this month’s kit also includes not one, but two Classic Stampin’ Spots!
- Comes in a cute, colorful, and collectible box.
- Coordinates with products from the Expressions in Ink Suite of products

Want to get even more freebies? Now is a great time to sign up as a demonstrator. Whether you craft as a hobby or would like to start a home business, that choice is up to you. However, from 4–31 May, new team members can choose $206 CAD worth of products for just $135 CAD + free business supplies + free shipping + all the fun being a part of Stampin’ Up!
By purchasing the Starter Kit, there is no obligation to purchase anything more, no requirement to sell or hold events/parties, and no penalty if you decide to stop your demonstrator ship.
Click here to join my team of Canadian Stampers and as a new team member, you get even MORE FREE products with your customizable Starter Kit. This promotion ends May 31st so time is running out. Contact me and let’s chat about what you want in your kit.
I hope you have enjoyed this post, please like and follow my blog to see future posts. As always, I welcome your feedback and so please leave a comment. I invite you to try your hand at making this card and I would love to see a picture of your creation.
Would you like to be added to my email newsletter? please provide your contact information here


