I love making gift boxes when we get together for a card class and today I wanted to share with you this gift box. I first saw it on Pinterest and loved the look of this box so had to give it a try. Sadly I cannot give credit because I cannot remember where I saw it. This adorable box could be made up with all different colours of card stock and different stamped images to suit any occasion.

To make the lid of this box
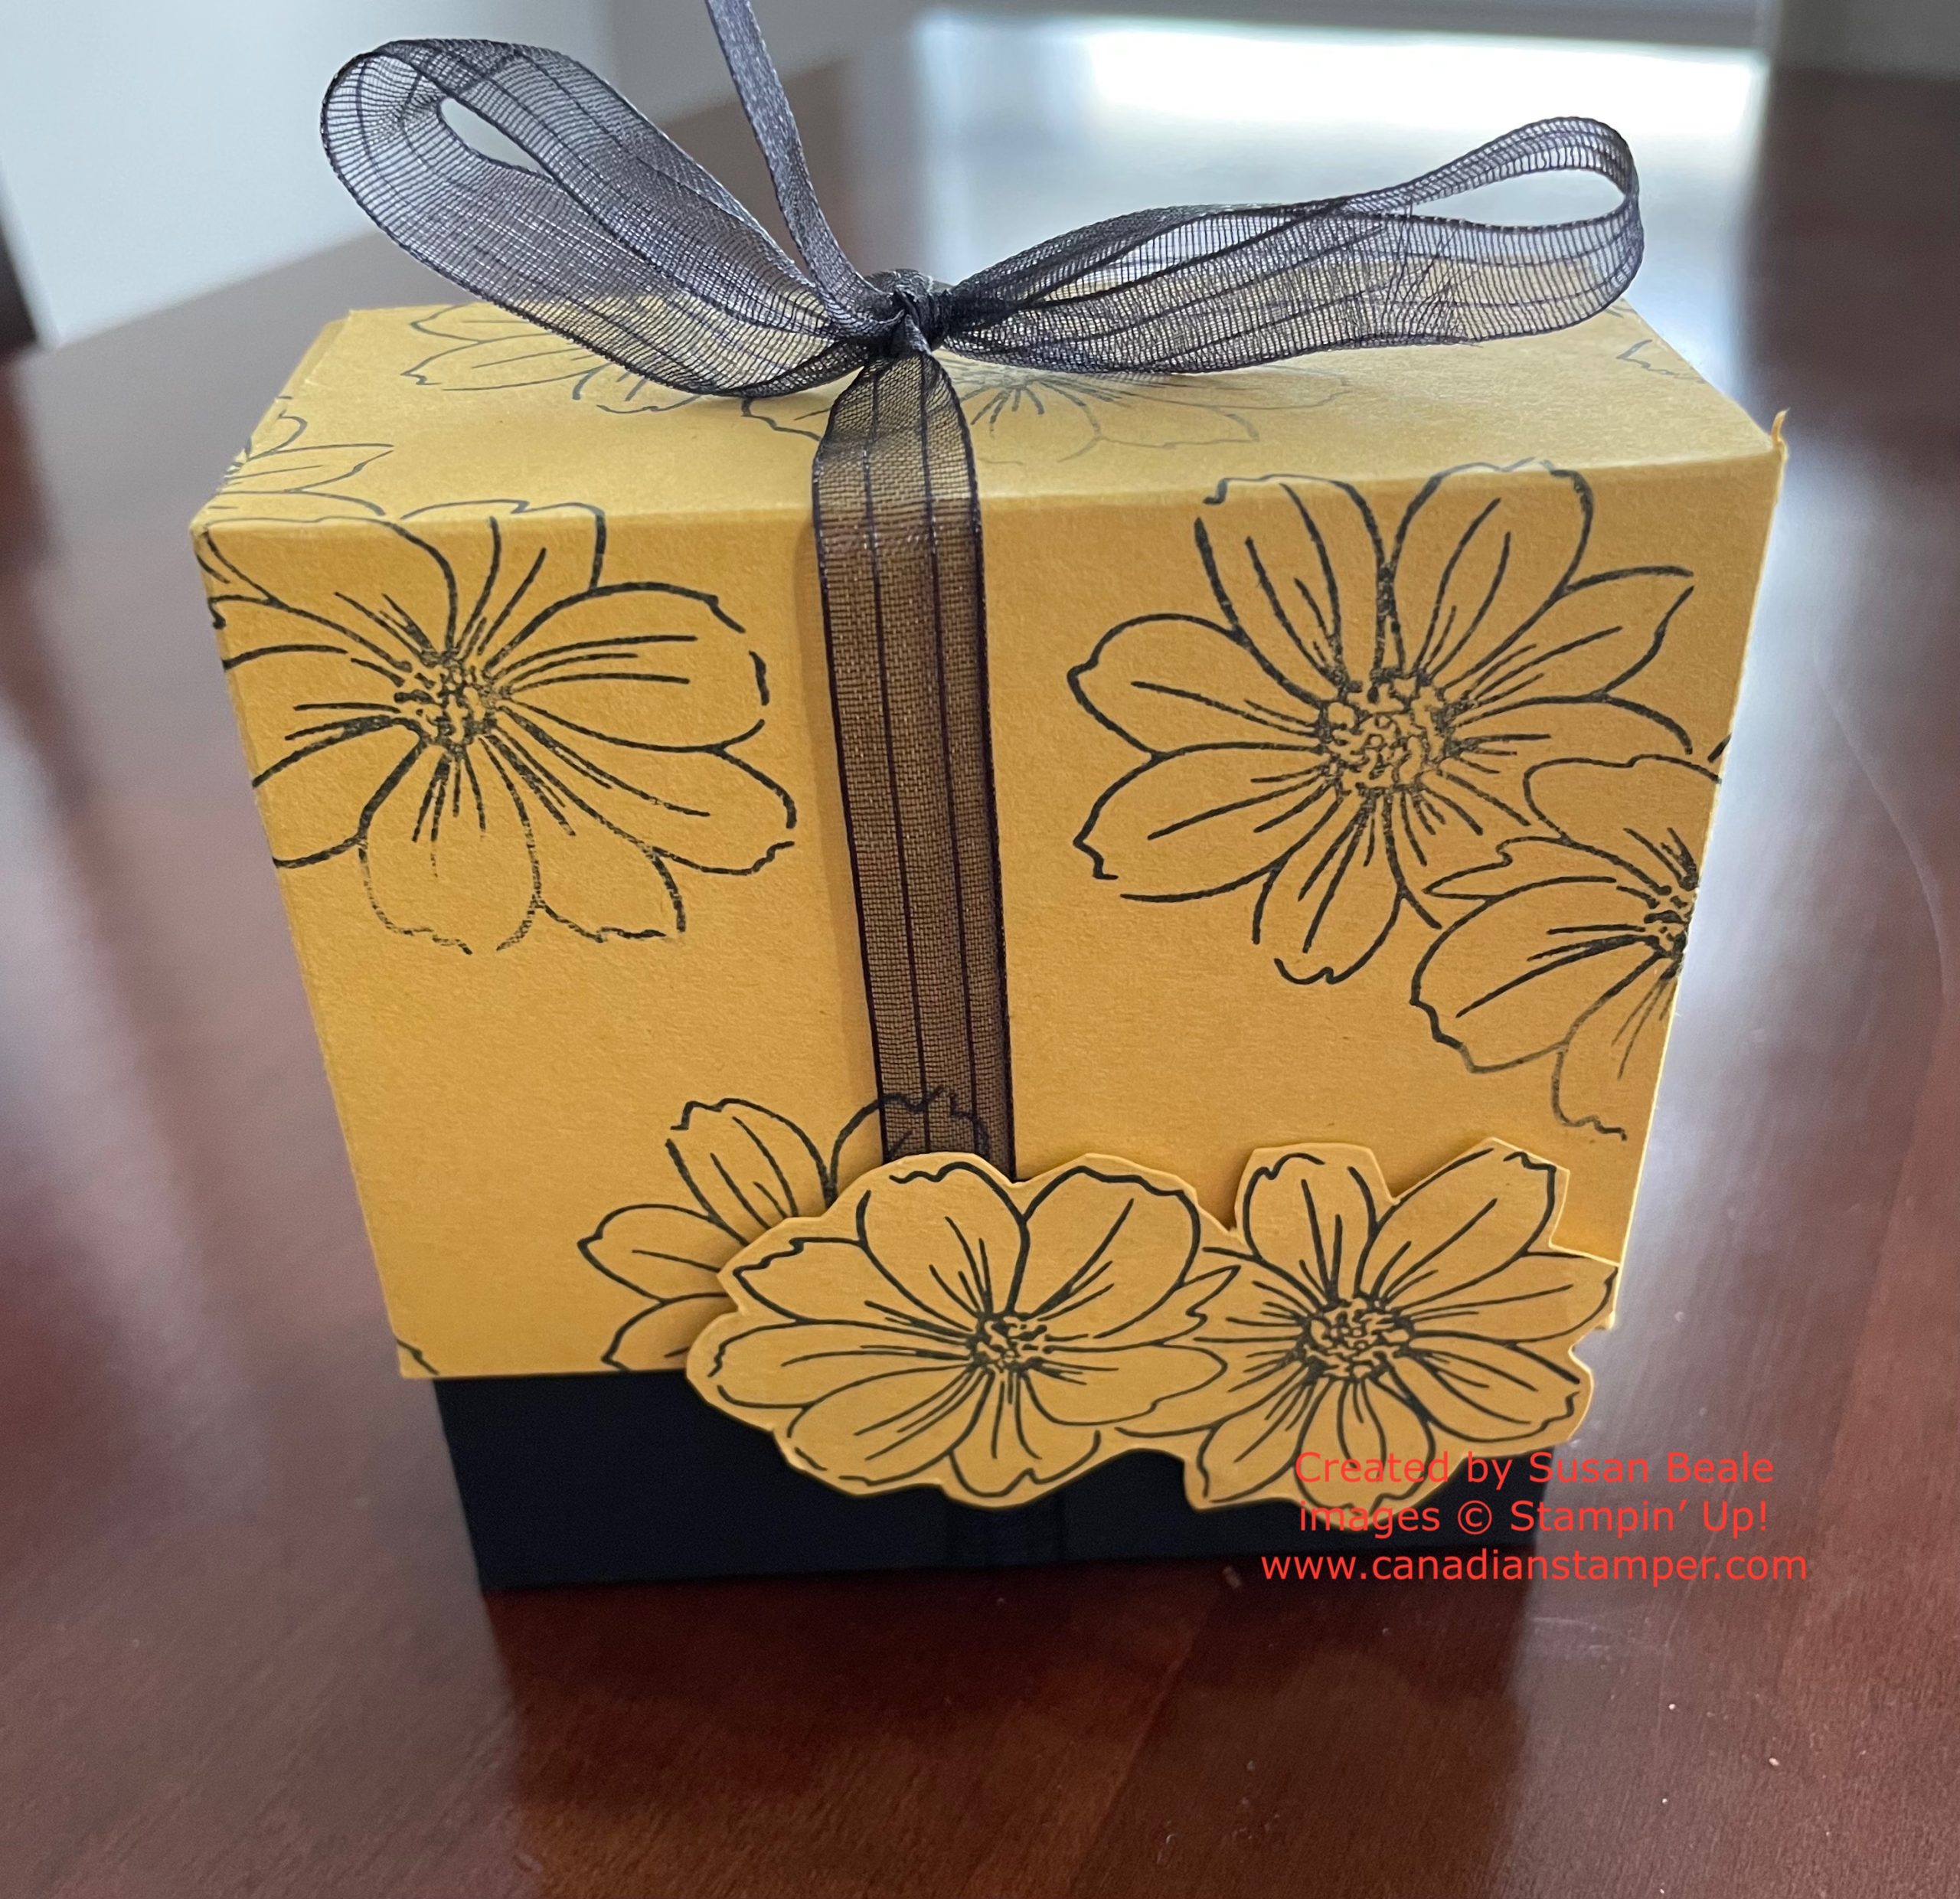
Stamp across the paper to create a pattern. I started in one corner then continued to stamp at an angle down the paper. Repeat your stamping all across the paper, stamping over the card stock edges as well for an overall even pattern. I used the COLOR & CONTOUR stamp set to create this pattern. I also stamped one image on a piece of scrap paper and cut it out for the front of the box.
Once you have completed the stamping, score your paper as follows;
- On the long side, score at 1 5/8”, 5 ¼”, 6 7/8” and 10 ½”
- On the short side, score at 1 5/8” and 4 ¼”
For the black box base, score your paper as follows;
- On the long side, score at 1 ½”, 5”, 6 ½” and 10”
- On the short side, score at 1 ½” and 5”
To create the box for both the lid and the base
Fold and burnish all the score lines. With the small score line on the right hand side, cut the bottom and top rectangles on the right hand side to create the narrow flap. Cut the vertical score lines to the horizontal score line on both the top and bottom of the paper. Wedge all the flaps as shown in the picture below.

Add Tear and Tape to the middle of each of the larger flaps on the inside.

With the small scored flap on the right, remove the double sided paper and fold down three flaps to secure in place, leaving the fourth flap alone. Center the DETAILED TRIO PUNCH in the middle of the two largest pieces you just folded down, and punch a hole. (Picture does not reflect the holes). If you don’t have that punch, you could use another type of hole punch.
Flip the card stock over and add Tear & Tape to the small flap. Close up your box by adhering the small flap to the other edge, lining it up to match the score lines & making sure your corners are square. Remove the T&T paper and fold down the remaining flap to secure in place.


To close up the bottom of the box, Fold in the large rectangle, then adhere the two middle flaps with a little glue. Add T&T to the last rectangle and fold to close.
Repeat the steps above to create your lid in the exact same way.
To Finish it off and add your ribbon
Fold your ribbon in half and place the black box in the centre of the folded ribbon. Thread each ribbon end, through the holes from the outside in. Gently pull your ribbon through the holes and pull up so the ribbon ends are even. Then position your lid and thread the ribbon ends from the inside out.
TIP: It’s works best if you hold your lid at an angle when doing this.
Now is a good time to fill your box with treats or a small gift. Pull your ribbon ends up so both sides are even then gently push the lid down. The ribbon will get shorter as you do this. Tie your bow to secure. Add your flower to the front with a dimensional, making sure it is adhered to the lid only.
Optional: Make a small tag with a string/thread. Loop it through the ribbon at the top before tying your bow at the top so the tag will hang down. You could also add DSP to the panels of the lid for a different look. I’ve included the measurements should you wish to do that.
Below are two alternative gift boxes I made, because they are just adorable and so easy to make.
For the Yellow Box, I used the FRIENDLY HELLO stamp set which will be in the new January – June 2022 Mini Catalogue in January, just in time for the Sale-a-bration promotion.
For the Santa Box, I used the BE JOLLY Stamp set from the July-December 2021 Mini Catalogue which will be expiring by Jan 3rd so there isn’t much time to grab certain products before they disappear.


Supplies & Measurements
Lid
- Card stock measuring – 6 3/4” x 11”
- Scrap for stamp the flower
- Optional DSP (instead of stamping images)
- 3 3/8″ x 2 3/8″ (cut 2)
- 1 3/8″ x 2 3/8″ (cut 2)
Box
- Card stock measuring – 8 1/4” x 10 1/2”
Black Glitter Organdy Ribbon – Approximately 30”
Stamp Set used – Color and Contour
Tuxedo Black Memento Ink Pad
Tear & Tape double sided adhesive
Detailed Trio Punch

Time is running out!
Between the LAST CHANCE product sale and the CLEARANCE RACK, It’s a great time to take advantage of the sales with deep discounts up to 50% off. Products from the July-December 2021 mini catalogue will be retiring to make room for the new January-June 2022 catalogue. ,
To visit my online store, which is available 24/7, CLICK HERE
it’s a great time to pick up some much loved products before they retire for good. When shopping, don’t forget to use my December Host Code – 92UXF2ZN and you will receive a free gift from me along with a thank you card in appreciation for your business.

We all know that roses are red and violets are blue. Well it’s time that love-themed cards got an upgrade! THE KISSES & HUGS Paper Pumpkin Kit will help you express that forever kind of love with heart-shaped cards that would make Cupid jealous.
The Kisses & Hugs kit is not just for Valentine’s Day, it works for all love occasions year-round such as anniversaries, weddings, birthdays, or those “just because” days. You’ll be all set for the upcoming year’s worth of celebrations!
Details:
Each kit contains enough supplies to create 10 cards—5 each of 2 designs, plus 10 coordinating envelopes so you can spread the love. The kit also features an exclusive “Two-Step” photopolymer stamp set which you can use over and over again along with a Gray Granite Classic Stampin’ Spot to add to your crafting supplies. Each heart shaped card is 4-1/2″ x 4-1/4″ and they coordinate beautifully with the following colours; Blushing Bride, Flirty Flamingo, Gray Granite and Very Vanilla
BUT, IT GETS EVEN BETTER!
Jan 25th, you can purchase the adorable KISSES & HUGS MINI TREAT BOXES as an Add On, for just $13.75 CAD. This Add On, includes 20 mini treat boxes and 20 heart tags, plus 10-1/2″ yards of gold cord so you’ll be all set to fill these up with treats and spread the love. This exclusive offer is only available for Paper Pumpkin subscribers so sign up before Jan 10th. Just CLICK HERE to subscribe.
The best part of Paper Pumpkin, is you can suspend you subscription, to skip a month, or you can cancel your subscription at any time, without penalty. I love that.
If you would like to see future posts, I invite you to like and follow my blog so you won’t miss out.
If you would like to be added to my email newsletter, please provide your contact information here. I provide monthly emails with all the latest updates so you won’t miss out.
Until next time,
Happy Crafting!
Susan


