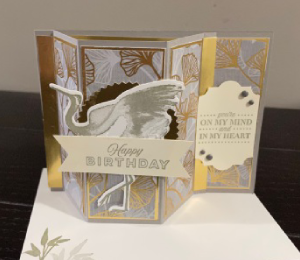
I love creating unique cards that you won’t find in any store. Today I would like to show you how to make a Bay Window card. This card folds flat so you can fit in an envelope for mailing but when you open it, it sits up on your table top or mantle for display. This card is also a great card to make for beginners and avid crafters alike. It’s just that easy to make.
To make your card
Take your card base and score on the long side at 3/8″, 1 7/8″, 3 5/8″ and at 5 1/2″

Fold your card base as follows.
At the 5 1/2″ fold your card base in half (valley fold) and burnish with a bone folder. Working from the inside of the card, Fold the small scored line right beside that, and fold it outward (mountain fold). Fold the next two score lines as valley folds and the small score line at the edge and fold.
Turn your card over so the panels are on the outside. Add Tear & Tape between the two middle score lines on the inside and close your card, pressing gently to adhere the center as shown. Your Bay Window has now been created.

To complete your card.

I cut out my gold panels first and then took a piece of designer series paper and cut my panels. As I cut them I placed them on my gold panels to ensure the pattern was correct. I then glued the panels together. The panels line up as narrow, wide, narrow, wide.
TIP: When cutting your panels, start with one piece of 6″ X 4″ Designer Series paper, paying attention to the direction of the pattern if there is one. You want to have the image of the panels, carry over from one panel to the next.
Now it’s time to put it all together.
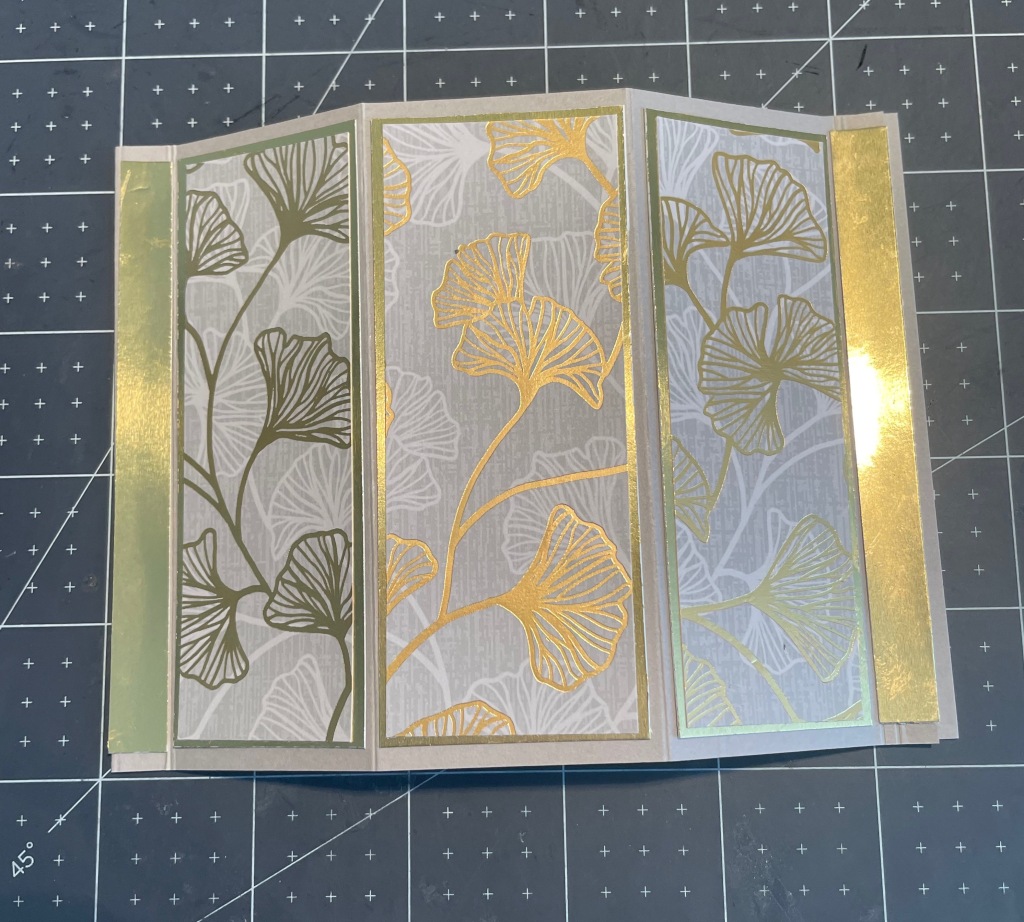
First adhere the two strips of gold foil to the outside edges between the small score lines. Working from left to right, adhere the three panels (narrow, wide, narrow) between the score lines.
Don’t you just love how it looks when the pattern carries over? The fourth panel will be adhered to the inside of the card.

Adhere the fourth panel to the inside of the card, making sure it lines up with the outside panels.
Stamp your sentiment onto the Very Vanilla piece. Die cut the image on gold foil and adhere. Once your have done that, adhere to the gold foil mat and line it up beside the fourth panel on the inside. Punch out your label making sure it fits within the panel and stamp your greeting. I used the Every Day Label Punch. Add Dimensionals to the back, down the middle only and adhere to the patterned panel as shown. By leaving the edges free of dimensionals, you can tuck the bay window behind it so the card will stand up on its own.

I finished off the card by stamping the crane on Basic white card stock, with Gray Granite ink, then die cut it out. I punched out the starburst circle in gold foil and adhered the crane to the front. I then stamped my greeting and and flagged the edges before adhering it across the front of the crane. I didn’t use dimensionals so my card wouldn’t be too bulky. I also stamped my envelope with a few leaves from the same stamp set and added a few gray matted dots to my greeting on the panel. Eh Voila! Your card is done.

This card was made up the same way but has a more simplified look about it.
I didn’t add any image to the front. I stamped my greeting and added a mat behind it.
On the inside I just stamped my greeting and a floral image to match the Designer series paper for a little bit of added interest.
As you can see, the card looks the same but has a completely different look about it. You can make this card up with a little or as much added decorations as you like. I love them both!
To purchase the supplies I used to make this card, CLICK HERE to visit my online store. As you can see, the stamps and dies are beautiful with some lovely greetings and the Designer Series Paper is gorgeous, with so many variable colours and patterns. Both of these products are available in the January – June 2022 Mini Catalogue. If you decide to purchase these, you won’t be disappointed. Please use my current Host code TWRX6V2X when shopping so I can reward you with a free gift and thank you card in appreciation for your business.


Supplies used.
Gray Granite Card Stock
- 4 1/4″ x 11″
Very Vanillia Card Stock
- 3 3/4″ x 3″
- Scrap for label
Basic White Card Stock
- Scrap for stamping image
Symbols of Fortune Designer Series Paper
- 1 1/4″ x 3 7/8″ (cut 2)
- 1 1/2″ x 3 7/8″ (cut 2)
Gold Foil Sheet
- 1 3/8″ x 4″ (cut 2)
- 1 5/8″ x 4″ (cut 2)
- 4″ x 3 1/4″
- 4″ x 1/4″ (cut 2)
- Scrap for die cut image
- scrap for label
Crane of Fortune Stamp/Die bundle
Gray Granite Ink Pad

This coastal collection includes an inspiring set of stamps and detailed dies, both early-release products from the upcoming 2022–2023 Annual Catalog. It is now available to purchase in advance of the new catalogue launch. How cool is that?
The promotion lasts from March 1 through to May 2, 2022
But don’t delay
- The following exclusive products are only available while supplies last:
- Waves of the Ocean 12″ x 12″ (30.5 x 30.5 cm) Designer Series Paper
- Blue Foils 12″ x 12″ (30.5 x 30.5 cm) Specialty Paper
- Rhinestone Waves Basic Jewels


Now that you’ve enjoyed this post…..
- Whenever you need crafting supplies, just CLICK HERE – You’ll be redirected to my Stampin’ Up! shopping page!
- Thank you for using my Current Host code TWRX6V2X when your order is under $200.00. All orders placed with me, will receive a gift from me as a thank you. I appreciate your support.
- Be inspired, CLICK HERE! to see even more crafting projects
- Shop the CLEARANCE RACK with discounts up to 60%
- Download The United Through Creativity Digital Download FREE from Stampin’ Up!
- Contact me to receive my Monthly Newsletter, CLICK HERE

Susan Beale
Independent Stampin’ Up! Demonstrator
Ontario Canada
Email: sjbeale@canadianstamper.com
- Website: http://www.canadianstamper.com
- Facebook: https:facebook.com/canadianstamper
- Instagram: http://www.instagram.com/canadianstamper


