I love making cards but it’s also nice to have a cute little box to store them in. So today, I wanted to show you how to make this adorable gift card box which is shaped like a book. It measures 5″ x 7″ in size and 1″ in depth and will easily hold 4-6 cards/envelopes. It is a pretty way to store your cards until ready to gift them. This book/gift box is also pretty sturdy so would make a lovely gift for someone.
To make this card
Book Cover – Score on the 11″ at 5″ and 6″. Fold and burnish with your bone folder. If you want to round the outside corners to resemble a book, do that now but it isn’t necessary. Set aside
For the inside box – Score at 1″ and 2″ on all four sides of the card stock.

Before folding, cut away the two squares in each corner. Cut straight up the 2″ score line to the second horizontal score line. Leaving the center rectangles alone, wedge the edges of the flaps as shown. This gets rid of excess bulk when folding up your box.
Fold and burnish all the score lines.

Add liquid glue or Tear & Tape to the flaps as shown then turn your card stock over and removing the tape, fold the flaps inside, making sure you square off your corners.
Once you have completed that, add liquid glue to the outside flaps and fold inwards. Use your bone folder and run it back and forth over the folded flaps so give it a nice crisp edge and to seal the glue.


Line up your box inside the book cover leaving equal space at the top and bottom. Apply liquid glue to the bottom of the box and adhere just to the right of the vertical score line. Add glue to the side that faces the spine of the book and adhere. Give it a good press along the spine using your bone folder. You want a really good seal so it doesn’t come loose.
Once your book/box is all put together, it’s time to decorate.

To apply the flap, first score the flap closure at 2 1/4″ and 3 1/4″, then fold and crease. I also chose to round the edges but again, it is optional.
Wrap the flap around the outside of the box to position where you want it, then only glue the back part to the box
Apply the front and back matting and designer series paper to the gift box. The back part of the flap closure will now be hidden, so you will only see the side and front part.

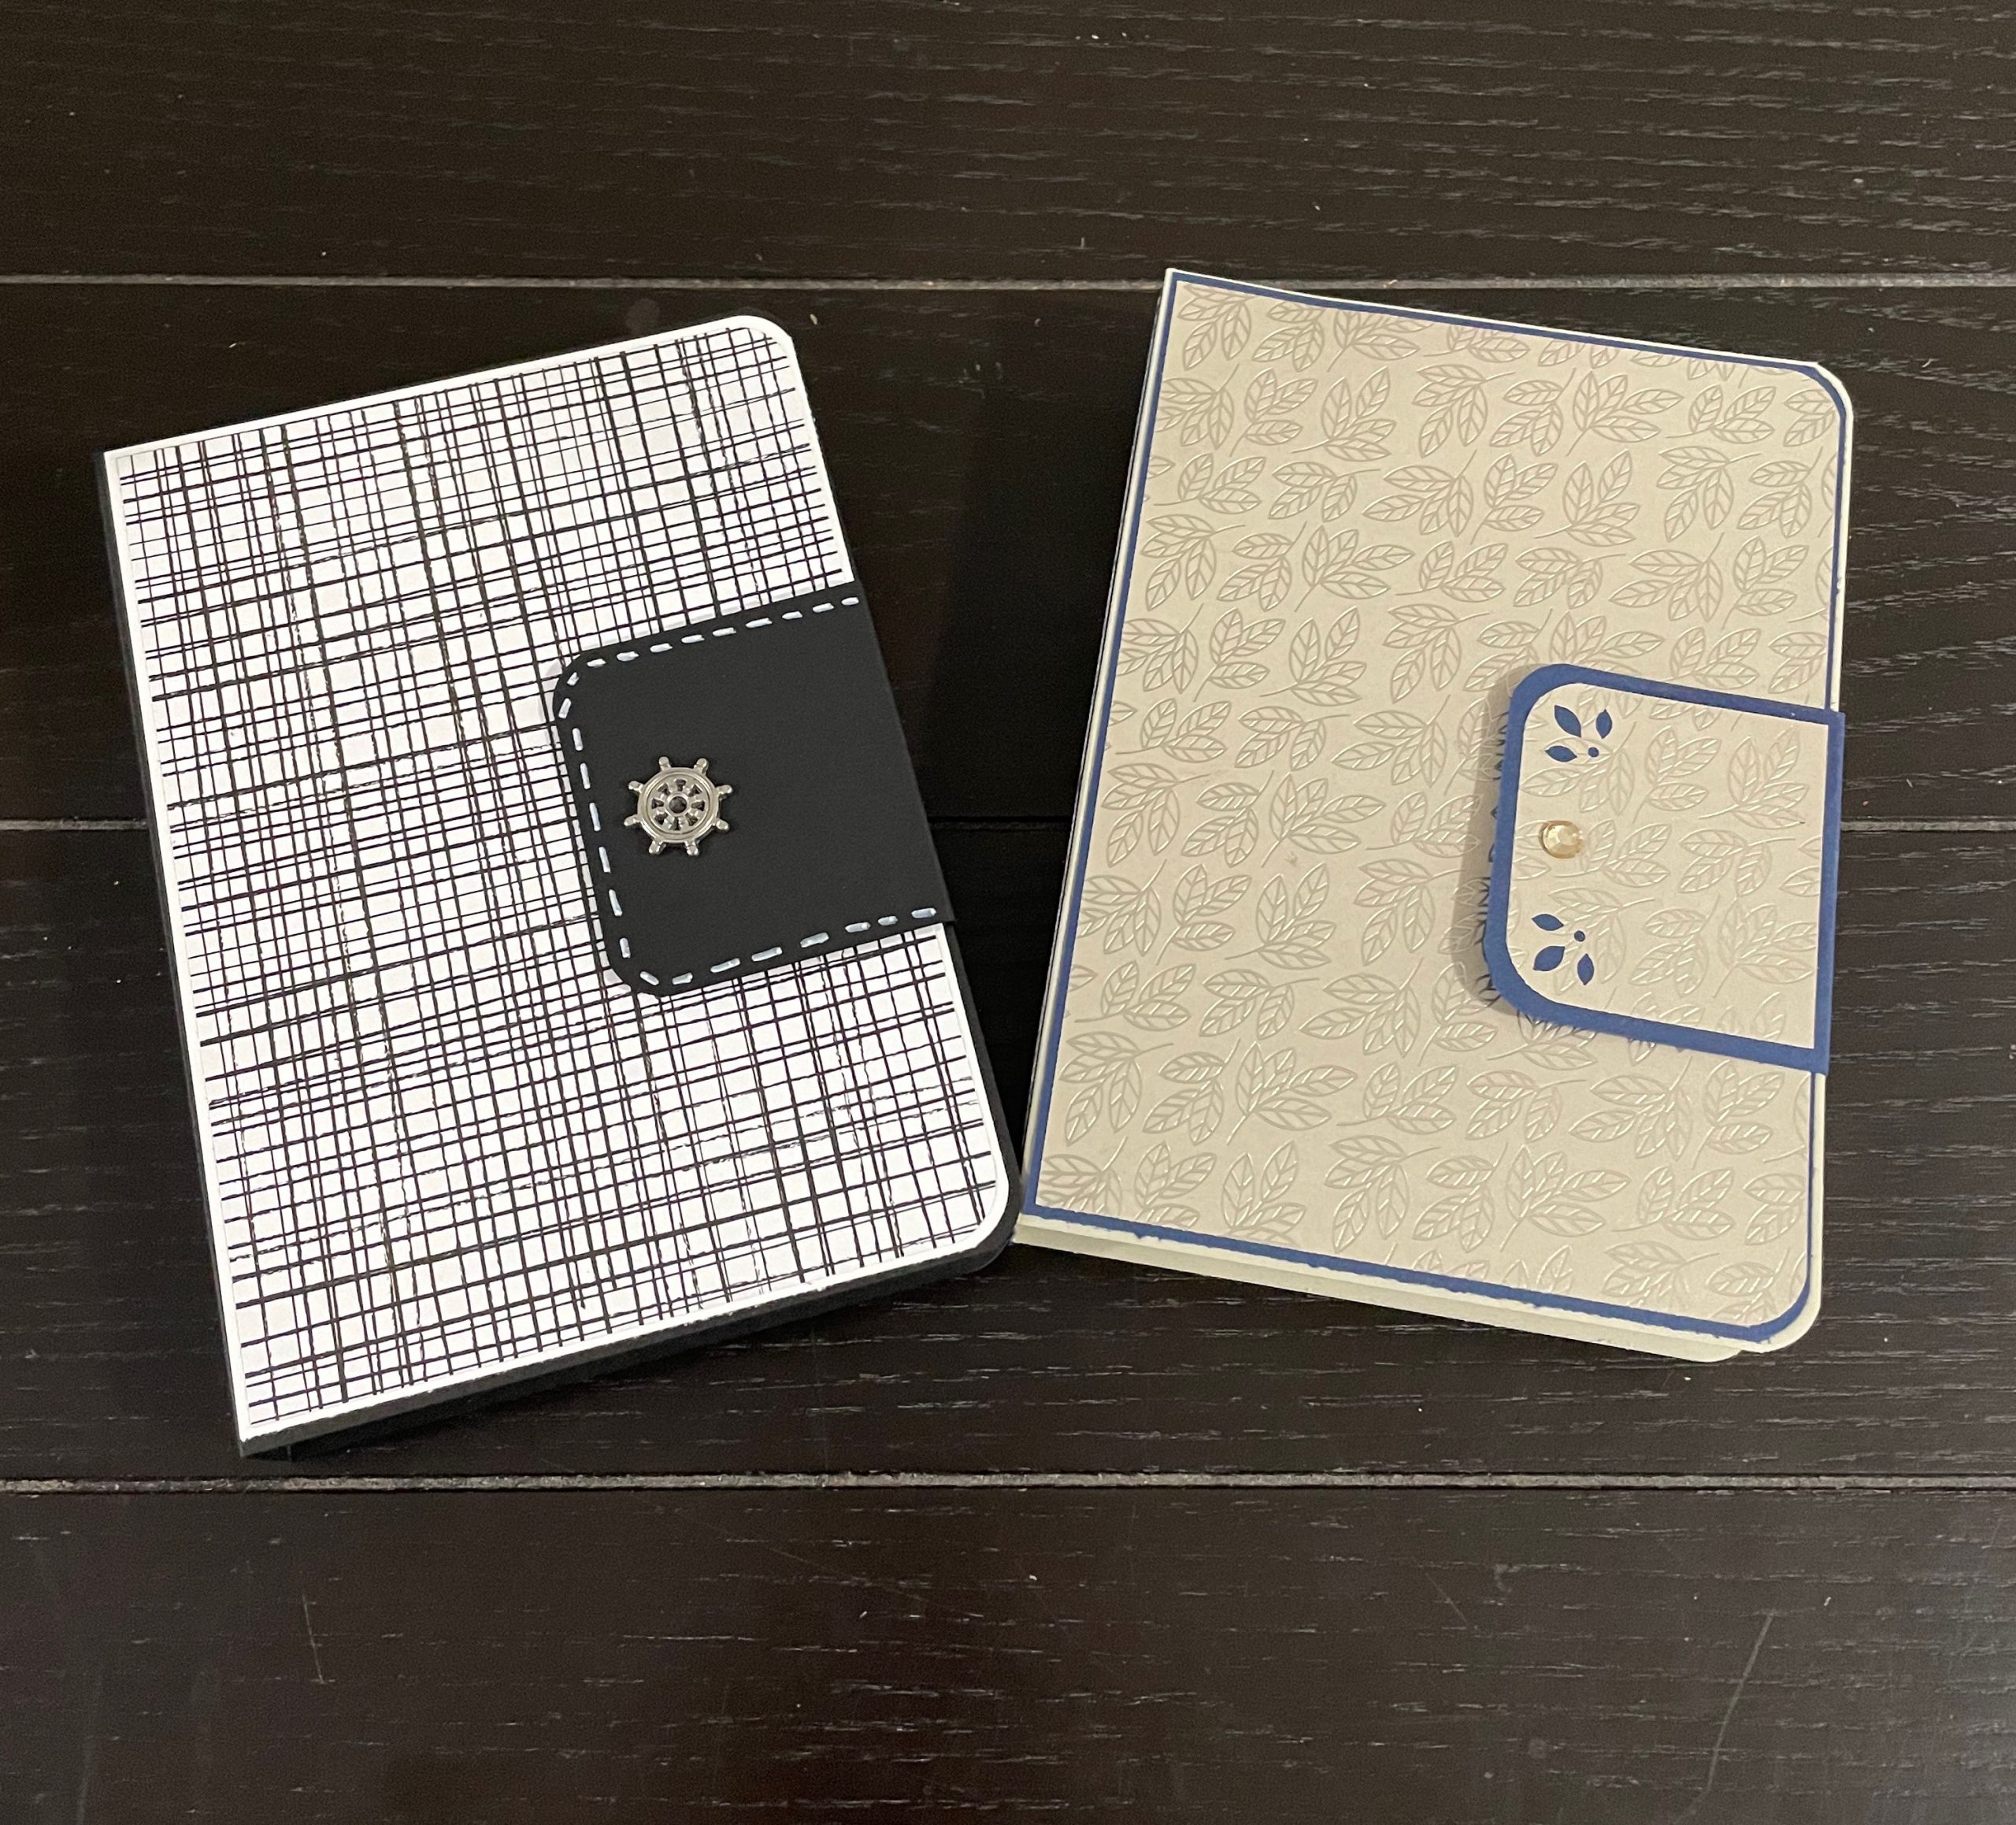
To ensure the closure stays closed, I added two magnets to the underside of the flap then decorated the flap. Another option would be to add velcro dots but I really like how the magnets work. Finish decorating the front as you would like.
Option: If you don’t have magnets or velcro dots, you could wrap ribbon around the box and glue it to the box. Make sure it is long enough (approximately 24″) so you can tie it closed when done. Afterwards adhere the matting and the designer series paper to the front and back. This way it will hide the ribbon so you will only see where it ties. You won’t need the flap piece if using the ribbon.
As you can see from the pictures below, I have made a couple of these boxes. The black & white box does not have the optional designer series paper around the edges while the other one does. The third picture below shows you how the ribbon has been added behind the designer series paper.
I have to say, I prefer the ones with the flaps better and they close up perfectly with a little snap from the magnets. I have yet to decide on how I will complete the front of these book/gift boxes thinking they need some sort of sentiment on the front to give it some purpose. Oh well, I will think of something to finish them off but I really like them just as they are. What do you think?


Supplies used
Card Stock
- 11″ x 7″ book cover
- 10 1/2″ x 8 1/2″ box
- 2 1/2″ x 5 1/2″ – Outside closure
Card Stock – Matting
- 4 7/8″ x 6 7/8″ (cut 2) front and back
Designer Series Paper
- 4 3/4″ x 6 3/4″
Optional: Should you wish to add Designer Series paper around the edges of the box and spine of the book, here are the measurements
Card Stock Matting
- 7/8″ x 6 3/8″ – Book spine
- 7/8″ x 4 1/2″ (cut 2) top and bottom of the box
- 7/8″ x 6 1/2″ – side of box
Designer Series Paper
- 3/4″ x 6 3/4″ – Book spine
- 3.4″ x 4 3/8″ (cut 2) top and bottom of the box
- 3/4″ x 6 3/8″ – side of box


