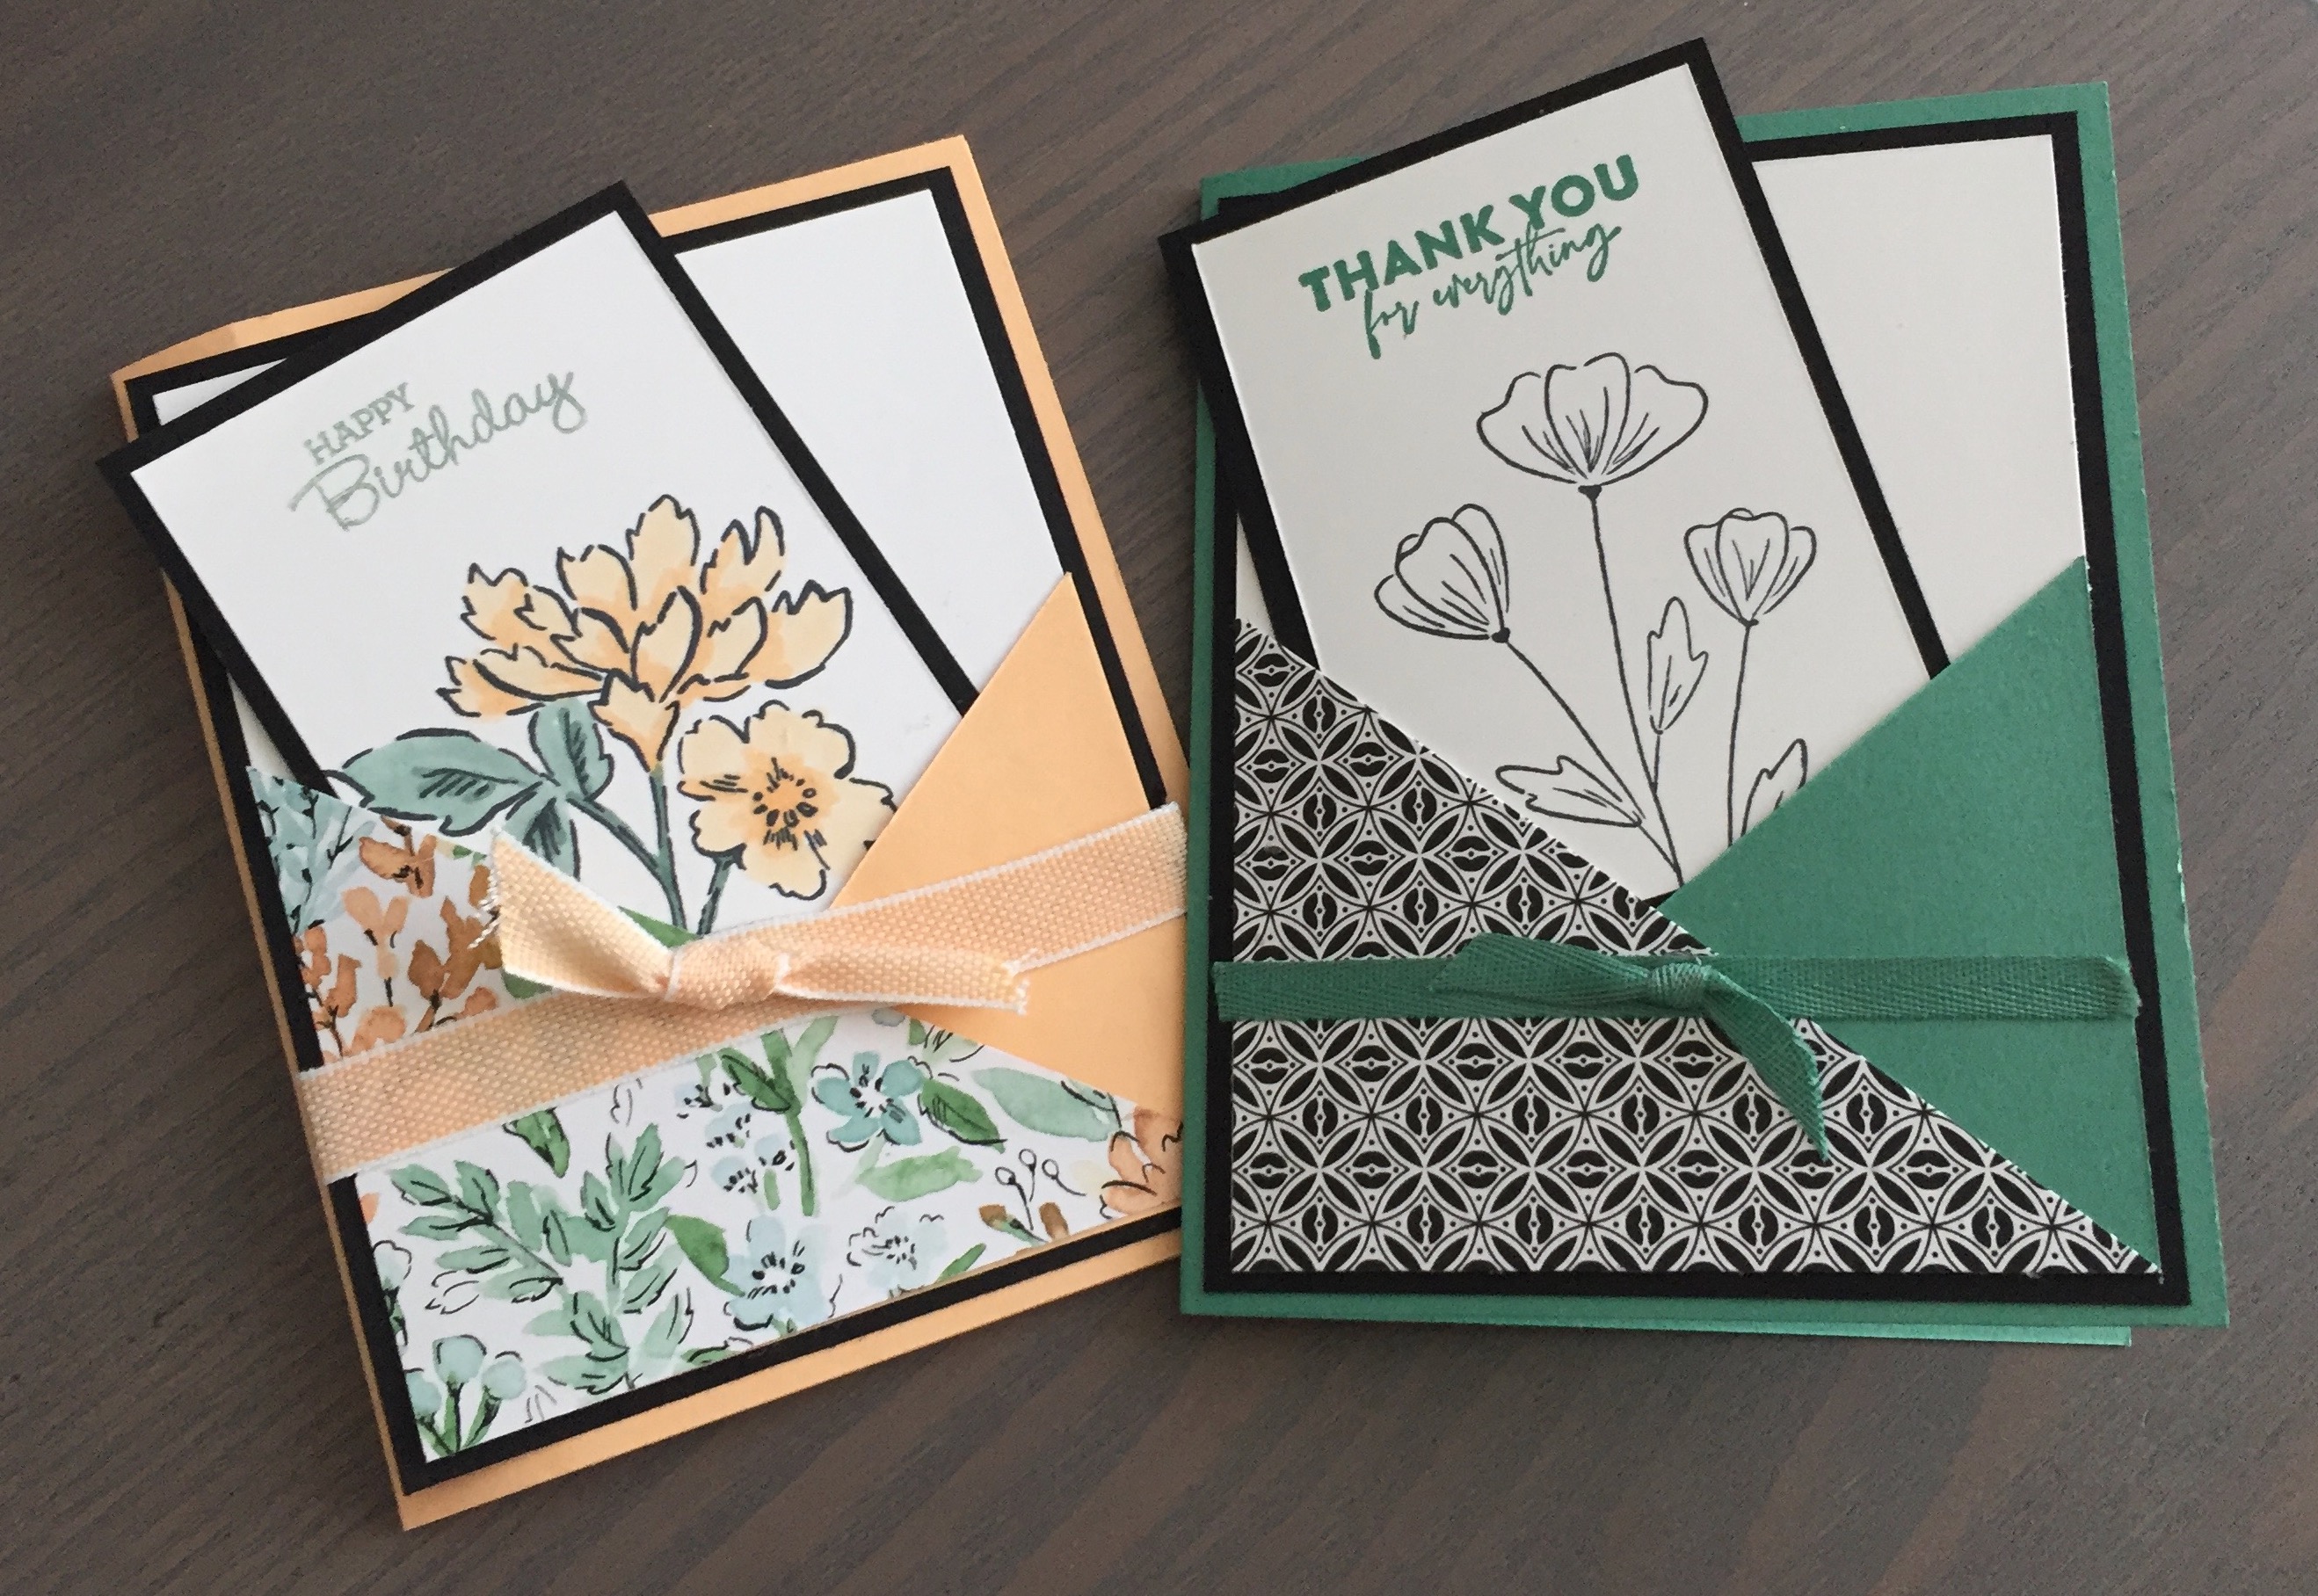
Hi Everyone, I finally went online to showcase how to make this card as a FaceBook Live video. Well I have to say that was an experience. However I stumbled through it, and as a first attempt, it was (just) ok. However, nerves got the best of me and in the middle of my video, I added adhesive to the wrong side of the paper LOL!. Oh well, Live and learn… then move forward right! Hopefully, my next one will be better.
So, despite the glue incident, this card is really easy to make and it looks adorable. So that being said, I wanted to post the instructions so you can give this card a try too. I used the Hand Penned Stamp set for the floral image and the Pansy Petals Stamp set for the sentiments. They work so well together.
To Make this card
For the insert piece:
- Stamp the Floral image onto the Basic White card stock with Memento Tuxedo Black ink.
- Stamp your greeting at the top in Soft Succulent ink
- Colour with Blender Pens. I used Pale Papaya for the flowers and Soft Succulent for the leaves
- Adhere to the Basic Black mat and set aside for now
For the card front;
- Adhere the two diagonal pieces to the basic white front piece, making sure they line up correctly with the 3″ edge is on the side and the 4″ edge runs along the bottom. Don’t do what I did and add glue to the wrong side of the triangle. Leave the diagonal edge glue free, as that becomes your pocket
- Add adhesive to the back of your ribbon and add to the front, just below the pocket and wrap around to secure at the back. Tie a bow or knot in another piece of ribbon and add a glue dot to secure it to the centre of the card
- Adhere to the Basic Black Mat then adhere to the card base front.
TIP: Use your silicone mat when adding the adhesive. it’s less messy and makes for easy cleanup.

For the inside of your card.
Stamp your sentiment and floral image to the Basic White piece. I stamped the colours from the stamp set instead of using my blender pens this time. I then attached it to the Basic Black matting before adhere to the inside of the card.
Close your card and add the insert into the pocket in the front of the card. The picture below shows the completed card. I also made a second card using the same technique with Just Jade card stock and the stamp set from Flowers of Friendship

Supplies required
- Pale Papaya card stock
- Card Base – 8 1/2″ x 5 1/2″
- 3″ x 3 3/4″ (cut in a diagonal)
- Basic Black card stock
- Front mat – 5 1/4″ x 4″
- Inside mat – 5 1/4″ x 4″
- Insert Mat – 4″ x 2 3/4″
- Basic White card stock
- Front – 5 ” x 3 3/4″
- Inside – 5 ” x 3 3/4″
- Insert – 3 3/4″ x 2 1/2″
- Patterned Paper
- 3″ x 3 3/4″
- Blender Pens – Pale Papaya & Soft Succulent
- Ink Pads – Memento Tuxedo Black, Soft Succulent & Pale Papaya
- Ribbon – Woven Pale Papaya with white trim
- Adhesive – Stampin’ Seal

UNITED THROUGH CREATIVITY
The first Stampin’ Up! value statement is this: We care about people first. What does that look like? Caring about people first means treating others with kindness, respect, and equal consideration. It means working together towards a common goal, helping each other through life’s challenges, and celebrating one another’s accomplishments. It means including others, even when we disagree, have contrasting life experiences, or simply see things differently. Caring about people first is our greatest strength!
In the United Through Creativity Digital Download, you’ll see a variety of illustrations, sentiments, and other elements that represent each of our marvelous markets and more. Print your favorite pieces and use them to create cards, scrapbook pages, and other paper projects! We hope you’ll enjoy celebrating diversity, connection, community, and creativity with this sweet selection of inclusive, multicultural, and multilingual elements. Click here for your FREE download
Don’t be shy—share what you’ve made! When sharing to social media, use the hashtags #UnitedThroughCreativity and #DiversityDay.
I hope you have enjoyed this post, please like and follow my blog to see future posts. As always, I welcome your feedback and so please leave a comment. I invite you to try your hand at making this card and I would love to see a picture of your creation.
Would you like to be added to my email newsletter? please provide your contact information here
Leave a Reply