Happy Friday everyone, I hope you are enjoying all the nice warm weather that we are finally experiencing. It starting to feel a little bit more like summer and I am loving the heat.
Today I want to demonstrate a Crossover Gate card. This cute card folds in the middle but each panel opens up to reveal the card greeting inside. How adorable is that? This card will work with any designer series paper but I am loving the colours and patterns of the Hand Penned DSP package. I keep going back to my stash and it is already on my wish list to order more on my next order. Every time I open the new calendar, my wish list grows. How about you? Leave me a comment and tell me what is on your wish list
To make this card

Score your card base at 2 1/8″ and 6 3/8″ on the long side. Fold the panels towards each other and crease with a bone folder. Apply adhesive to the two panels of Hand penned DSP and adhere to the two outside panels lining up with the top and bottom of the card.
I chose a striped pattern so it’s not too bold.
TIP: Always fold towards the “bump” side of the score line so the outside fold looks crisp. Creasing your folds with a bone folder also helps to give a nice crisp fold without the paper “cracking” plus it helps to keep your folds closed.

Adhere the two front panels of the DSP to the card stock mats to create your flaps.
TIP: If using patterned paper as I did, I first cut a solid piece of DSP at 5″ x 3 1/2″ then cut the piece in half on the 5″ side to make up the two pieces. This way I can line up the pattern on the front of the card and the pattern isn’t looking like it’s on it’s side.


Line up the two flaps over the front of the closed card so they are just inside of your card front edges.
The top flap will open from the left and the bottom flap will open on the right (or you can make it visa versa). ONLY add adhesive to the panels where they overlap. You don’t want to glue your card closed right?
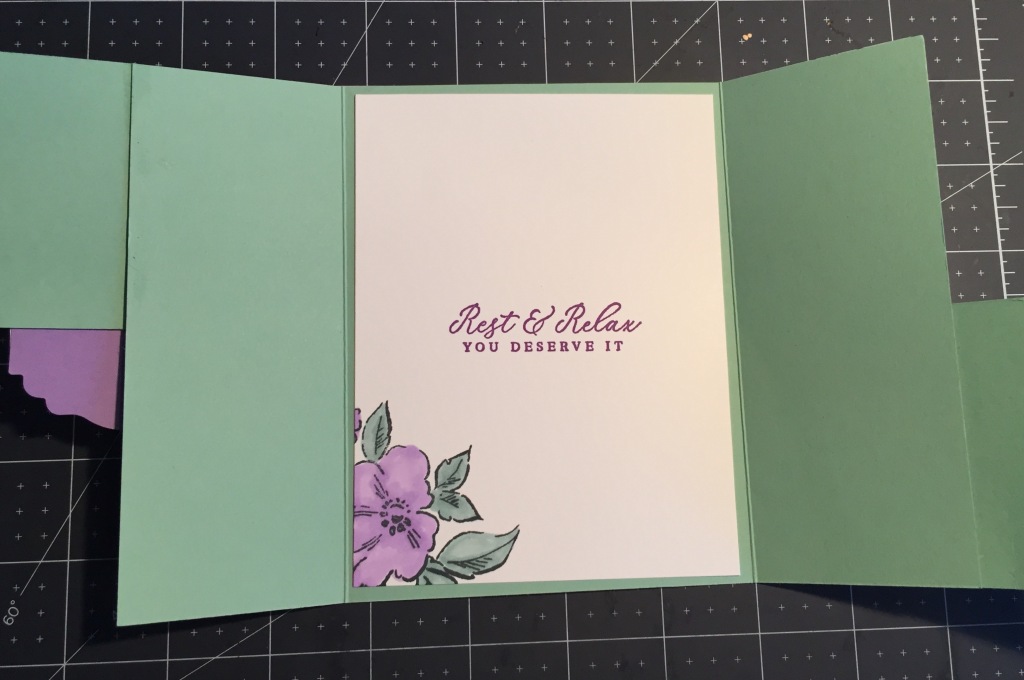
For the inside of the card, stamp your greeting in the centre. I also stamped a partial floral image from the Hand Penned Petals stamp set in the bottom corner. I then coloured it with my blender pens. Once completed, go ahead and adhere to the inside of your card.

Stamp your sentiment on the scrap paper of Basic White and punch out the label. Punch out a second label in Highland Heather.
Cut the highland heather label in half and adhere each have to the back of the white sentiment greeting by showing just the outline of the greeting on the top and bottom. Make sure that you line up the sides evenly for a clean look. Add adhesive to the back of the top half only and position over the two panels so the bottom half has no adhesive on it. This will hold the two panels closed but still allow your card to be opened.

To decorate, add a bow to the front bottom panel with a glue dot.
I also added some in-colour gemstones to the top panel and greeting for some added bling. I don’t think you can see them very well in the picture, but they are there.
Your card is finished.
Supplies used
- Mint Macaron card stock
- Card Base – 8 1/2″ x 5 1/2″
- Flap mats – 2 3/4″ x 3 3/4″
- Basic White card stock
- Inside of card – 5 1/4″ x 4″
- Scrap paper – Punch out greeting sentiment
- Hand Penned Designer Series Paper
- Two outside panels – 1 3/4″ x 5 1/2″ (cut 2)
- Flap Fronts – 3 1/2″ x 2 1/2 ” (cut 2)
- Scrap paper – Greeting sentiment
- Ink Pad – Highland Heather
- Blender Pen – Soft Succulent & Highland Heather
- Punch – Lovely Label
- Stamp Set
- Hand Penned Petals – Floral image
- Timeless Tropical – Greetings
- Adhesive – Stampin’ Seal and glue dots

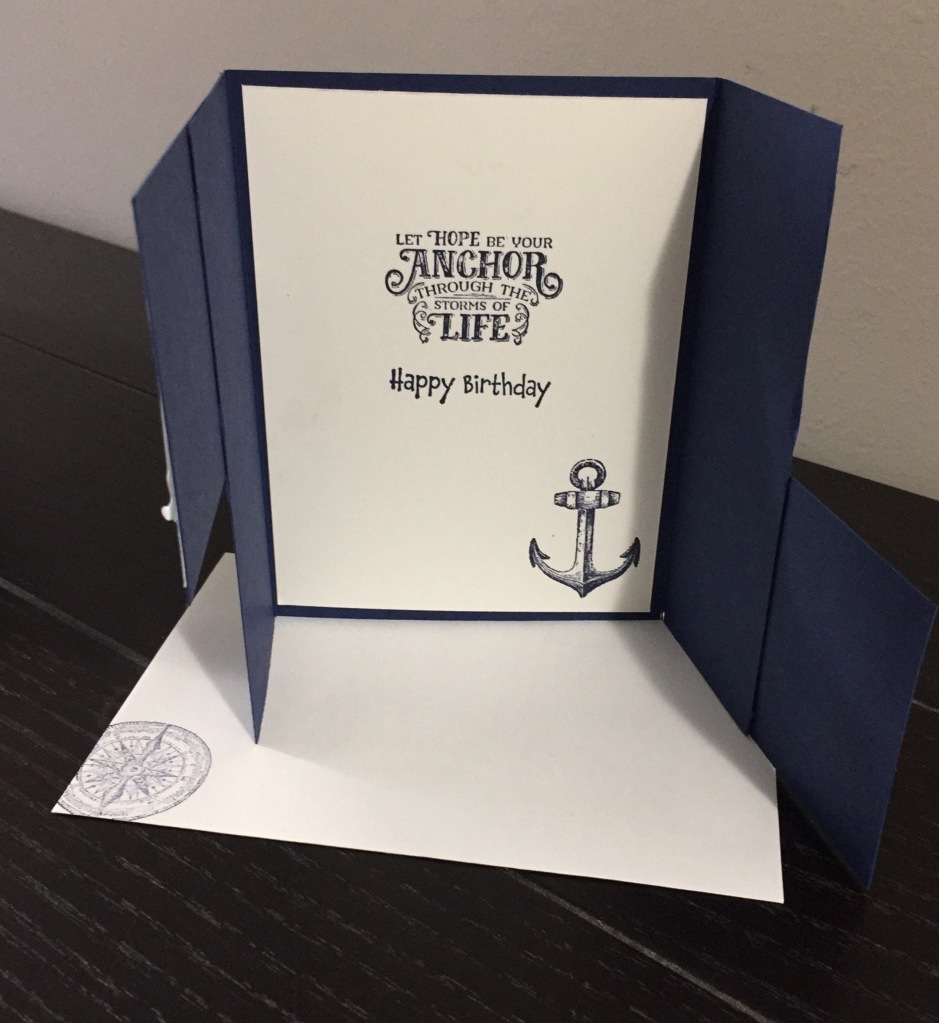
I also wanted to show you a similar card I had made using the Sailing Home stamp set which is also in the new annual catalogue. While this card is made in exactly the same way. It just shows you how different colours and different designer series paper can dramatically change the look of the card. This is why we have so many colours and choices. One card design can have many different looks.

To see all the colours available and the various Designer Series paper, I invite you to visit my online store by clicking here. All orders placed during the month of May, using my Host Code – KW643MGF will be automatically be entered into my monthly draw.
Better yet, gather some friends or family together and earn even more free rewards. From 4 May–14 June 2021, ALL qualifying orders of $300 CAD or more, will not only receive the regular 10% in free rewards but you as the host, will also receive an additional $30.00 CAD in additional rewards of your choice! Hosts can earn Stampin’ Rewards based on order totals for an entire party. Please contact me and I will set you up with your own personal host code.
Stampin’ Rewards promotion also applies to anyone who places an individual qualifying order of $300.00 or more.

Want to get even more freebies? Now is a great time to sign up as a demonstrator. Whether you craft as a hobby or would like to start a home business, that choice is up to you. However, from 4–31 May, new team members can choose $206 CAD worth of products for just $135 CAD + free business supplies + free shipping + all the fun being a part of Stampin’ Up!
By purchasing the Starter Kit, there is no obligation to purchase anything more, no requirement to sell or hold events/parties, and no penalty if you decide to stop your demonstrator ship.
Click here to join my team of Canadian Stampers and as a new team member, you get even MORE FREE products with your customizable Starter Kit. This promotion ends May 31st so time is running out. Contact me and let’s chat about what you want in your kit.
I hope you have enjoyed this post, please like and follow my blog to see future posts. As always, I welcome your feedback and so please leave a comment. I invite you to try your hand at making this card and I would love to see a picture of your creation.
Would you like to be added to my email newsletter? please provide your contact information here
Leave a Reply