I love willow trees, they look so majestic standing in the middle of a field or draping over the water’s edge beside a river. My grandmother had one in her yard and I spent many hours as a child, sitting under the branches and reading a book. It felt like my own personal world under that tree.

When Stampin’ Up! came out with the Willow Tree Bundle in the new annual catalogue, it went immediately on my wish list. I couldn’t wait to order it and create a beautiful card.
This lovely bundle comes with 10 stamps and 11 dies. You can stamp the image and then cut out the outline. I love that! Can you see how the stamp leaves line up with the tree branches? It even includes two cute little bunnies to sit under the tree and a stamp for water. How cute is that?
However, I was immediately drawn to the largest die with all the leaves. There is a card example posted online and I just had to CASE it. (CASE= copy and share everything). It is just so adorable.
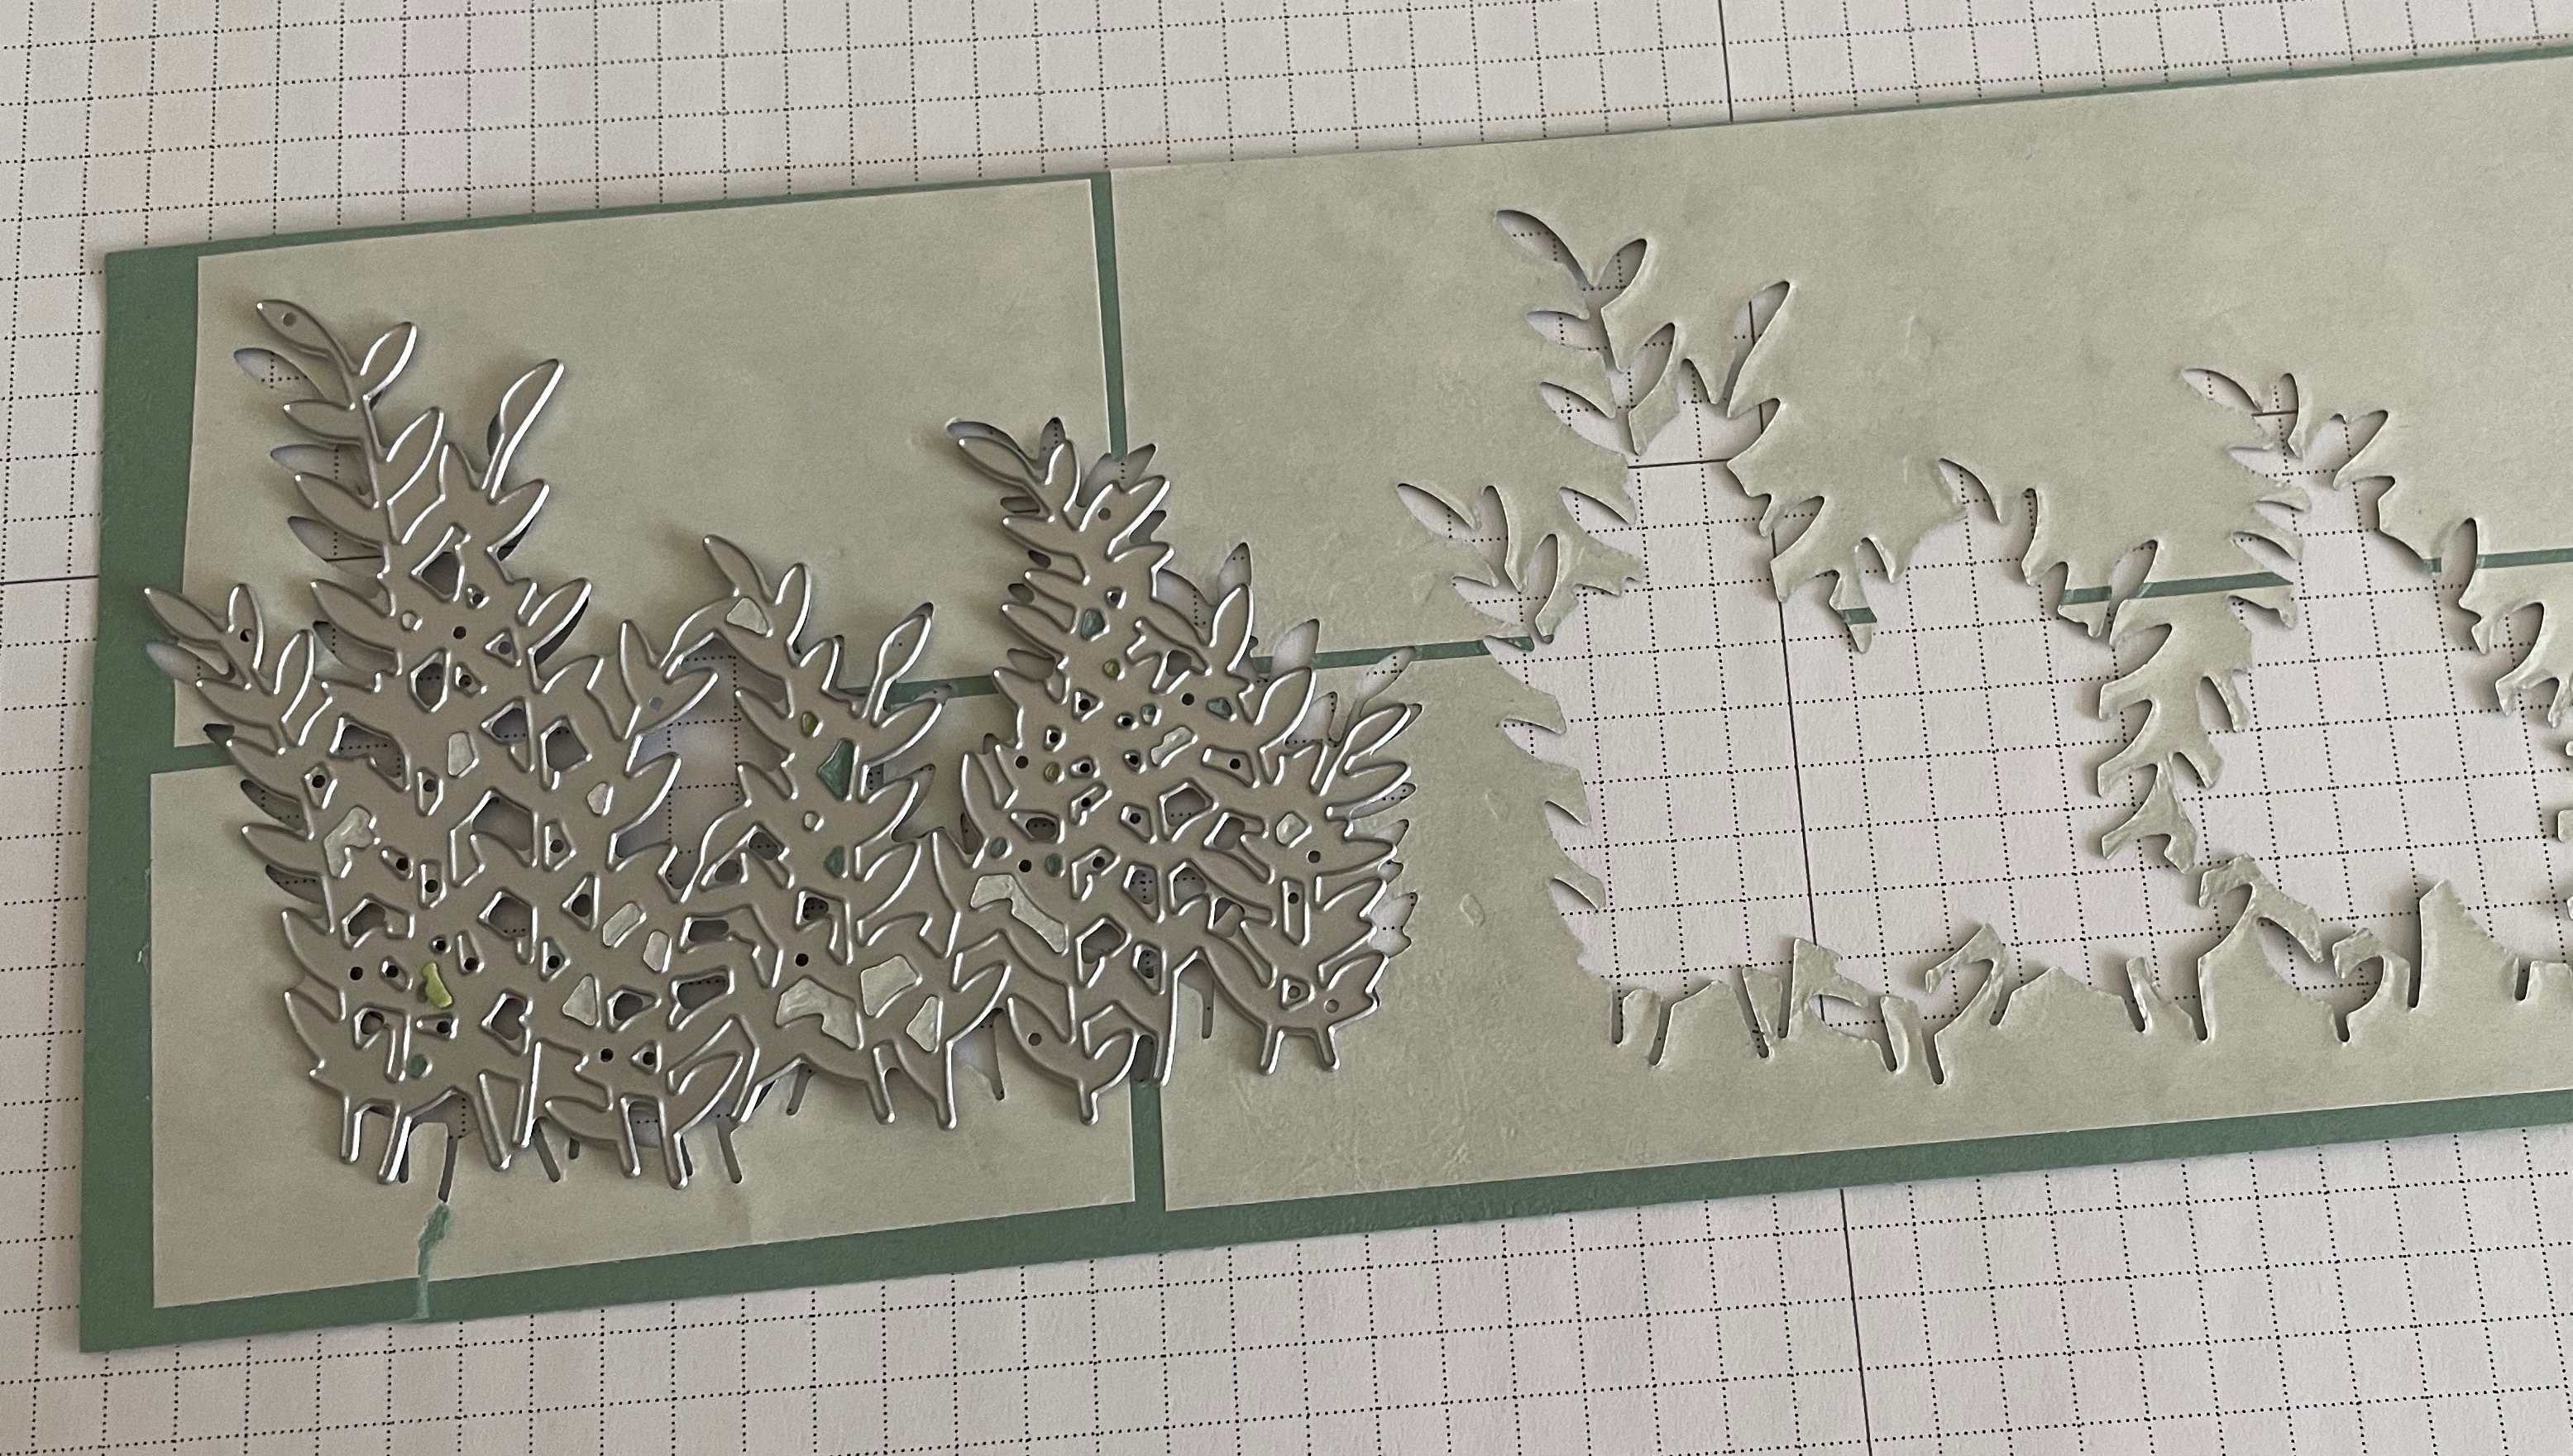
First I applied adhesive strips to some Soft Succulent card stock then placed the die on the other side to cut it out. As you can see, there are still a few small pieces on the die which can easily be removed with the Take Your Pick brush. Just run it over the die to remove all the little bits.
FYI: Adhesive sheets are 6″ x 12″ long and you get 12 sheets in each package. I use them all the time because you can cut them to fit any size card stock.
TIP: Leave a small space between the sheets for easy removal of the adhesive sheet after die cutting. If you slowly remove it, it will grab most of the little pieces as well.
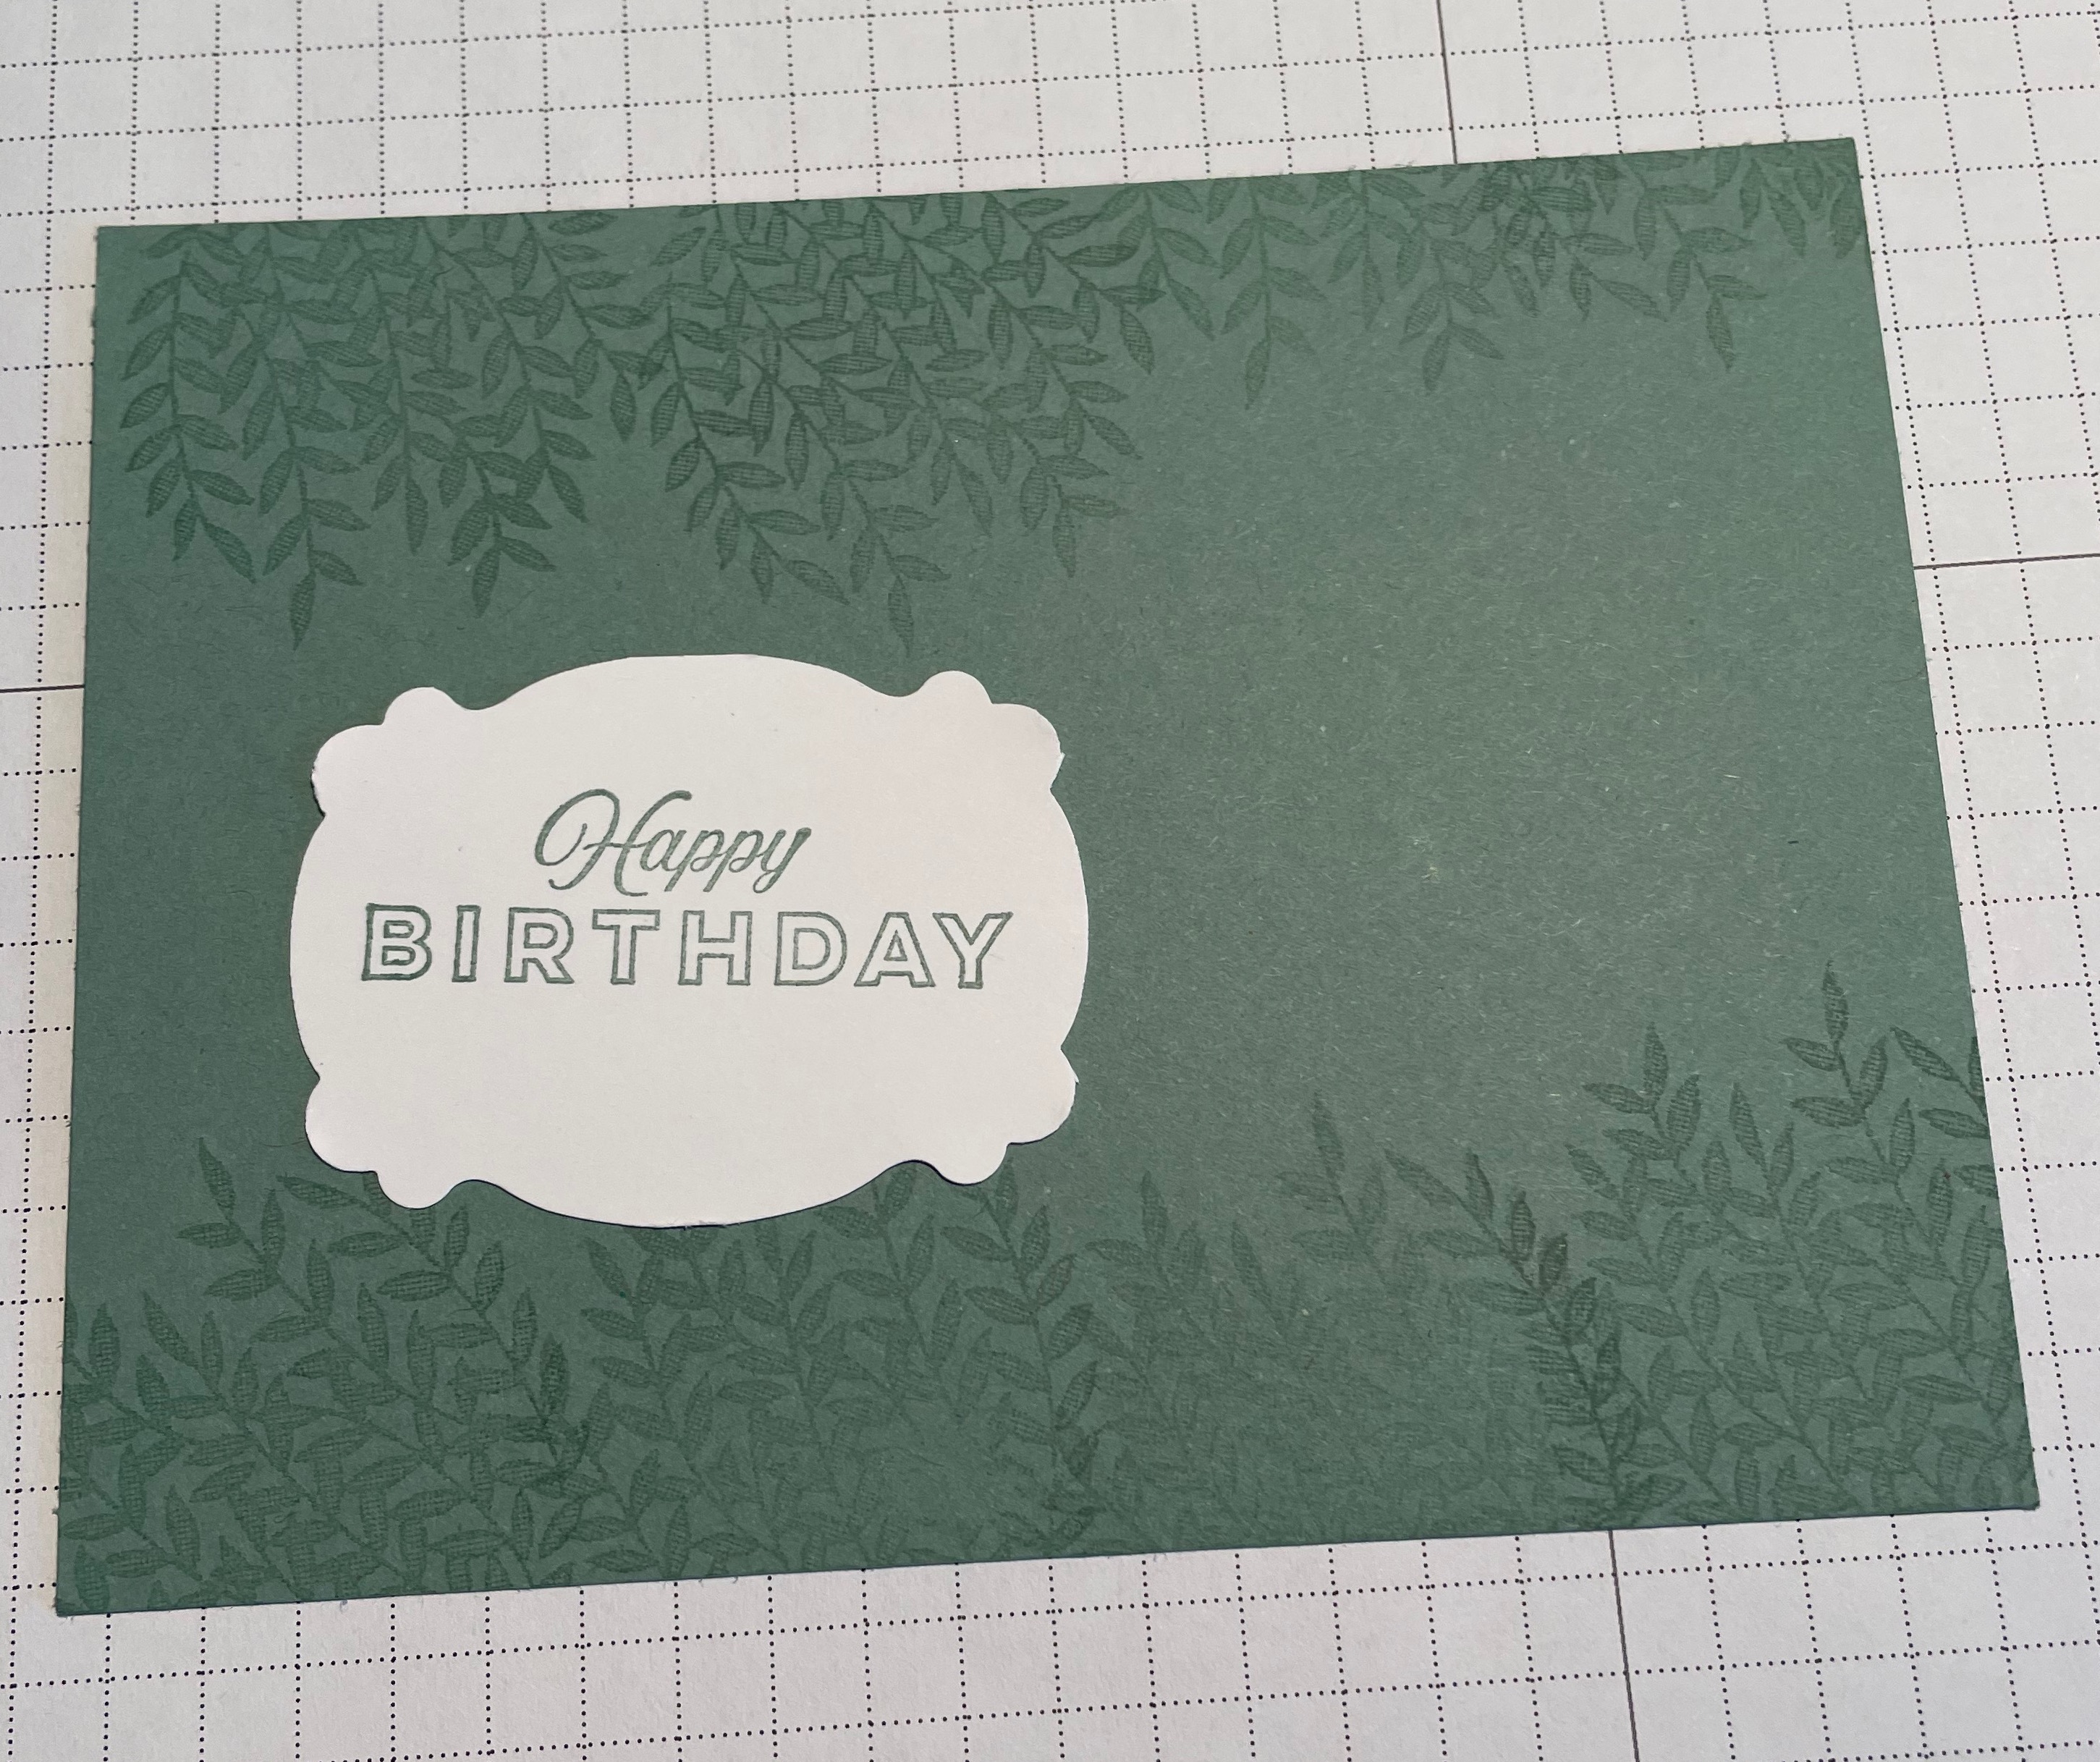
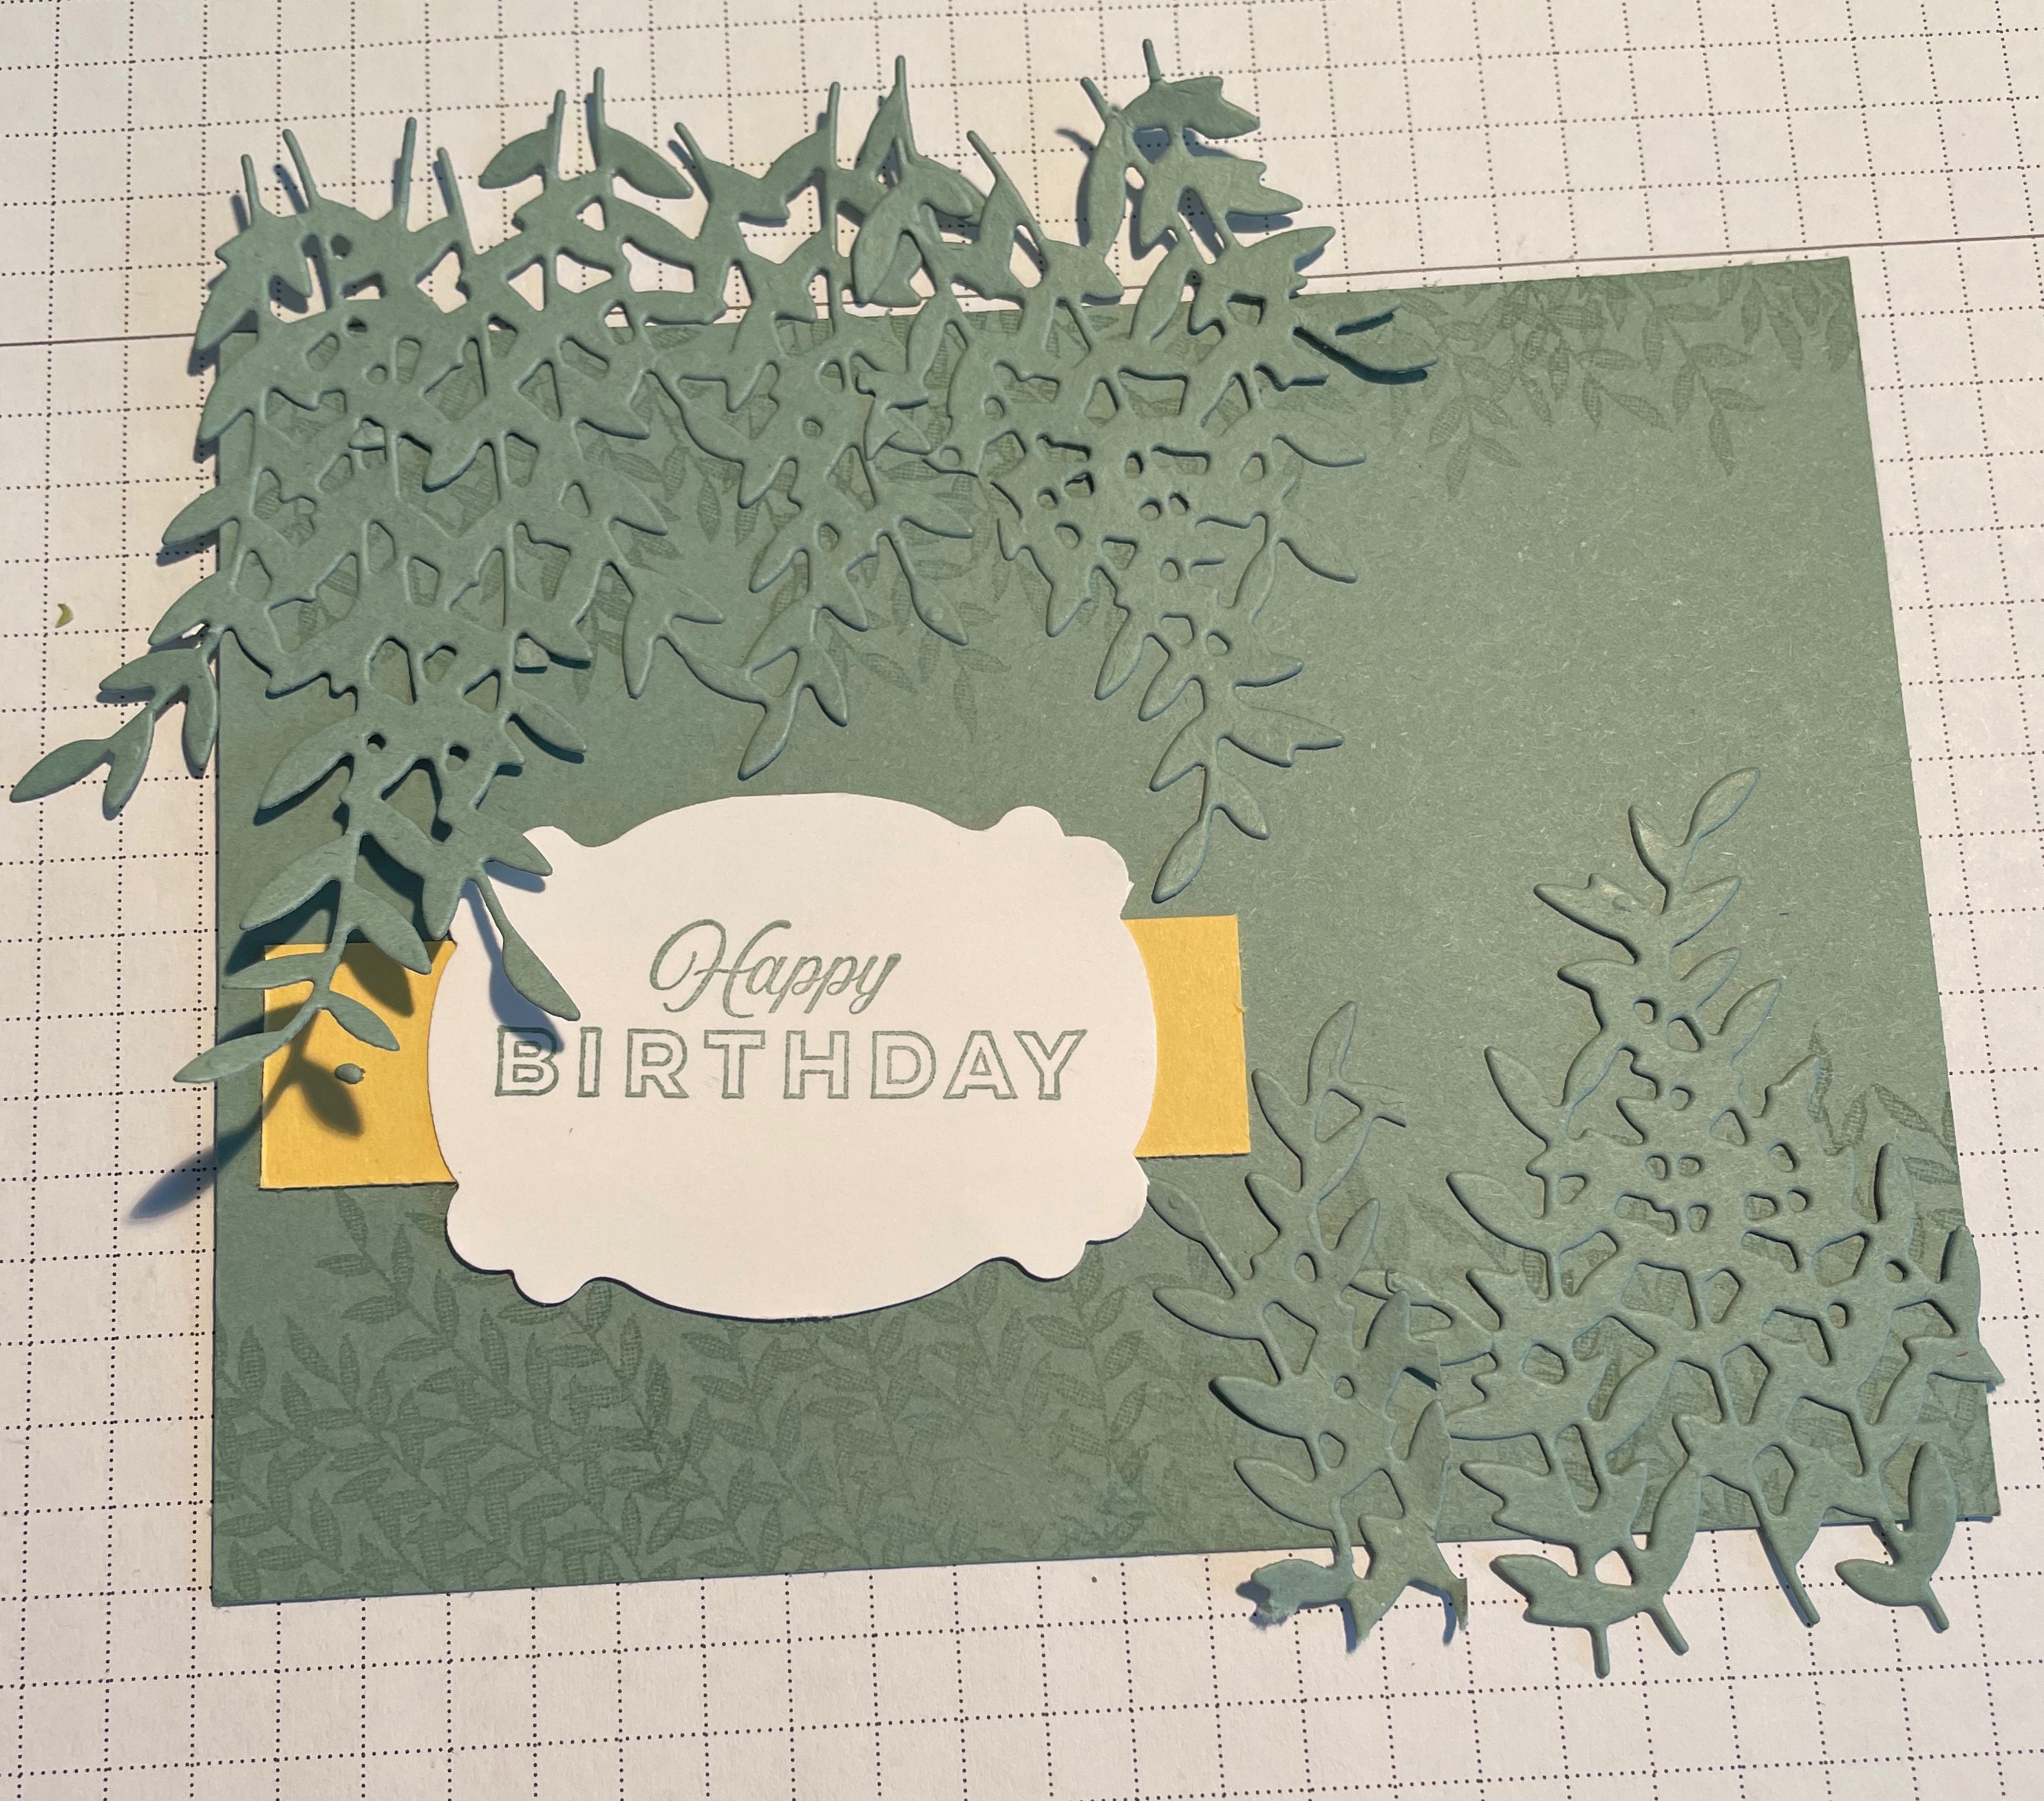
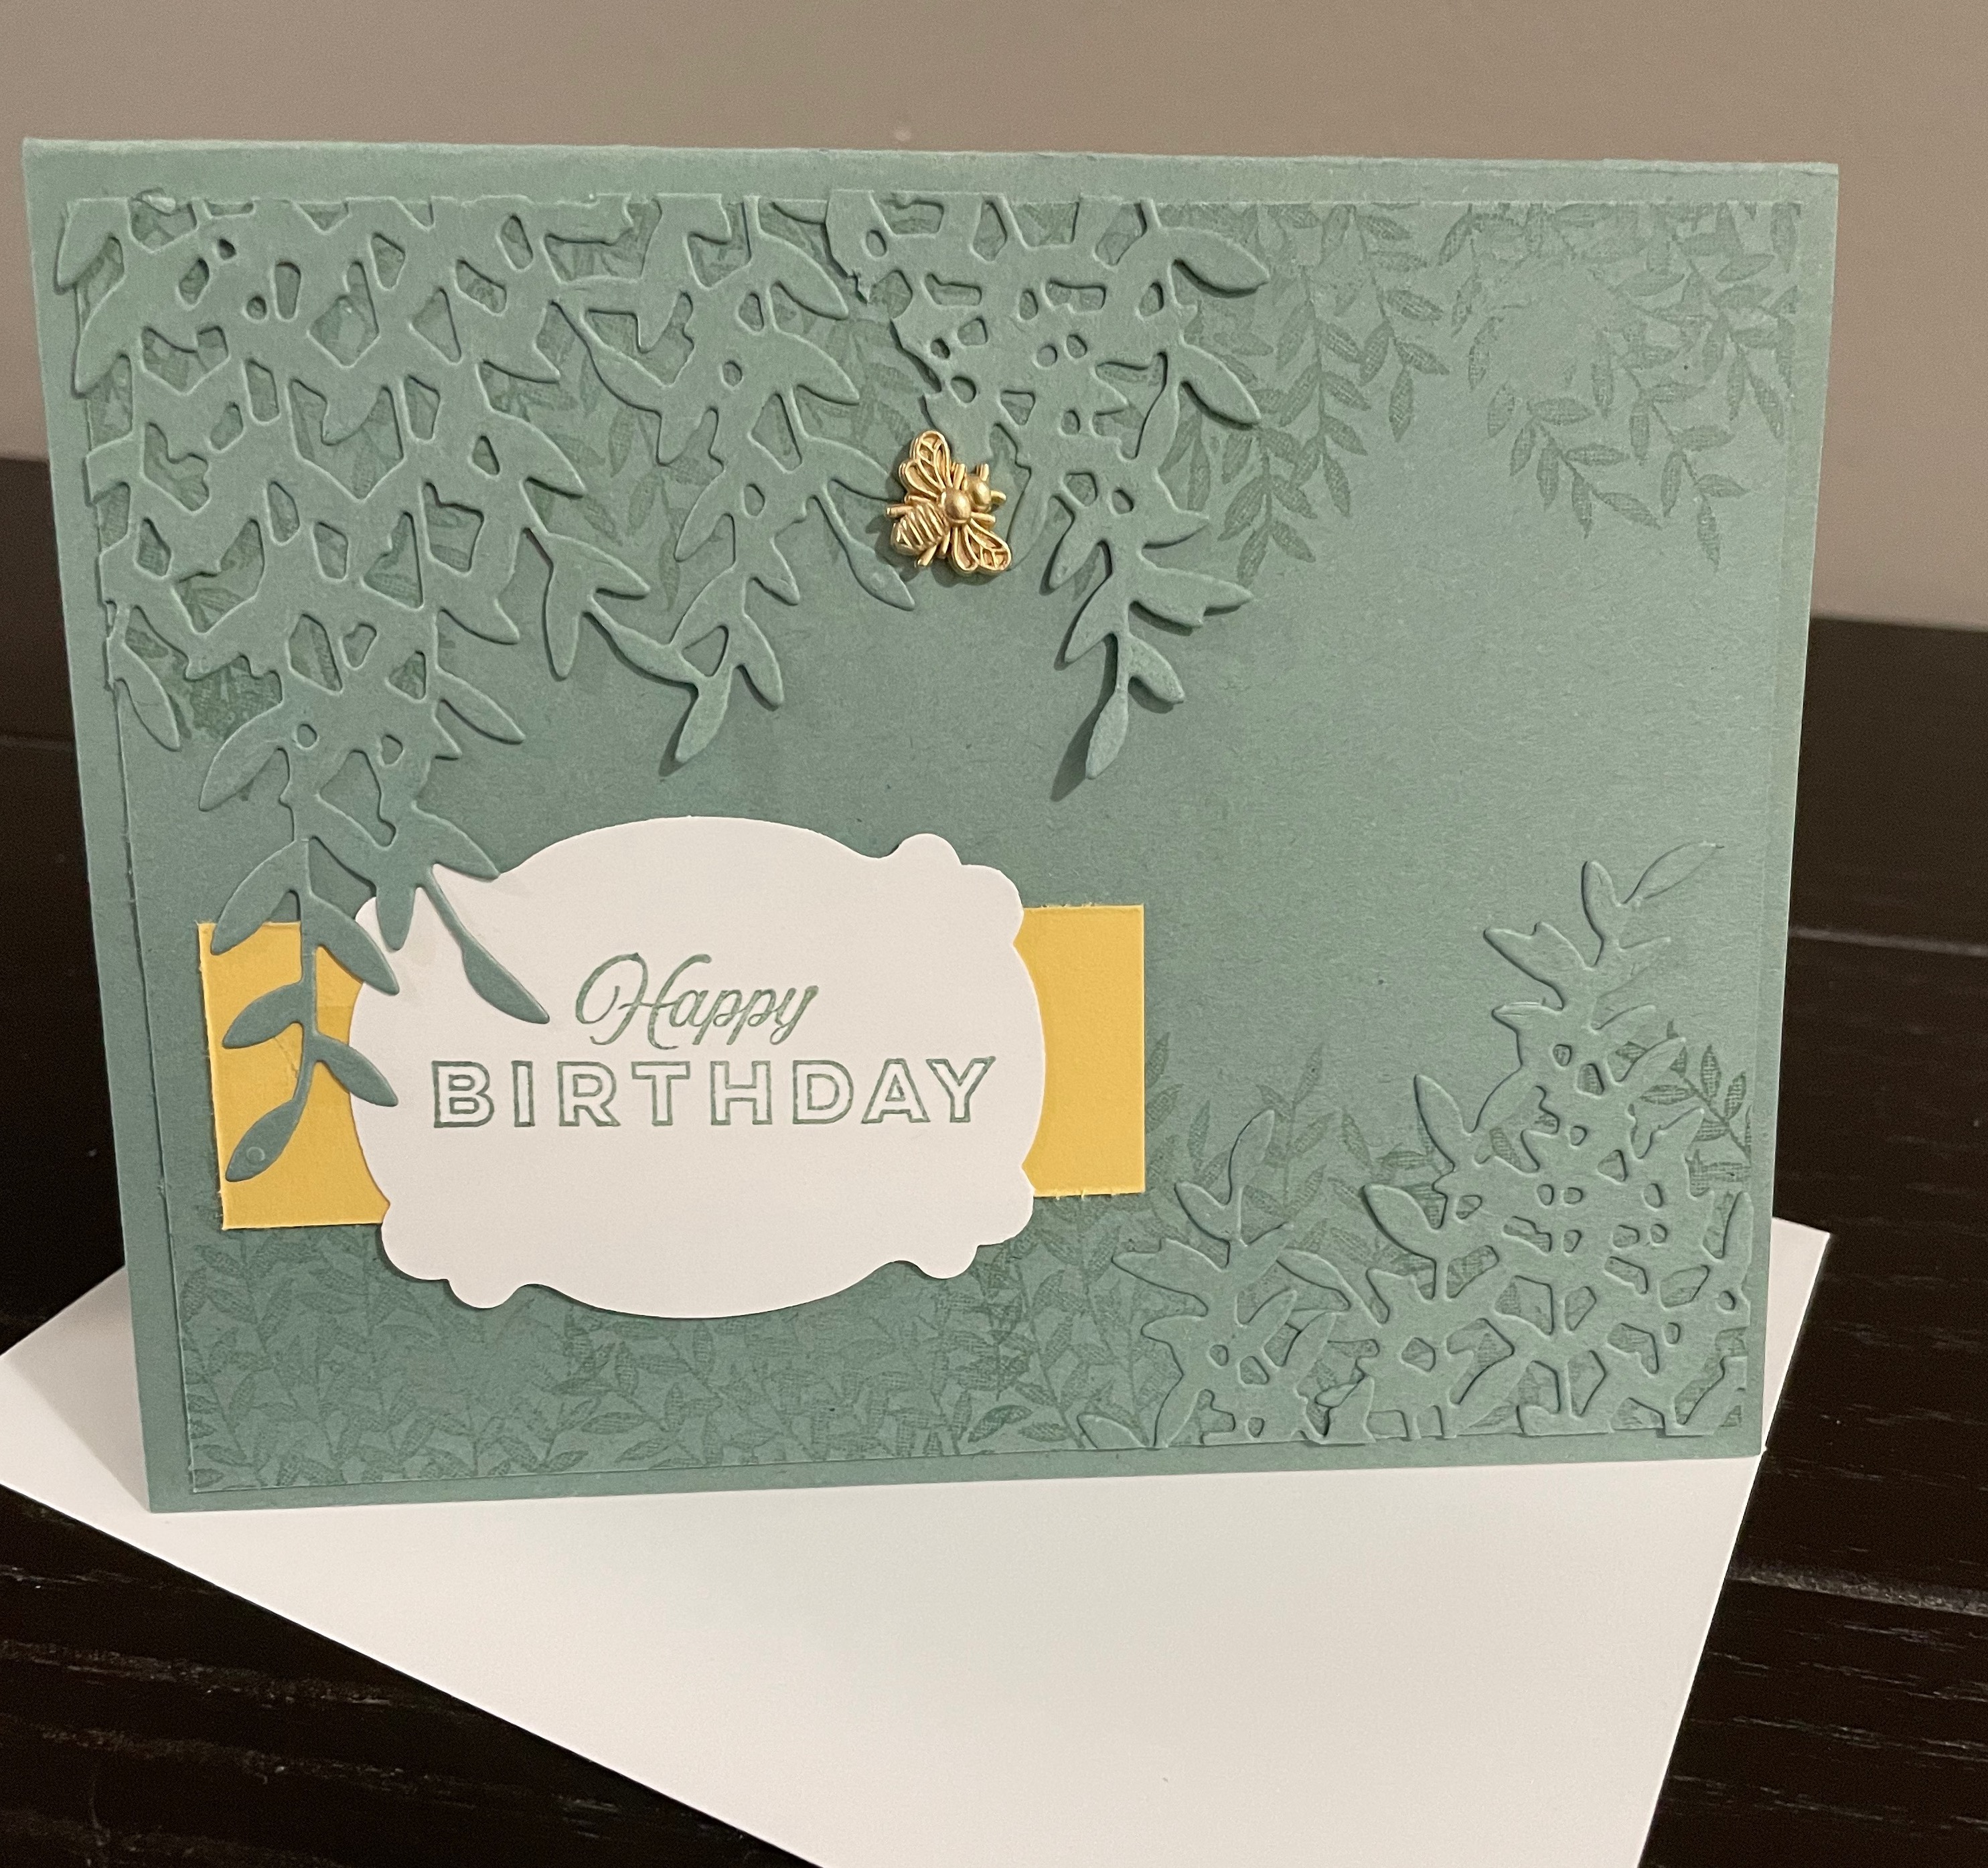
To make up my card front, I first stamped some leaves along the top and bottom of the card stock. I then stamped my greeting and punched it out with the Lasting label Punch which is a new punch from the annual catalogue. I then lined it up where I wanted it to go. Once I adhered it in place, adding a strip of So Saffron card stock for a little colour, I added the die cut leaves. As you can see, I overlapped them so the ends run off the card stock. I love how these leaves can go in both directions and they still look lovely. The adhesive on the back allows it to lie flat without any gluey (is that a word?) mess. I did lift up a couple of leaves so they would overlap onto my greeting. Once adhered, I turned it over and trimmed all the overlapping pieces for a clean edge.
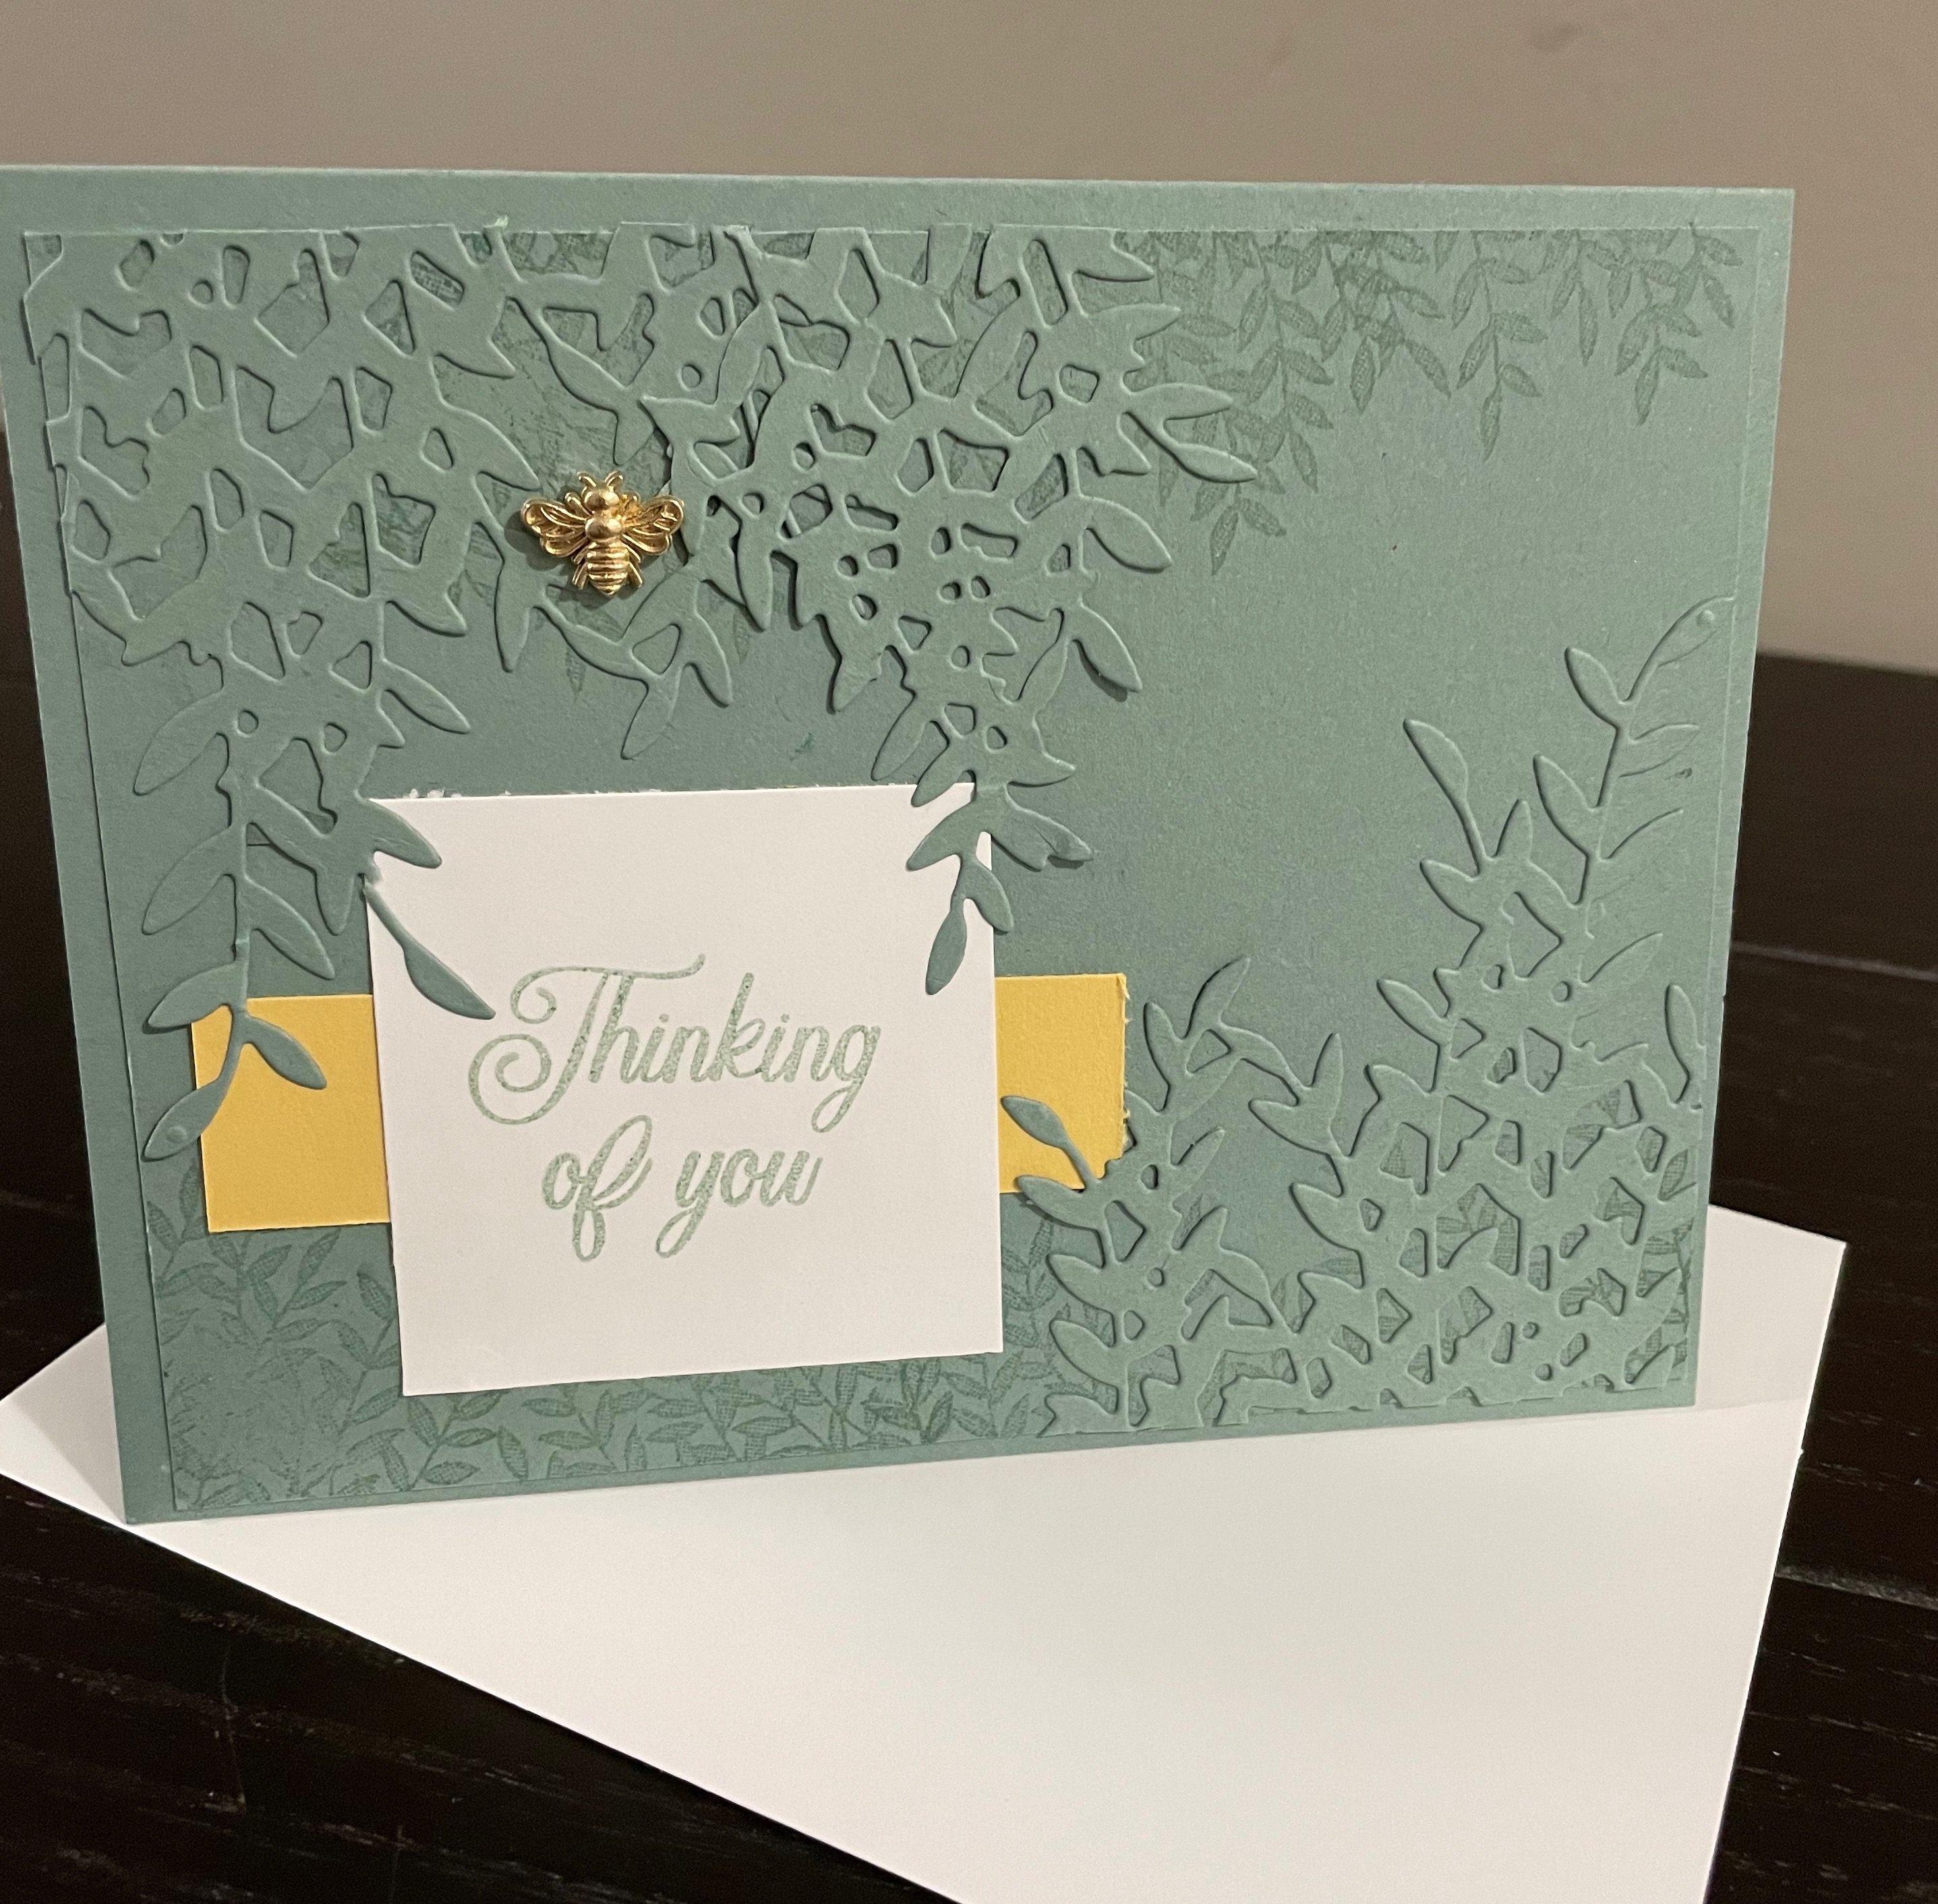
To finish my card, I adhered the card front to my card base, using the same Soft Succulent card stock. I really like that tone on tone effect. I then added a Bumble Bee (now retired) to the front for some added interest. I couldn’t just make one card so I wanted to show you the second card I made using the same technique.
Measurements
- Soft Succulent – 5 1/2″ x 8 1/2″
- Soft Succulent – 4″ x 5 1/4″
- Soft Succulent – 4′ x 11″ (for die cutting)
- Basic White – 4″ x 5 1/4″ (inside of card)
- Basic White – Scrap for greeting
- So Saffron – 1″ x 3″
To see more details about this wonderful bundle, visit my online store. CLICK HERE 24/7 to visit my online store. When shopping, please use my current Host Code 39XW4GBF. I like to reward my customers with a free thank you gift and card from me when using my host code.

While you are there, don’t forget to check the LAST CHANCE products from the Jan-June 2022 mini Catalogue.
These products are only available until June 30 or while supplies last. Savings can be up to 50% of some products.
Leave a Reply