[vc_row][vc_column][vc_column_text]
Have you checked out these lovely masks? The Abundant Beauty Decorative Masks can be found on Page 47 of the Sept-Dec mini catalogue and sells for just $14.50. This is a great way to jazz up your paper crafts because each of these masks have fun and detailed all-occasion designs. What better way to add some depth and colour to your paper crafting projects, whether it’s cards, gift tags, or gift packaging.
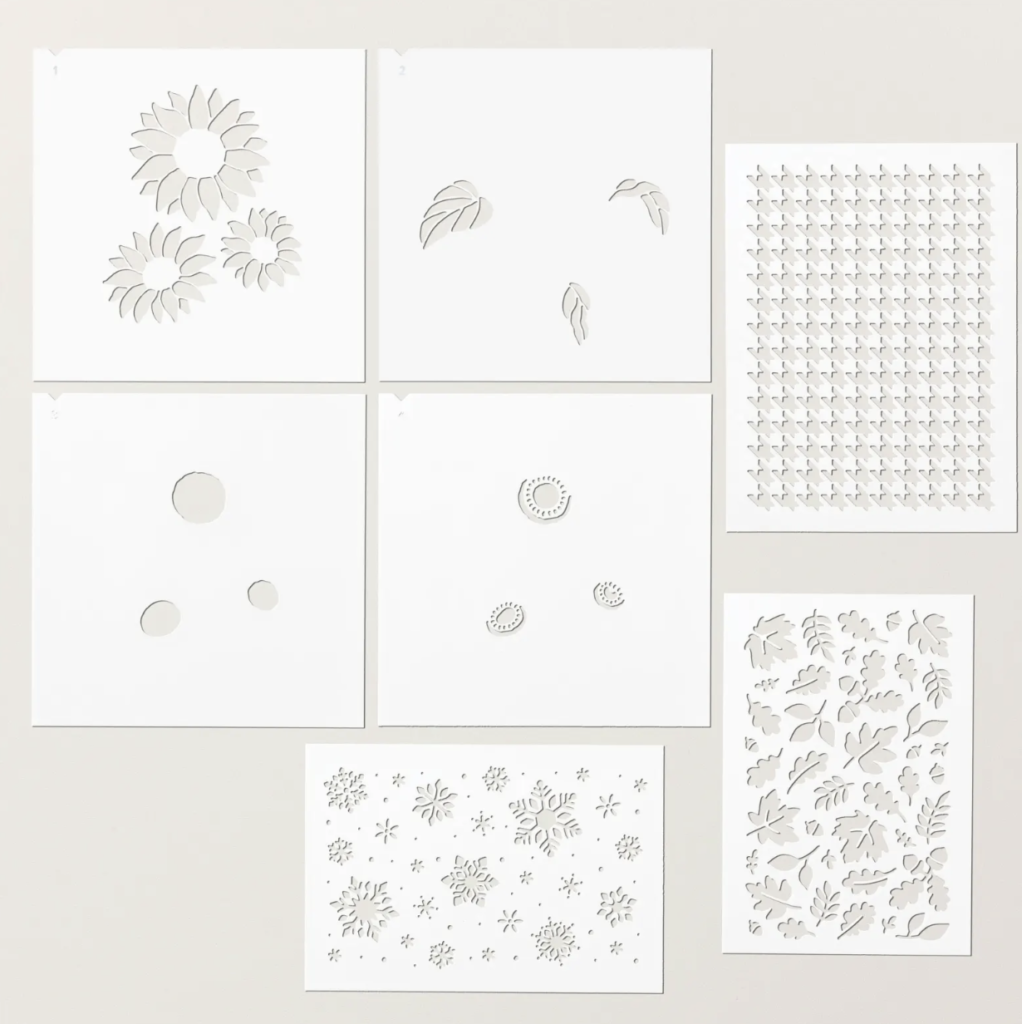
There are 7 masks included with this package. Three of these masks make lovely backgrounds for your projects. The 4 flower and petal masks will help you create beautiful flowers in a step-by-step process so even beginners will have no trouble creating beautiful flowers & leaves.
For more advanced crafters, you could also use the masking technique to combine a couple of the flowers or background masks to create your own unique designs. How cool it that?
Once you are done using the masks, just rinse them off, wipe them dry and they are ready to use again… So easy
Today I will show you how easy creating flowers will be using these decorative masks. All the masks line up perfectly so you cannot go wrong. So let’s get started.
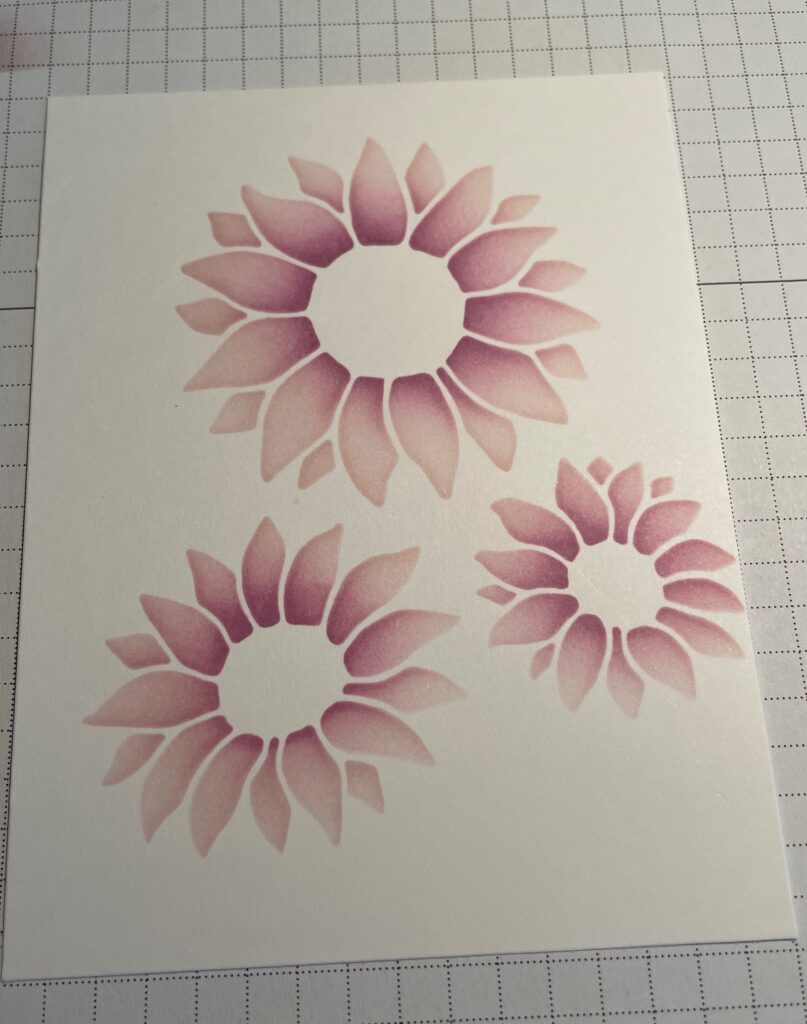
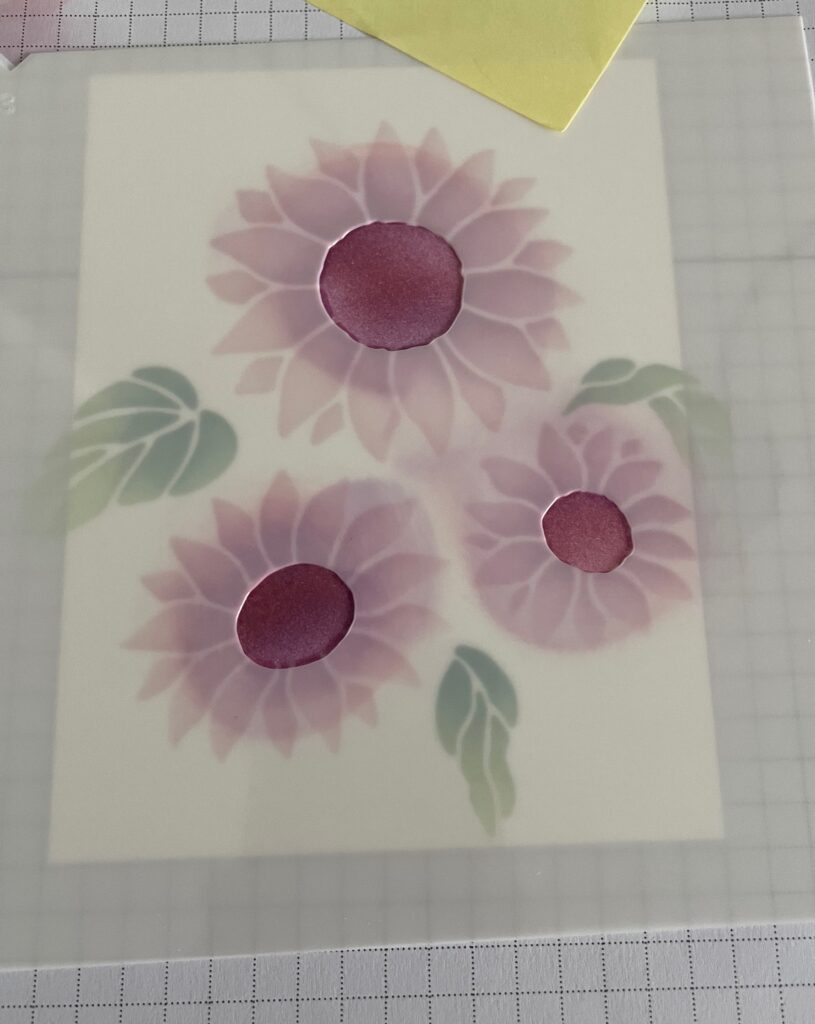
Step 1
Place your card stock on a piece of grid paper and add a glue dot to the back to hold it in place. Position your mask over the card stock and hold in place with a post it note or sticky tape. Do you see the small notch in the top left corner of the picture on the left? Take a blending brush or sponge dauber and add a little ink over this notch. This way you can line up the subsequent masks perfectly. For this picture, I used my blender brushes and very lightly sponged over the floral designs with Bubble Bath. I then sponged over it again (without moving the mask) with Fresh Freesia around the center to give some added dimension. On the right, is my finished piece with the mask removed.

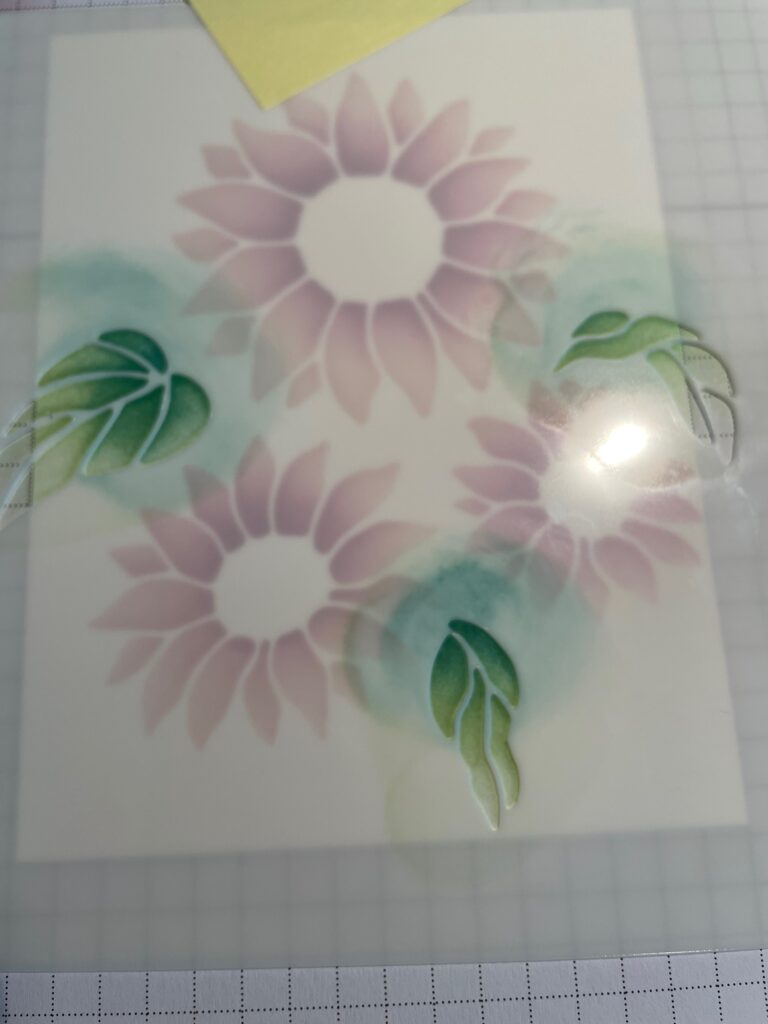
Step Two
After you have removed the floral images, it’s time to add your leaves. By lining up the notch mentioned above, you can position the leaves over your card stock. For my leaves I used the same method. I sponged So Saffron lightly over the leaves and then sponged Lost Lagoon over the base of the leaves for a bit of contrast. How easy is that?
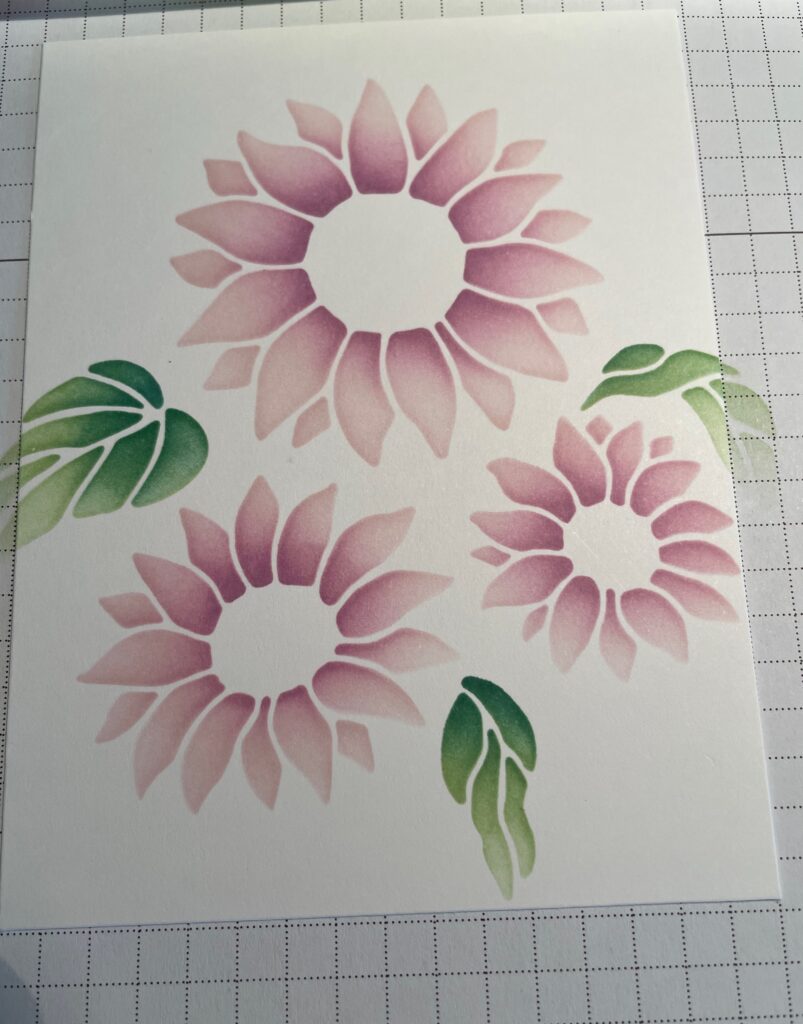
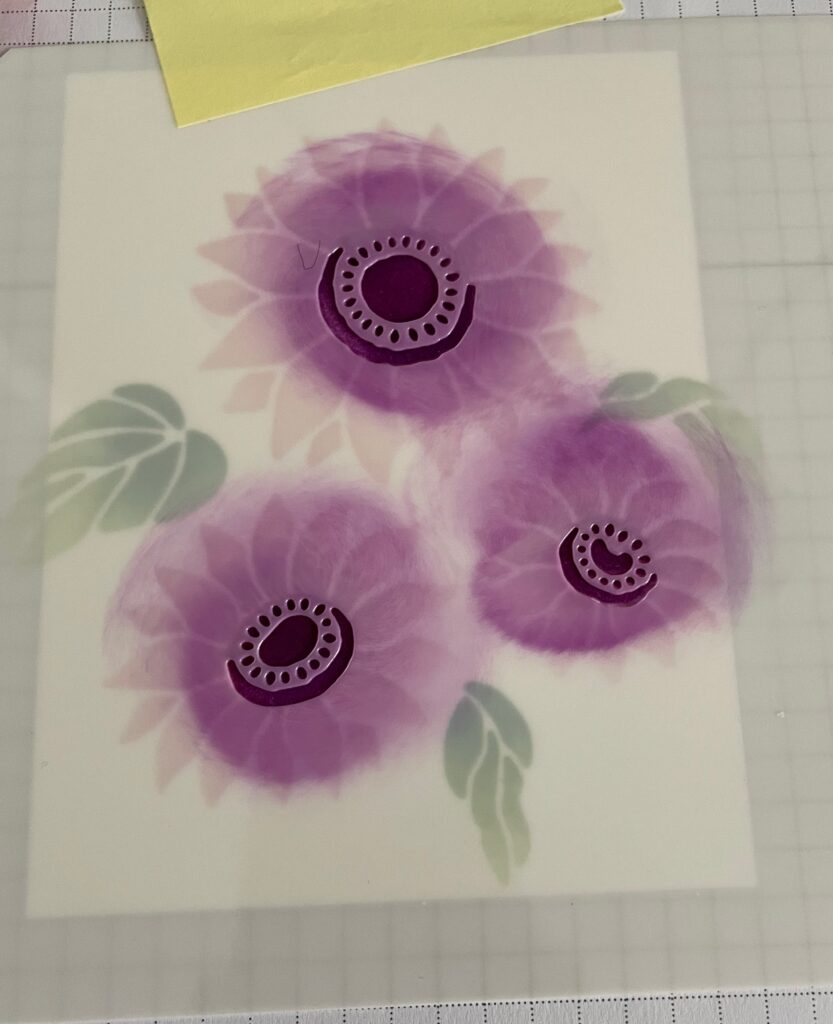
Step 3 and step 4
Now that the flowers and leaves are done, I went back and did the flowers centres. I used the third and fourth mask in the same manner as the first two masks. I positioned my notch (top corner) and sponged Highland Heather over the center, and then sponged the 4th mask in the same colour to add the detail to the center of the flowers
After completing my card front, I added matting to the back, in Lost Lagoon and then mounted it on my Bubble Bath card base. I love how the colours work so well together. For my greeting, I used Go To Greetings stamp set to stamp Happy Birthday with Versamark Ink on a strip of Lost Lagoon and then embossed it with white embossing powder. I then adhered it to the card front with dimensional’s. Below is my finished card. I love how the colours blend to give shading to the flower and leaves and it took just minutes to do. I still need to add a bit of bling by adding some coloured gems to the card front because it just adds a little extra to the card front.
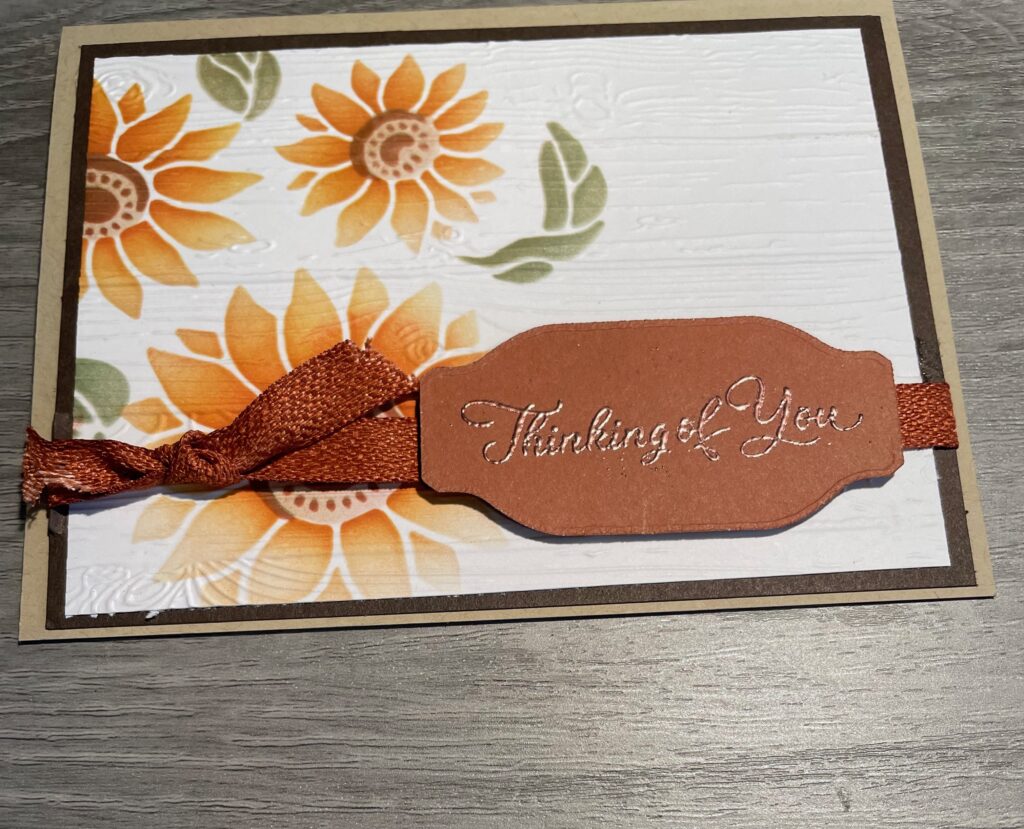
This was so easy to do I had to make more. After rinsing off the masks and wiping them dry, I created two more cards using different colour combinations. The colour possibilities are endless so you can use whatever you have on hand. I also moved the leaves mask around to add extra leaves to the card fronts. The card on the right was embossed with a woodgrain embossing folder. It’s retired now but any embossing folder will work. I also embossed the greeting in copper.

I also experimented with one of the background masks and cannot wait to try something with the other two masks included.
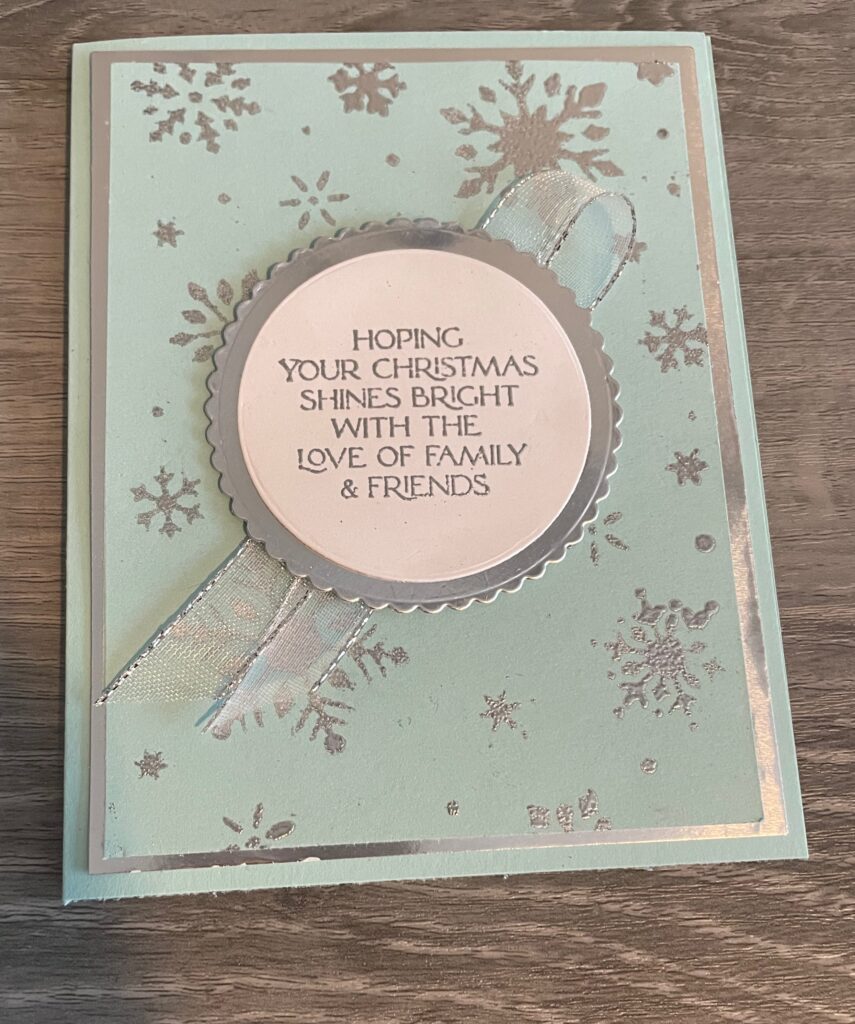
For this background mask, I decided to make a Christmas card. How could I resist with all the gorgeous snowflakes?
To make this card front, I recommend using a larger piece (6″ x 6″) of card stock so you have an edge to hold onto. I covered the mask with Versamark ink and then heat embossed it with silver. The picture doesn’t really show how it just pops with silver snowflakes but it’ lovely. Once that was done, I trimmed the card stock down to fit my card base. I also stamped my greeting in Versamark and heat embossed it as well.
The matting is in silver for both the card front and the greeting matting, which was cut out using the Layering Circles dies.
To finish it off, I add some silver trimmed ribbon to just add a little more interest.
Product List


")

[/vc_column_text][/vc_column][/vc_row][vc_row][vc_column][html_block id=”11645″][/vc_column][/vc_row][vc_row][vc_column][html_block id=”11646″][/vc_column][/vc_row]
Leave a Reply