[vc_row][vc_column][vc_column_text]As paper crafters, there is always an abundance of paper scraps. They ARE NOT WASTE but occasionally, it does get a little overwhelming. So this will be the first part of three posts, showing you how to use up some of those scraps to create some lovely cards.
Our first card is very popular technique and you can find all sorts of variations on Pinterest. It is called a Twisted Ribbon Card. This is a very easy technique to make and it is meant to look like the paper is wrapped around the card stock showing both the front and the back of the paper. I have never tried making this technique with actual ribbon but may just have to try that… hmmm…
Ok, let’s get started.
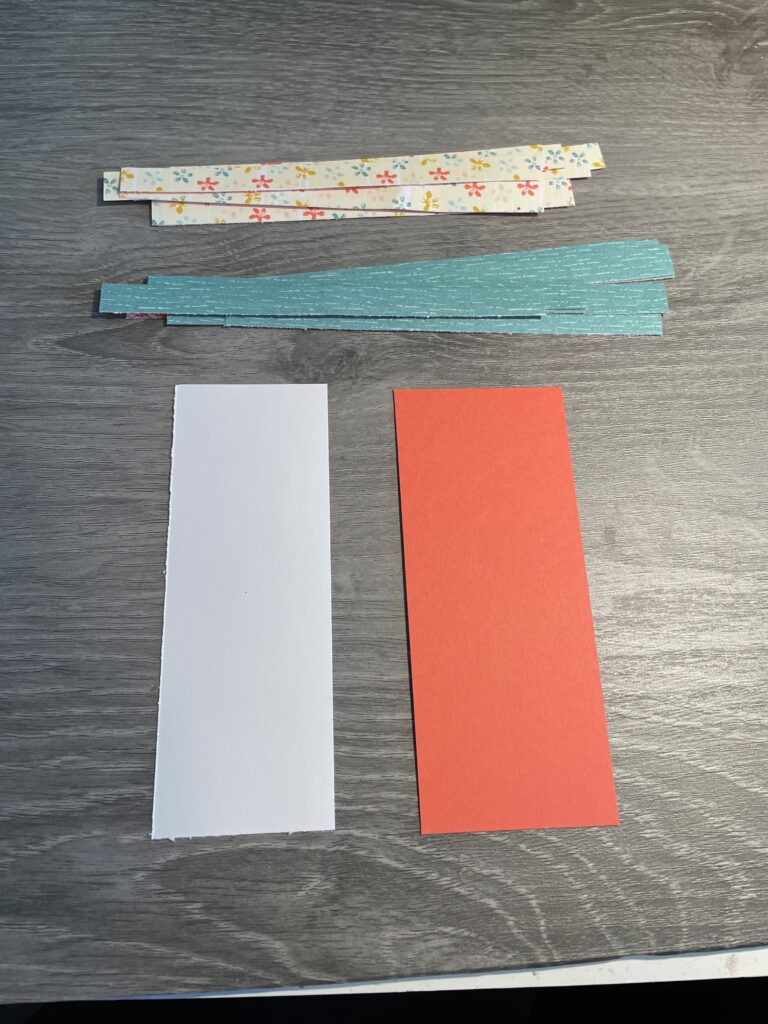
You will need a selection of strips in two coordinating colours of designer series paper. For this card, I used the Inked Botanical designer series paper and cut about 5-6 strips of each pattern about 6″ in length and 1/2″ in width. I then ended up cutting them down I worked, as I found them to be too long.. I personally like one subdued pattern and one with a lot of pattern but any coordinating pattern paper you have on hand will work.
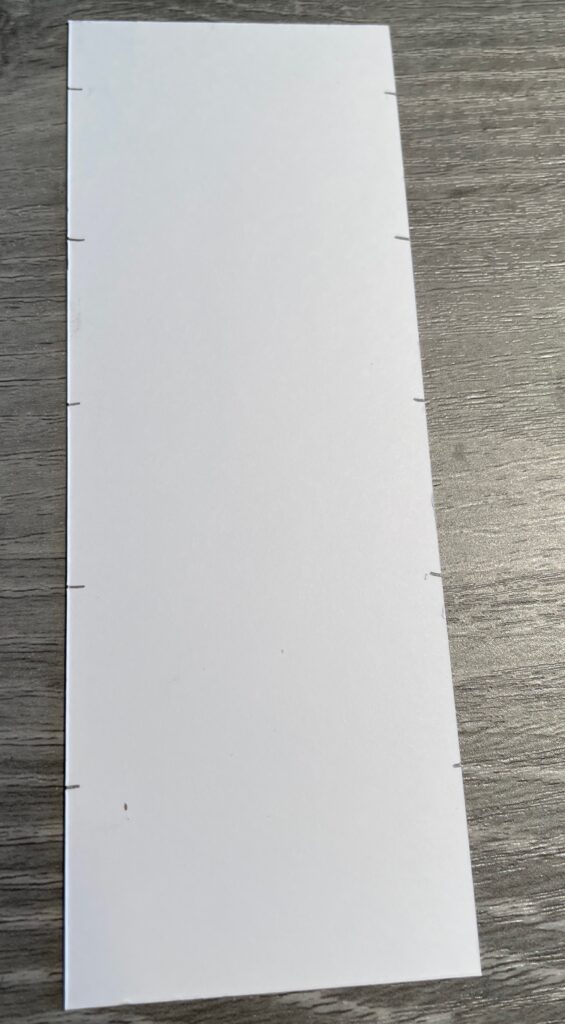
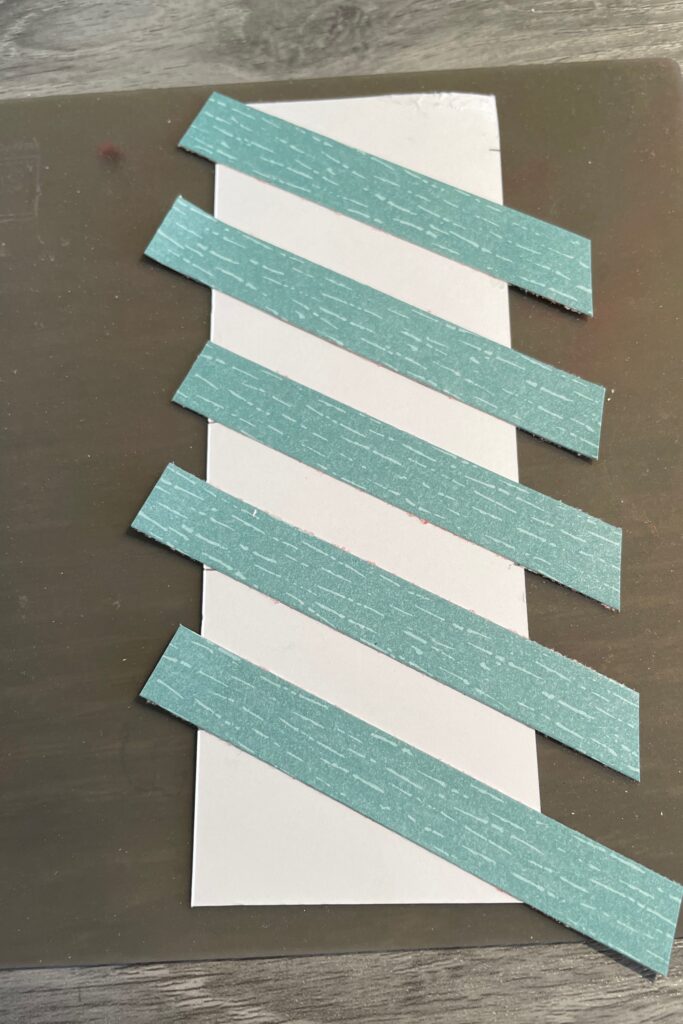
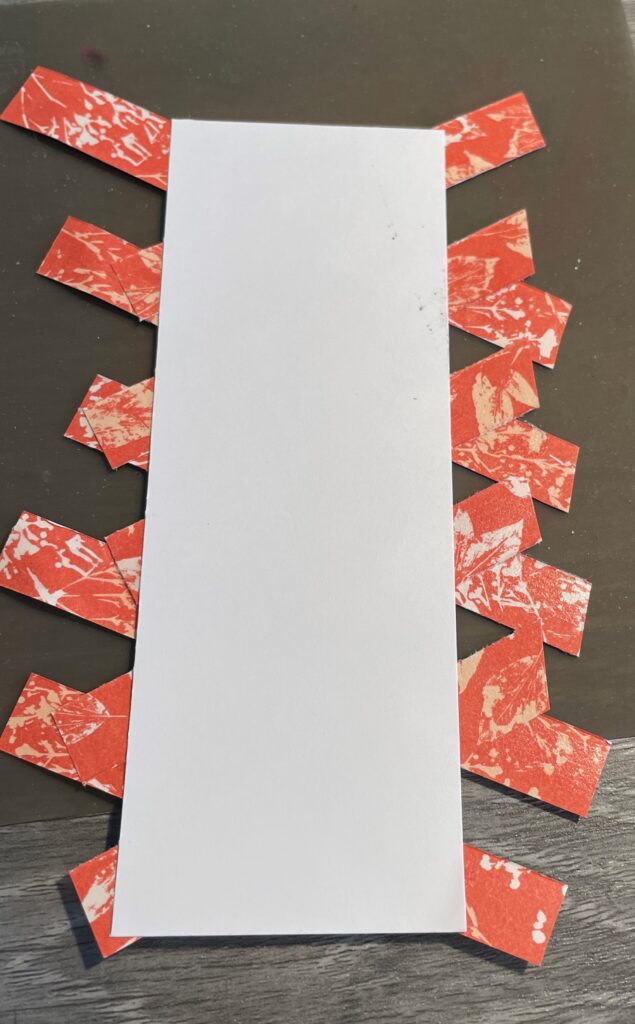
The basic white piece measures 2″ x 5 1/2″ and the mat measures 2 1/4″ x 5 1/2″. I used Calypso Coral for my matting to match up with the patterned paper. Mark your Basic White card stock from the bottom at 1″ increments on both sides. Now take your first pattern and glue it down so the bottom of the strip covers the pencil mark on the left and then angle it diagonally so it covers the next pencil mark below on the right. Continue down the paper using the pencil marks as your guide to ensure the strips are evenly spaced.
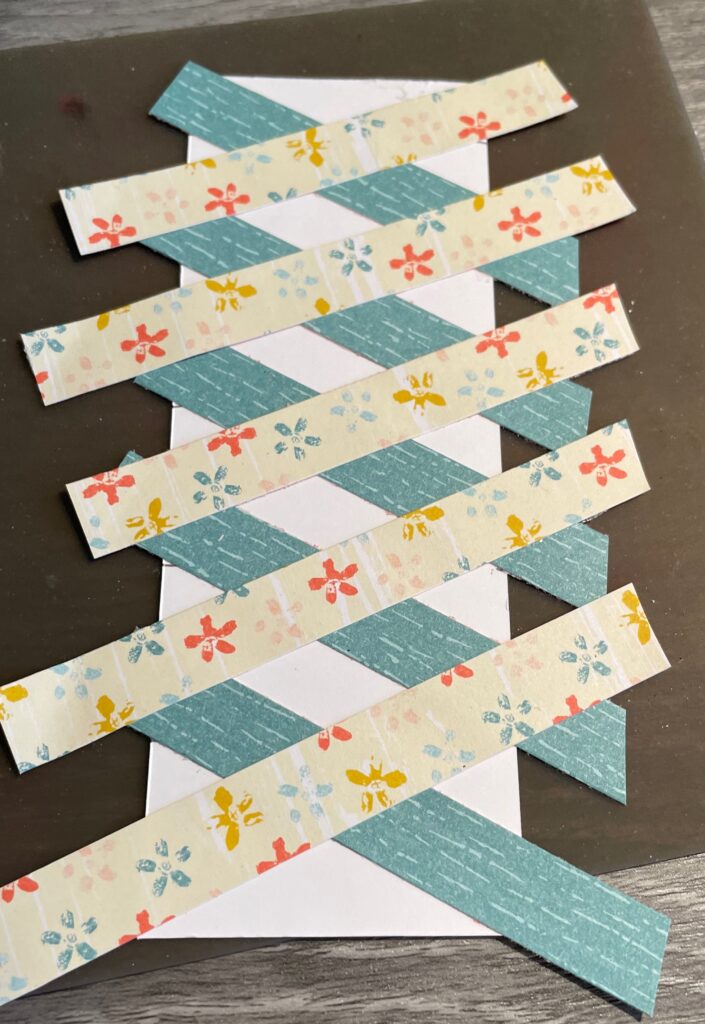
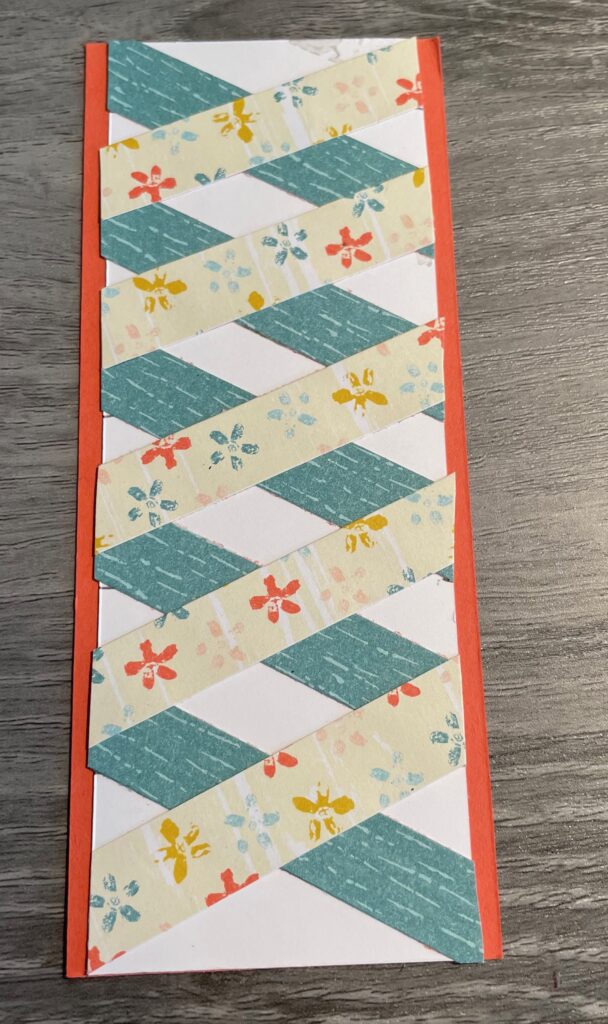
Next take the second patterned strips and repeat, going from right to left. You want to line them up so they are evenly spaced. Once you have all the strips glued down, turn your paper over and trim away all the bits with a pair of scissors. There may be some bits of glue on the back side so you might want to avoid the paper trimmer. Once this is all done, glue to the matting and it should look like this. Pretty cool right?
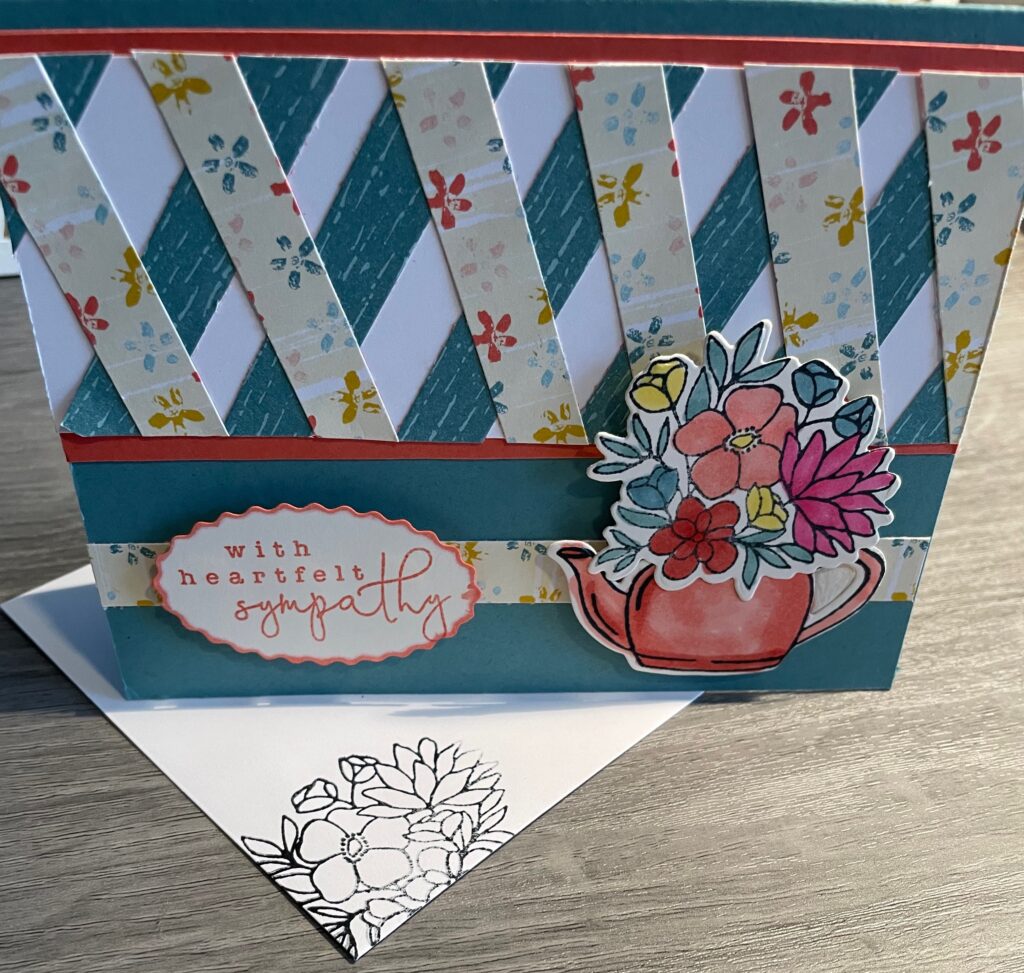
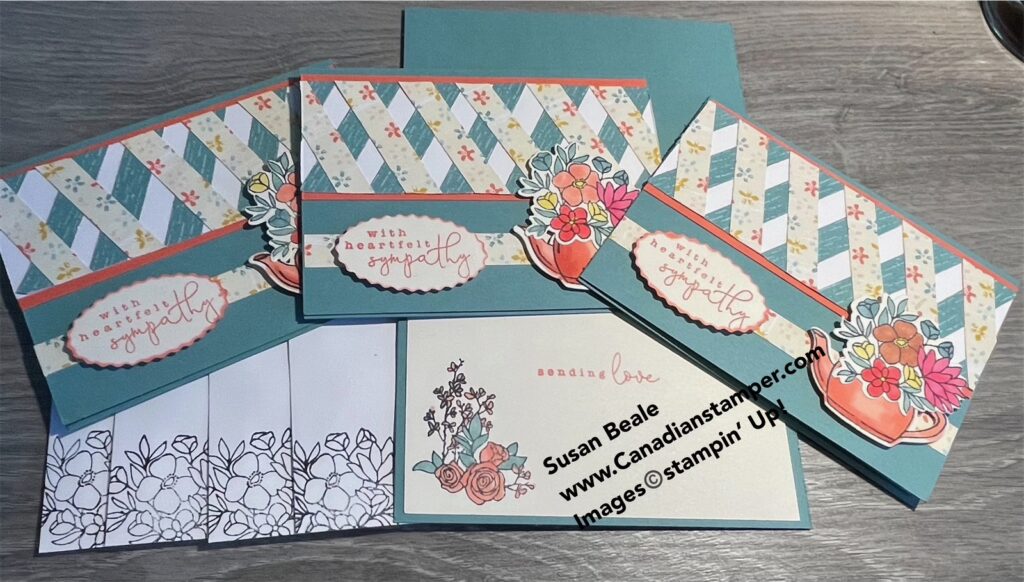
Now many cards I have seen using this technique, attach the twisted ribbon to the front of the card base for a portrait look. However to be different I decided to make my card a landscape card. I attached the twisted ribbon piece at the top of my card base. I then stamped the greeting and flowers from the Countryside Flowers stamp set. This is a brand new stamp/die bundle which will be in the 2024-2025 Annual Catalogue which goes live in May. For the inside I did a little added stamping and coloured it in the coordinating colours, just to tie it to the front of the card. The flowers and tea pot were then die cut and glued together. The sentiment was punched with the Double Oval punch and then the edges were coloured with the coordinating blender pen. I love how that makes the sentiment pop out.
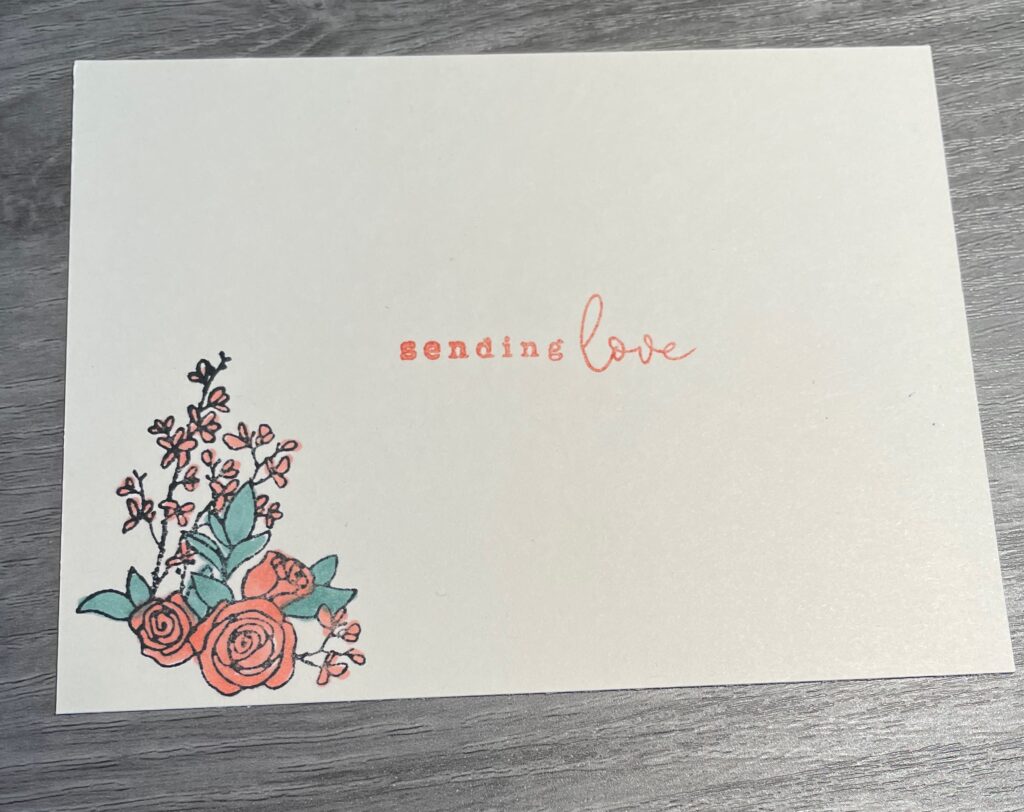

Below is the finished card. As you can see I also used a coordinating strip across the bottom. It was a leftover strip. I then added my greeting and floral image to the front with dimensional’s. I also stamped the envelope just because. I love when an envelope coordinates with the card inside. I don’t usually colour the image on the envelope but now when I look at the picture, I think I’ll have to go back and colour it.
Each month, I participate in a monthly card swap with three other ladies. Each month, we each make one card design, times 4. Three of the cards are mailed out and you get to keep one card for yourself. It’s a great way to share designs and techniques and they are always very different. Because we are just a small group of 4, it is easy to do without feeling overwhelmed each month. Once you have a design in mind, it is quite easy to make up multiples by doing all the cutting, stamping, colouring etc. in advance. Then it is just a matter of assembling as you go. This will be my April Card Swap so they are all sitting on the table ready to mail out next week.
My next post will show you a completely different way of using up card strips so stay tuned…
Last Chance Sale

Both the Jan-April mini catalogue and the 2023-2024 annual catalogue will be retiring at the end of April. However, there is still time to stock up on your favourite colours, stamps, ink refills and embellishments before times runs out. Starting April 9 right through to April 30, you can stock up on your favourite products and save up to 60% on essential craft supplies! Please note, not all retiring items will be discounted.
When shopping online, you will see is a small Retiring Soon in red below the picture so you can easily see what is retiring and what isn’t. This is showing now, so you don’t have to wait until April 9th.
However if you would like to see the complete list of retiring products from both the Jan-April mini catalogue and the 2023-2024 annual catalogue, please email me at sjbeale@sympatico.ca and I will send you a copy of the two lists.
[/vc_column_text][/vc_column][/vc_row][vc_row][vc_column][html_block id=”11646″][/vc_column][/vc_row]
So pretty & yet so simple ! Thank you !
Just found you on Pinterest and I’m loving this idea. Wow, so easy and can’t wait to see part 2.
I too have a stamping group. We’ve been together for almost 25 years (with changes in between). There are 9 to 10 of us, depending and we also meet once a month. We don’t meet in the summer, so in Sept. I give them the dates for the year that we will meet and they will pick a month. That person will show us how to make three cards during our get-together at her home. In the beginning I use to do it all, but then it became too much. I suggested each take a month and that seemed to work.
I’ve signed up, so hopefully I’ll be seeing more of your creations and passing them onto my group. Thanks loads!
Ginnie
Hi Ginnie, I love your idea of getting together to create, laugh and learn new techniques. What a fun way to socialize. I am thrilled that you love my creation and it’s a great way to use up left overs scraps of paper (or not). I am so happy to inspire you and hopefully will do so again. Thank you
Hi,I just saw this on Pinterest and love this idea. Hope I am on your link now.
Donna Dilley