Hi Everyone,
Today I want to share with you a W Fold Card that I made for Valentines day. This card is so easy to make and yet it looks pretty cool when you open the card.
To make this card, I used the following;
- Card Base – Rococco Rose – 4 1/4″ x 11″
- W fold – Rococco Rose – 1 3/4″ x 11″
- Scrap – Rococco Rose (die cuts)
- Card Front – Whisper White – 4 x 5 1/2″
- Inside of card – 4″ x 5 1/4″ (cut 2)
- (I used some retired Designer Series Paper (DSP) for this card
- Panel Mats – Rococco Rose – 2 1/4″ x 2 3/4″ (cut 4)
- Panels White – 2″ x 2 1/2″ (cut 4)
- Stamp – Meant to Be
- Stamp/Die Bundle – Always in my Heart
Take your card base and score at 5 1/2″. (This will be a landscape card) and fold and burnish with a bone folder to give it a crisp fold line. Adhere your background DSP or cardstock to both the front and the inside of the card.
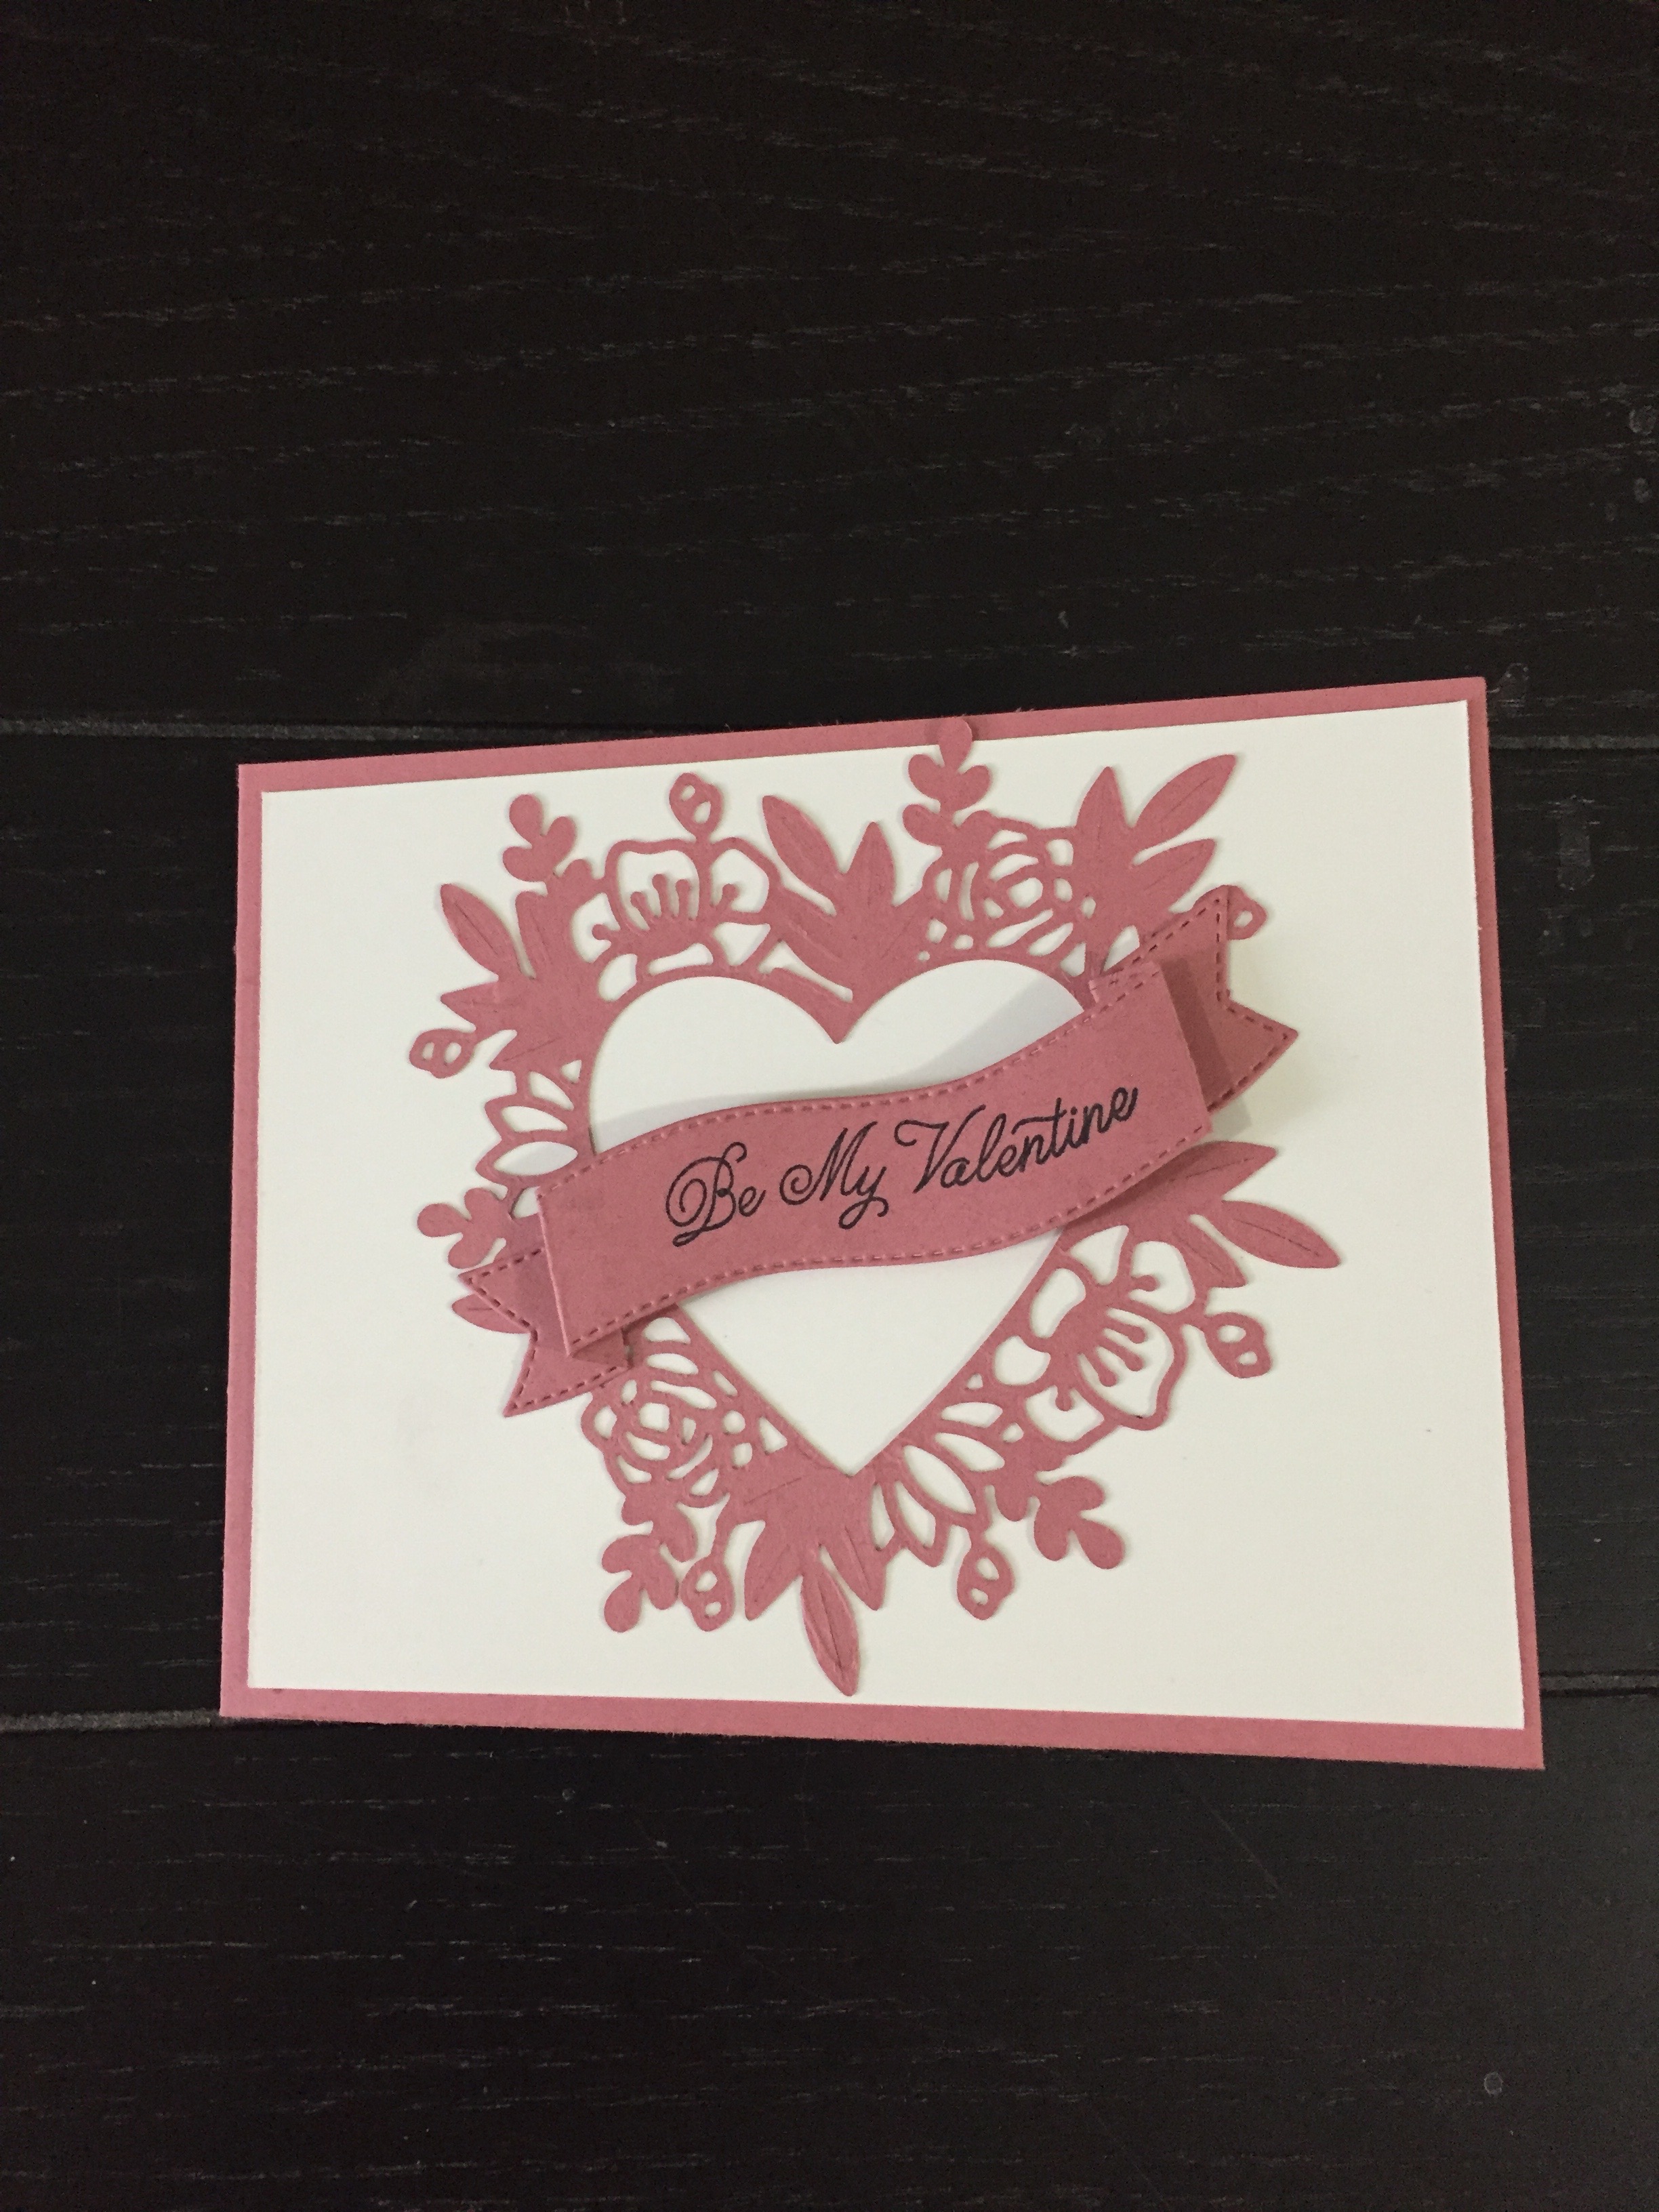
For the front of the card, I used the Forever and Always dies to cut out both the heart and the banner. Isn’t that heart gorgeous? I removed the inner portion of the heart and set it aside to be used on another card. I used my adhesive sheets before cutting out the heart. These sheets are perfect for the really detailed dies as is really makes it easy to adhere, with no messy glue to deal with. I just place the adhesive sheets on the card stock, then die cut as usual. I then peeled off the adhesive backing before applying it to the card front.
For the Banner, I stamped the sentiment first then folded up the ends along the score lines (part of the die) to give the 3D effect. Before adhering over the heart I added one dimensional to the middle then added liquid glue to the banner edges, gently pressing down to adhere. This way the banner pops up nicely on the front of the card.
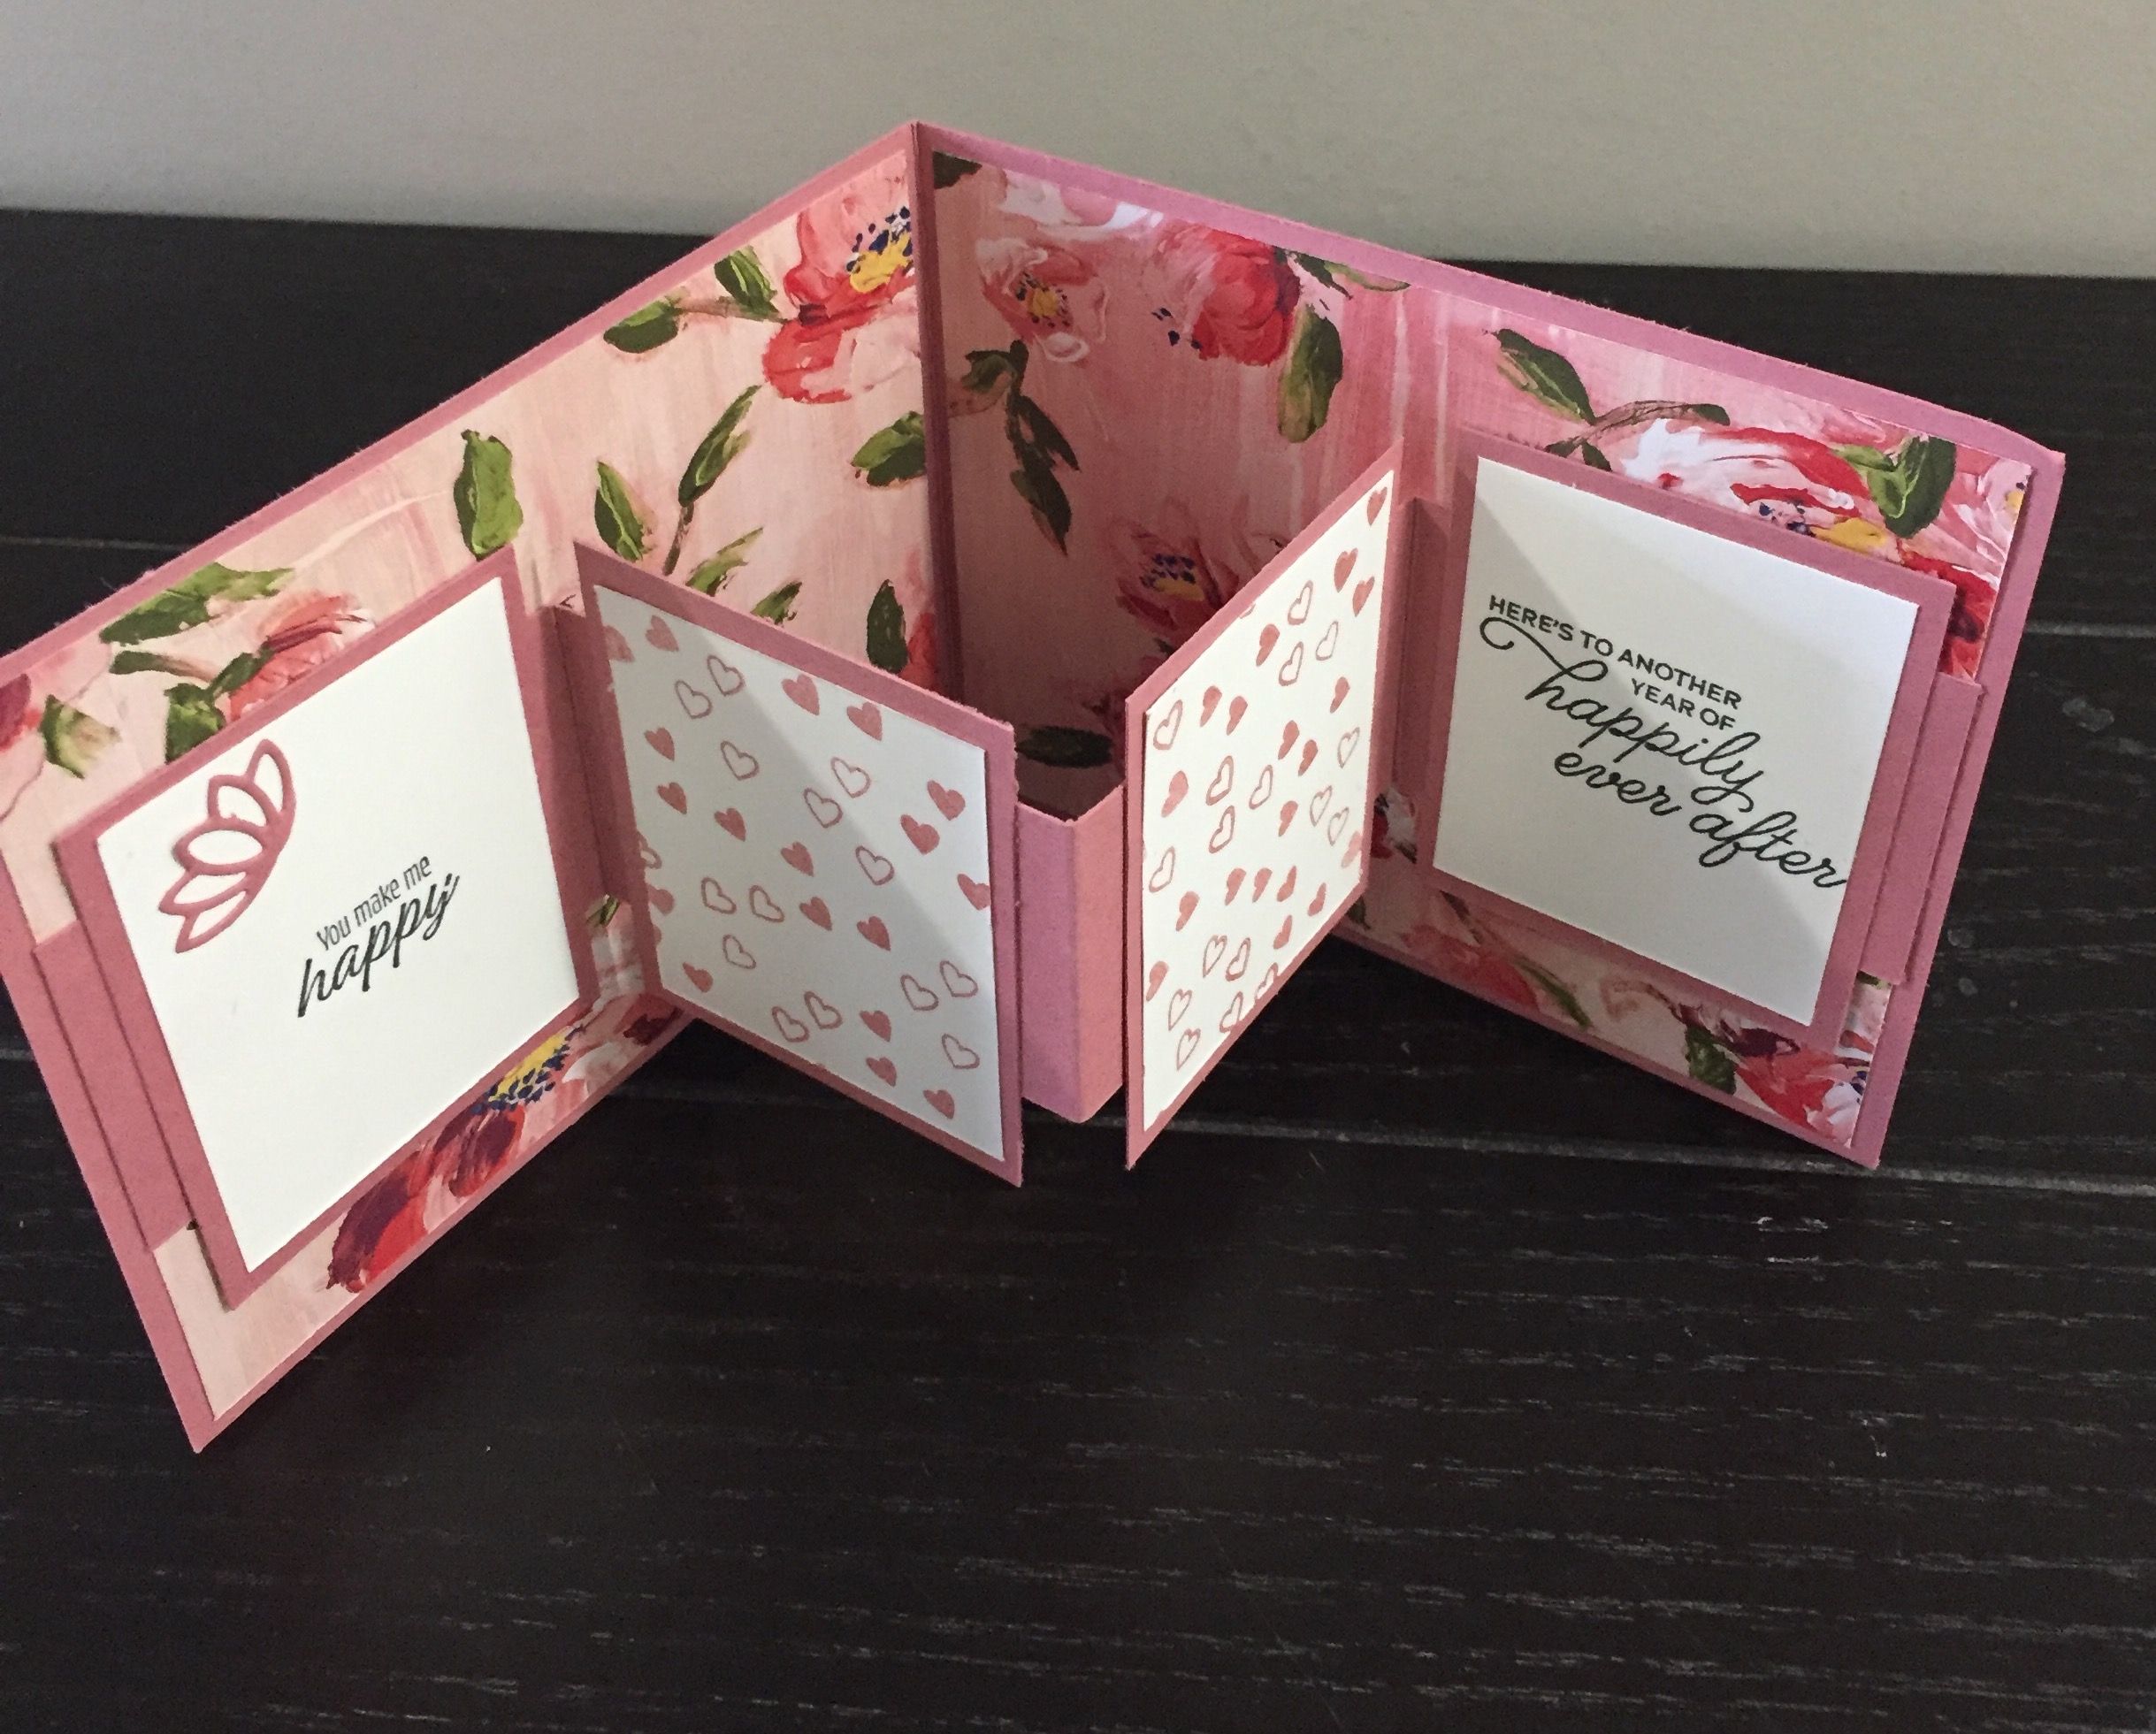
To create the W fold for the inside of the card, score on the long side of the strip at 2 3/4″, 5 1/2″ and 8 1/4″. Fold on the score line as follows; the two outside pieces inward (valley fold) and the middle score line outwards (Mountain fold). If you don’t have a scoring tool, fold the strip in half, then fold the ends back towards the fold. Burnish the fold lines so they are crisp clean fold lines. When you lay this strip on it’s side, it should look like a “W”, hence the name for this card. Adhere this piece of card stock to the inside of the card by adding adhesive to each end ONLY. You don’t want to have any adhesive in the middle two panels. The two middle pieces should now be able to pop up when you open and close your card.

Now it’s time to decorate.
Decorate each piece of card stock for the panels with sentiments, DSP, stamps or whatever you like, then adhere the panels to the individual mats. I stamped three of the panels with sentiments from the Meant to Be (from the Annual Catalogue) and the Always and Forever stamp from the new Mini Catalogue). The cut out flowers are also part of the dies. I love how it all works together.
Once you have all your panels completed it’s time to add them to the “W” fold portion. Lie your card open. Add your adhesive to the center of each folded portion of the “W” portion of card stock and not the panels. This prevents you accidentally glueing the mat panels to the card base. When you are positioning each panel, take care to center it evenly between each score line ensuring the top an bottom are evenly overlapping as well.
NOTE: While decorating my panels I decided to use just three panels instead of all four, replacing one panel with the two hearts (also retired). It is for Valentines Day after all and I had some left overs from last year.
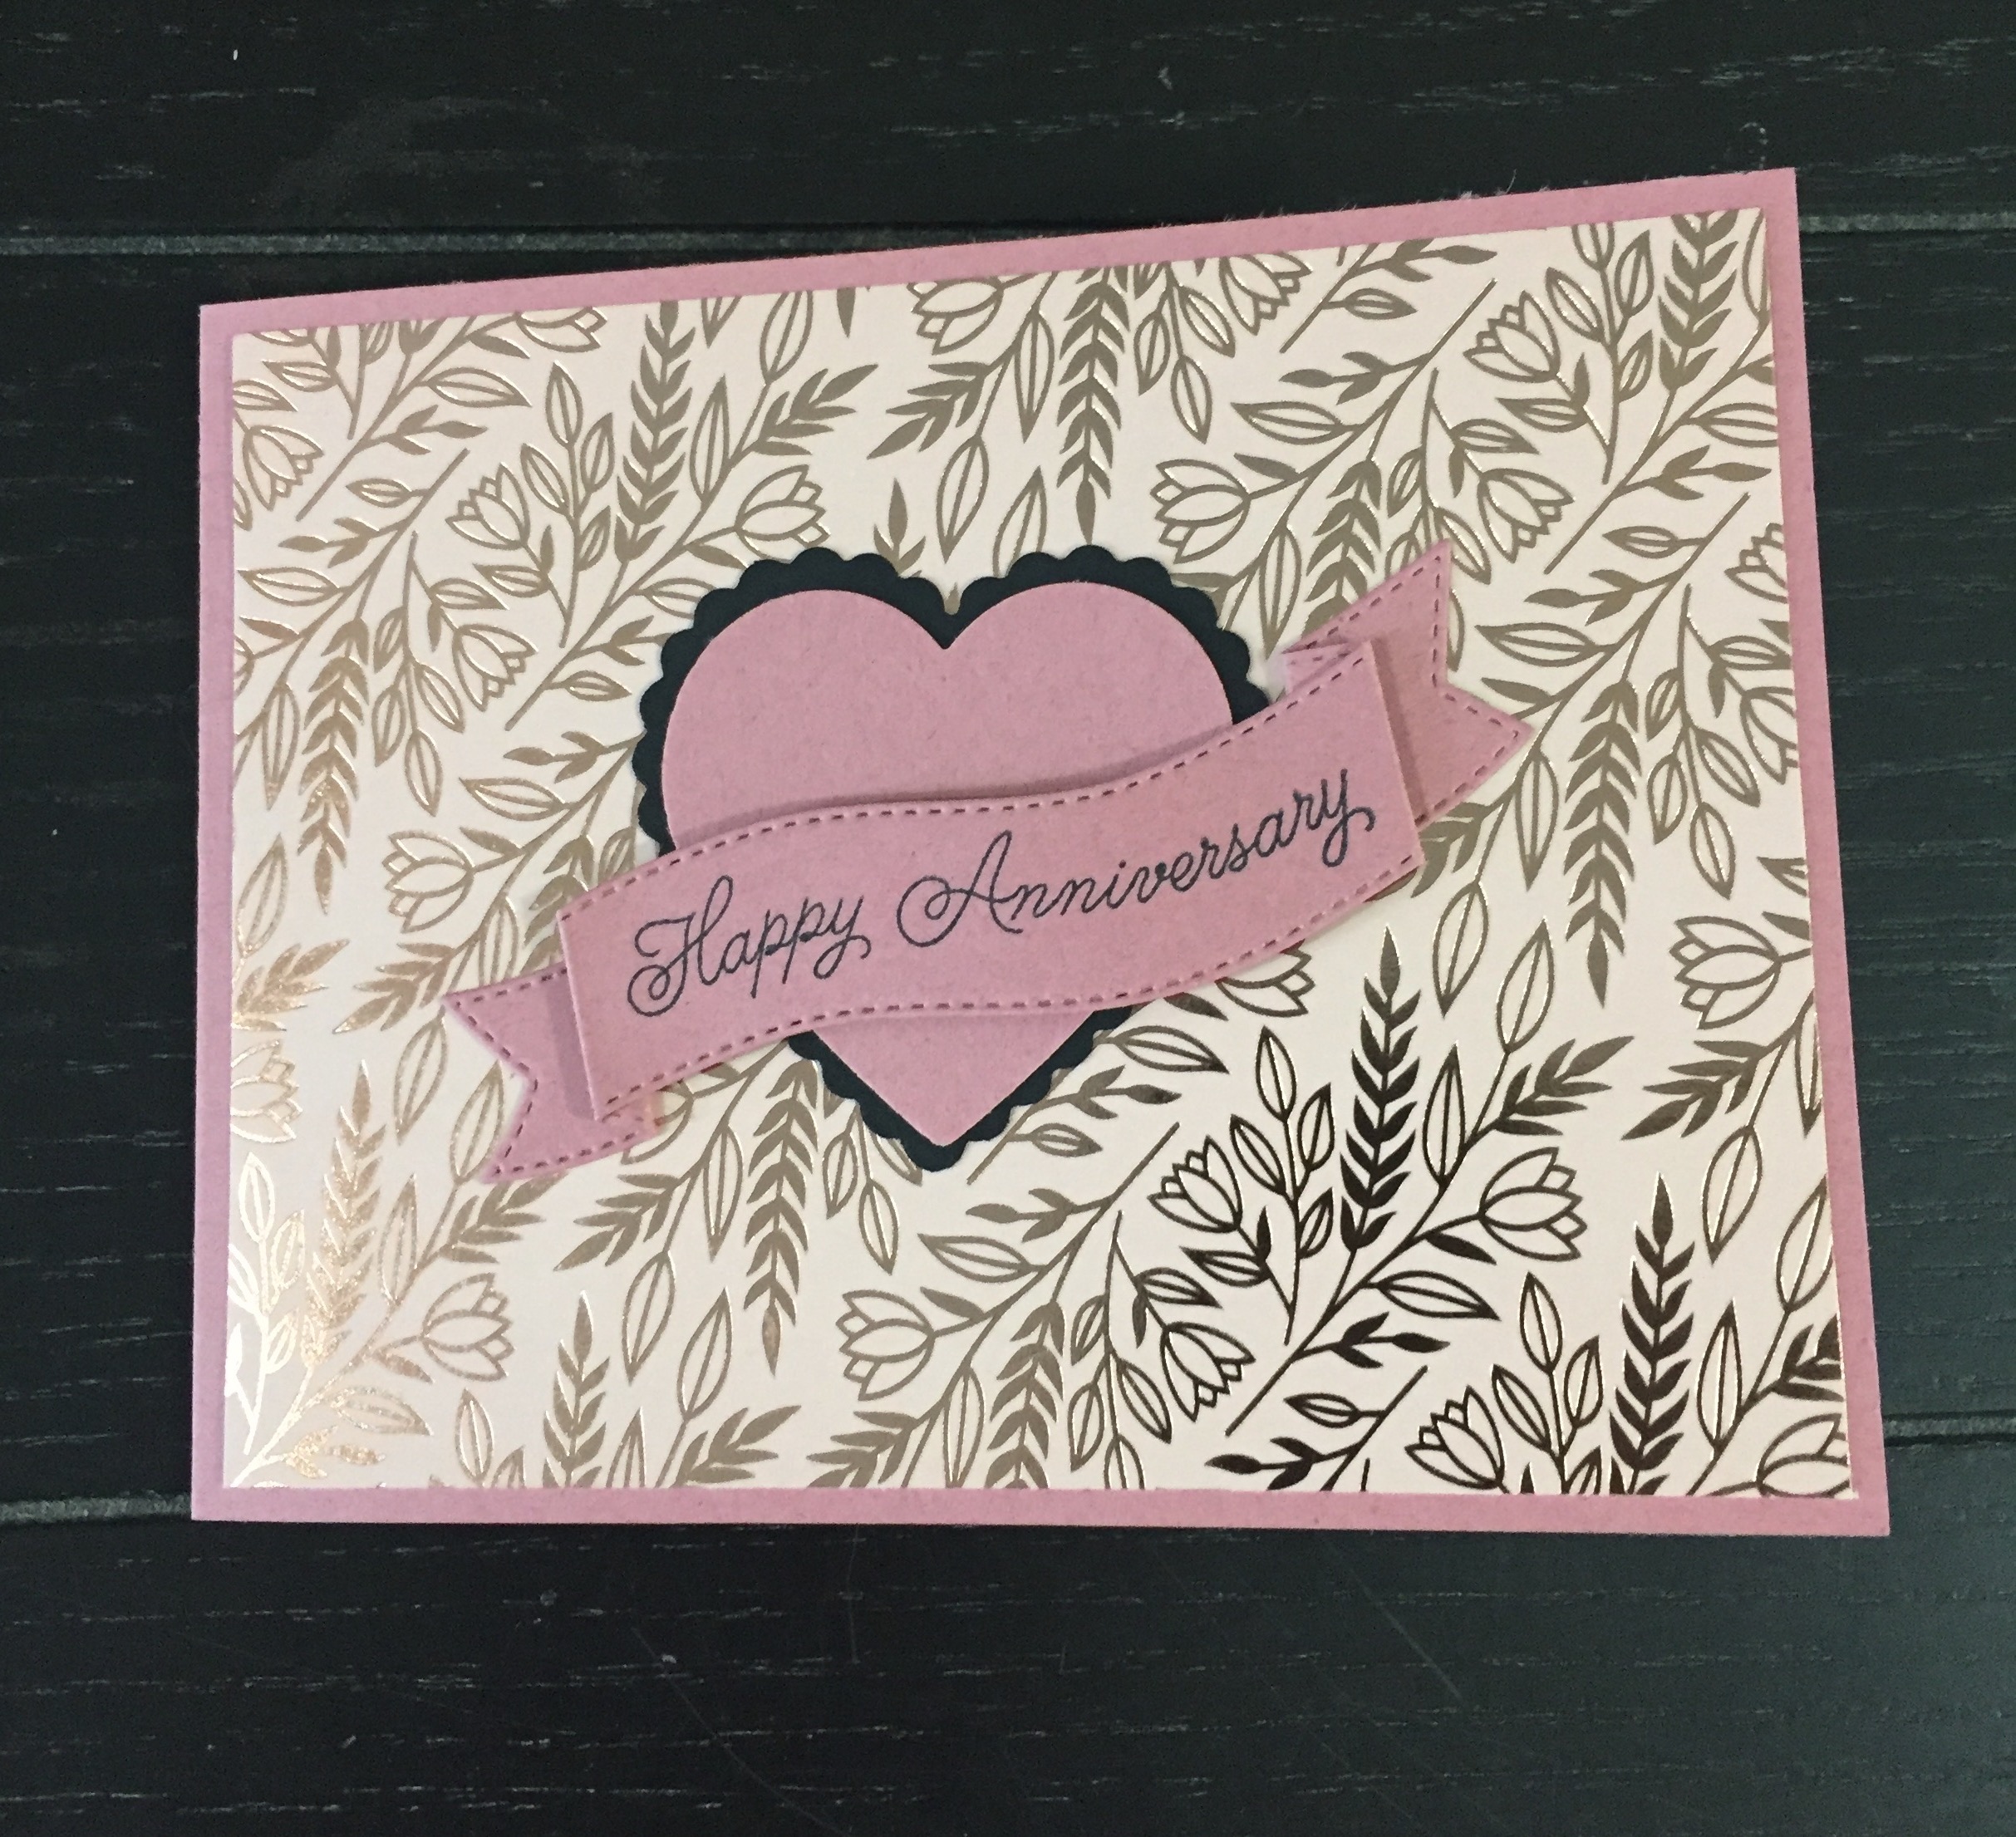
This card was so easy to make, I made a second card as an anniversary card. I changed it up a little and this time I did use four panels along with the beautiful Designer Series paper. The Front of the card is the very beautiful Love you Always Specialty Designer Series Paper and the inside is from the Fine Art Floral Designer Series paper. The heart on the front of the card is actually the centre portion of the first heart I cut out from the card above. I love how you have the option to remove it or not. I stamped the hearts over the white cardstock before adding them to the mats, then stamped the sentiments as well.
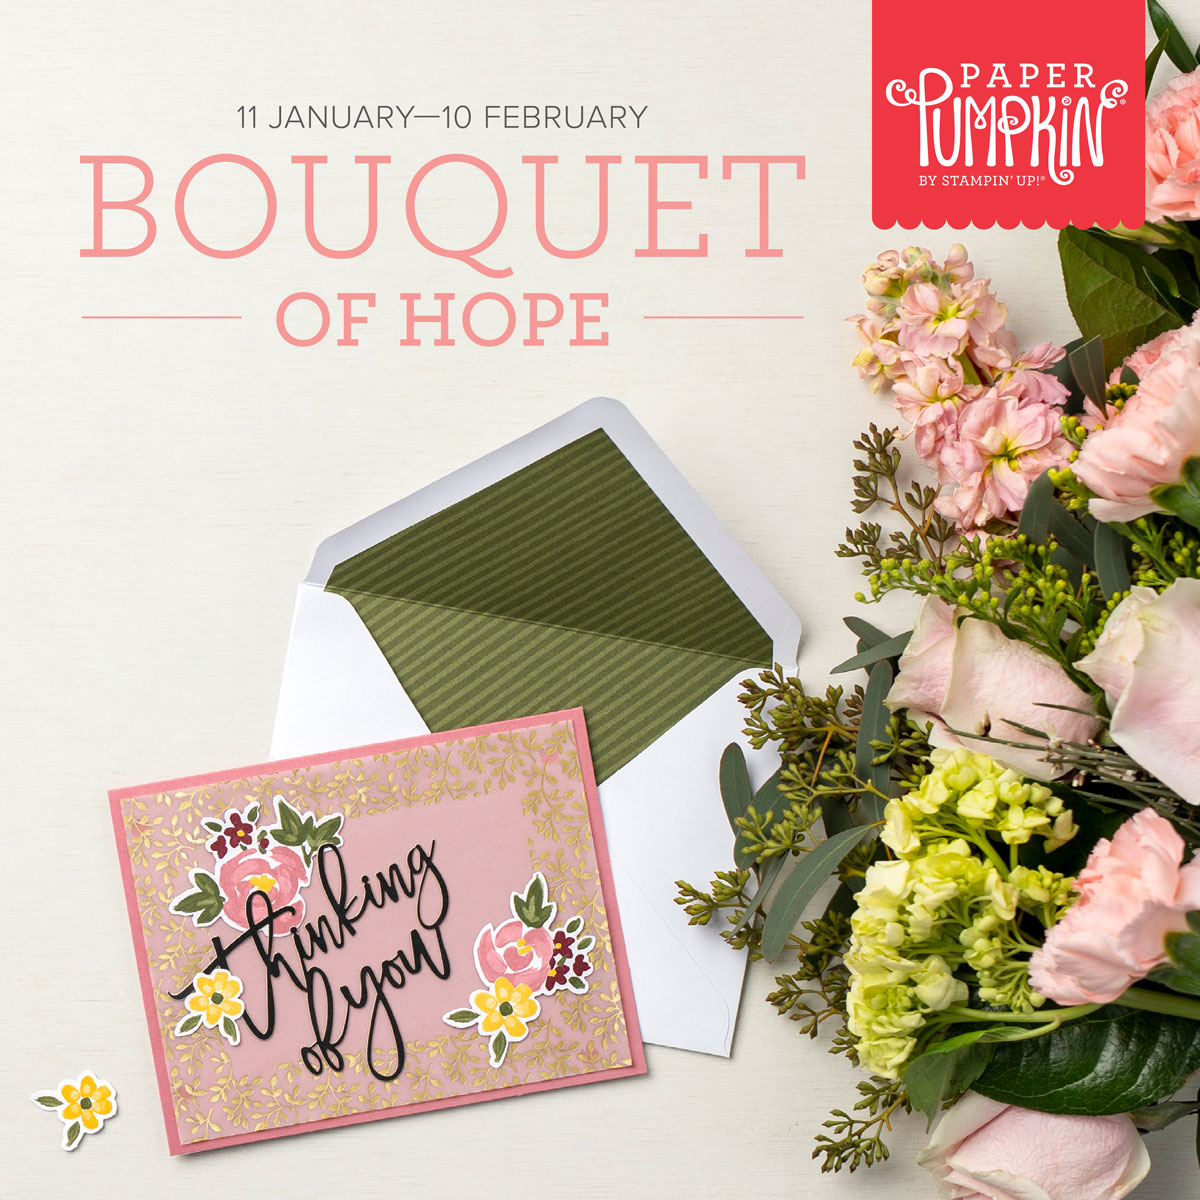
I also wanted to remind you that the cut off date for the February Paper Pumpkin kit is fast approaching. To subscribe monthly click here before Feb 10th and you will receive your kit before the end of the month. By subscribing monthly, you will receive a new kit every month all with free shipping.
This month’s kit is called The “Bouquet of Hope” It provides a way to offer comfort, care, and condolences to those enduring life’s challenges. This is a great way to send a hug, within the folded card, to someone special.
During Sale-a-bration (which ends Feb 28th) you could purchase a 3-month pre-paid subscription instead and you will earn a FREE Sale-a-bration product, just click here to visit my online store. It would be a wonderful way to get the FREE Flower & Field Designer Series Paper that coordinates with this kit perfectly or you can choose any of the other FREE options from the brochure.
This month’s kit provides everything you need to create nine cards of comfort and includes coordinating envelopes. The versatile stamp set and the ink pad can be used over and over and will be a great addition to your crafting supplies.
I hope you have enjoyed this post. As always, I welcome your feedback so please leave a comment.
Would you like to be added to my email newsletter? please provide your contact information here
Have a wonderful day
Sue
Leave a Reply