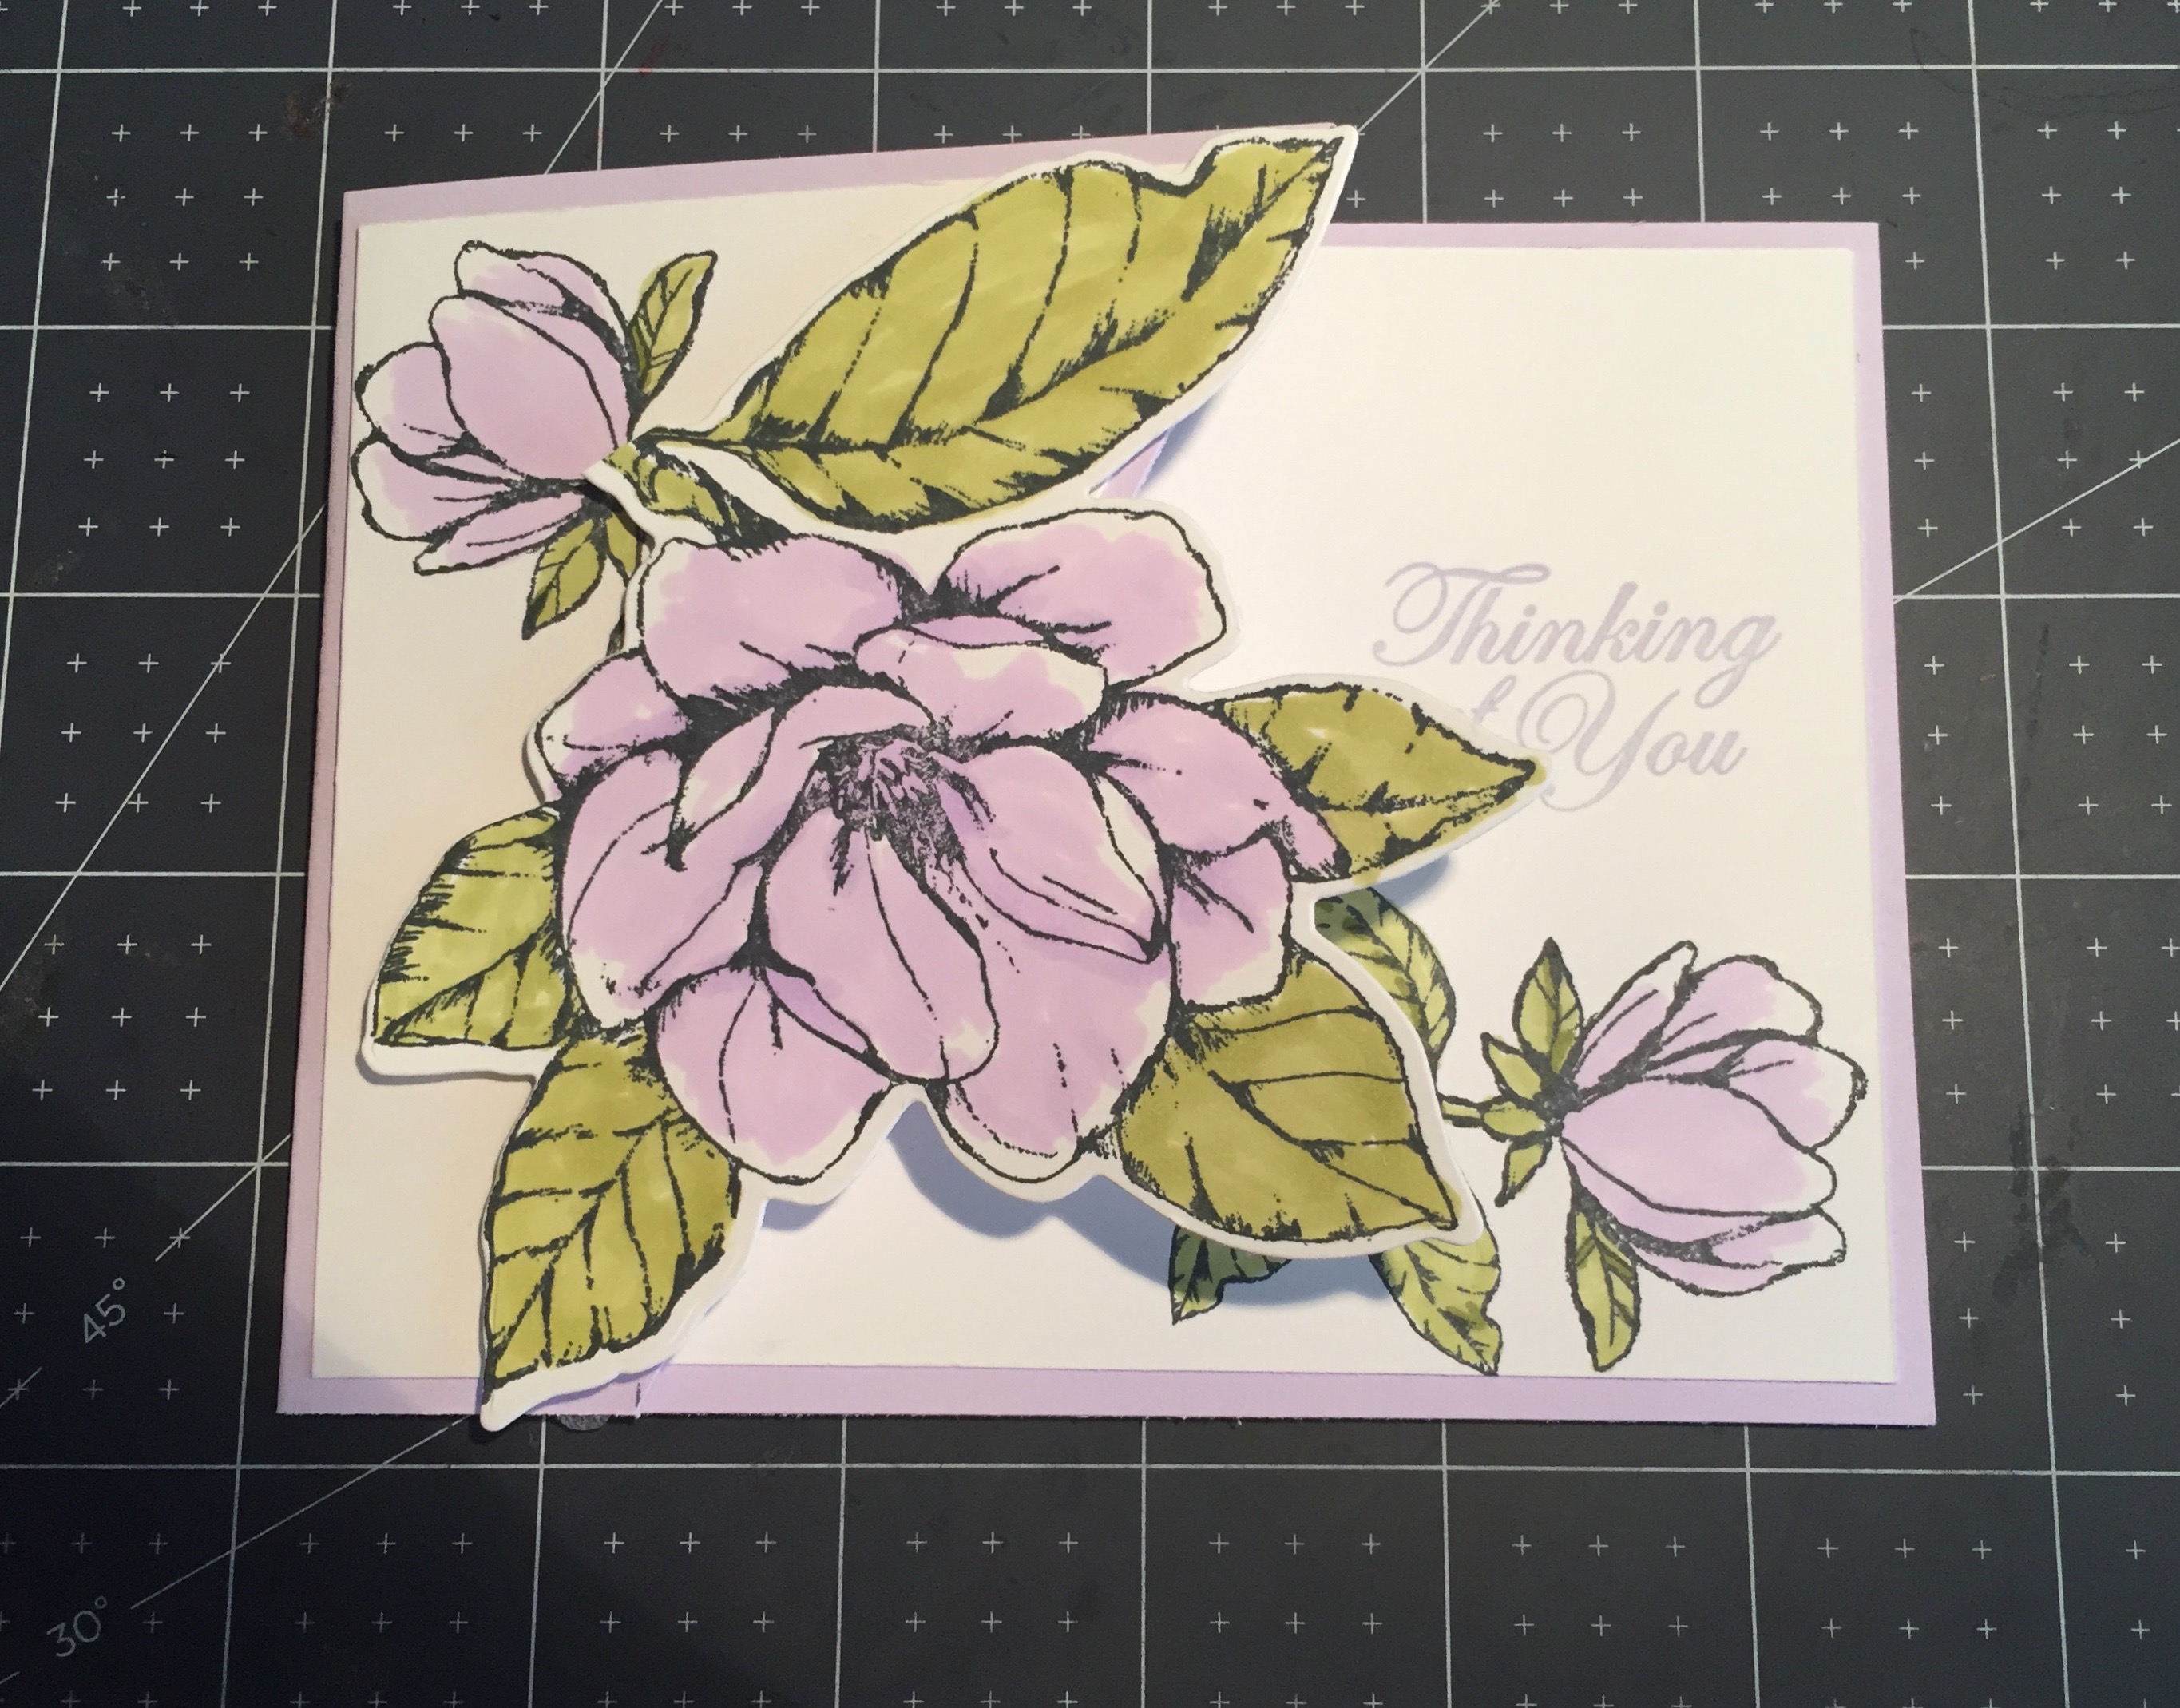
Hi everyone, today I want to share with you this lovely Magnolia card. I am calling it a Cut Out Card because I am not sure if there actually is a name for this type of card. I decided to use this stamp set and colours because sadly, they will be retiring on May 3, 2021 to make way for the new annual catalogue. I have to say that this is one of my favourite stamps from the current Stampin’ Up! Annual Catalogue. I also made up these cards in Rococo Rose and Purple Posy, as these gorgeous colours are also retiring.
The Cut Out Card is made up in a landscape format, which sits beautifully on a table top.
To make this card

Score your card base at 5 1/2″. For the front of the card portion, make a small mark at the top of the card base with a pencil at 3 7/8″ from the middle score line, On the bottom of the card front mark a small mark at 1 1/4″ from the middle score line. Cut a diagonal line between the two marks and put the cut out piece aside to be used on another project.
OPTION: You now have a choice. You can fold your card so the the larger piece is at the top or fold your card so the smaller piece on the top. Just fold your card in half along the score line and crease with a bone folder for a nice clean fold line, so the front is facing in the direction you want. Below are pictures of both examples and you can see there is very little difference. I like both but I think I am leaning to the larger portion on top as it gives a little more flexibility in arranging your large flower.

Ok, once you’ve decided, take the Basic white for the outside of the card and mark it at 3 3/4″ along the top and 1″ along the bottom. This will be slightly smaller and allows for a nice border of your card base. Caution: Remember, this is landscape card so make sure you mark and cut it the same way you did for the card front.
On the separate scrap card stock, stamp the large Magnolia Flower. Once you’ve done that, go ahead and colour the flower and leaves with your blender pens then die cut it out.

Now position your large flower along the diagonal cut line of your white card stock and mark it with a pencil. Stamp the smaller flower and leaves around that marking so it will be on display and not hidden by the larger flower. Go ahead and colour it. Once you have completed that, you can adhere the card stock to the front of the card.
For the inside, place your Basic White on the inside of the card (do not adhere yet) close your card and line up your large flower again using the previous markings. Stamp your smaller flower and leaves onto the inside bottom corner of the card stock and colour accordingly. Erase any pencil marks. By lining it all up first, you will see how the positioning will affect the two stamped flowers and leaves. Go ahead and stamp your sentiment to the inside piece towards the top of the inside so when the card is closed you will see it and it won’t be covered by the flower. Once you are happy with your placements, adhere the inside piece to the card base.
Add your dimmentionals to the back of the large Magnolia flower and add it to the front of the card taking care that the overlapping part has no dimmensionals on it. You want to be able to open the card after all.
Optional: Although my pictures don’t show it, I also added some Wink of Stella to the large flower to give it a little sparkle. I then coloured some white pearls with my Blender Pens to match the card stock and added them as well. I love how the added bling makes a card pop.
Supplies required
- First Card – Rococo Rose Card Stock – 4 1/4″ X 11″
- Basic White Card stock – 5 1/4″ x 4″. inside of card
- Basic White Card stock – 5 1/4″ x 4″. outside of card
- Basic White Card Stock- 5″ x 5″ to stamp your image on
- Blender Pens – Old Olive (leaves) Light and Dark
- First Card – Blender Pens – Rococo Rose (flower) Light and Dark
- Second Card – Blender Pens – Purple Posy Light and Dark
- Second Card – Purple Posy Card stock
- Stamp/Die Bundle – Good Morning Magnolia
- Memento Tuxedo Black Ink Pad
- Dimmensionals and adhesive

This beautiful stamp set and coordinating dies will be retiring on May 3, 2021 to make room for the new Annual Catalogue.
If you are interested in purchasing this set, don’t wait, visit my online store today, before it sells out completely. Once these products retire, it will be too late
If you would like to see a complete list off all retiring products, click here and I will send it to you.
If you would like to be added to my list and receive the new Annual Catalogue, click here

The 2019-2021 In-Colours are also retiring. They include Pretty Peacock, Purple Posy, Rococo Rose, Seaside Spray, Terracotta Tile.
This includes everything associated with these colours; Ink pads and refill bottles, Blender pens, Card Stock, Write Markers, ribbon and any embellishments.
If you need any stamping supplies and live in Canada, I would love to be your Demonstrator. You can visit my online store directly by clicking here or you can drop me an email if you have any questions at sjbeale@canadianstamper.com
My current host code for March is 3JTVASQ6. Use this host code for any orders up to $200.00 and you will automatically be entered into my monthly draw for a free gift. If your order is over $200.00, do not use the host code and you will still be entered into the monthly draw.
I hope you have enjoyed this post, please like and follow my blog to see future posts. As always, I welcome your feedback and so please leave a comment. I invite you to try your hand at making this card and I would love to see a picture of your creation.
Would you like to be added to my email newsletter? please provide your contact information here
Leave a Reply