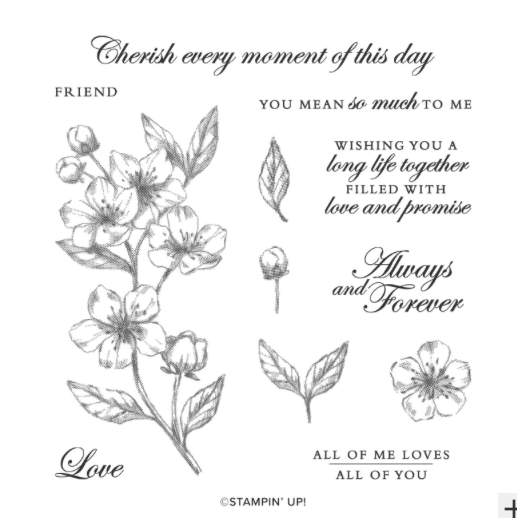
Today I would like to share this window card with you. I used the Forever Blossoms Stamp set and the coordinating Cherry Blossom Dies which I am happy to say was carried over from the old catalogue to the new one. This set has some lovely floral images as well as seven different sentiments which are suitable for weddings, anniversaries, valentines day or any occasion where you what to share the love. The dies coordinate perfectly with the floral images and some of them include some embossed details

To make this card

Take your Petal Pink card base and score on the long side at 4 1/4″ and fold and crease with your bone folder. Open up and position your oval die just to the left of the middle of your card front. For this card, I used the now retired layering ovals but you can use another shape die to cut out your window. I highly recommend getting shaped dies as they are so versatile.

To create my window frame I placed the smooth die and the next largest scallop die on the Soft succulent card stock with a little washi tape to hold it in place, then cut that out on my Cut & Emboss machine.
(The inside oval will be saved for another project)
I then glued the scallop frame to the card front.
TIP: Currently Layering Circle dies (16 dies) (#151770) are available to purchase and they include both smooth and scalloped edge dies

For the inside of the card, take the Soft Succulent card piece and score at 3 1/2″ and fold, creasing with a bone folder.
As per the picture , attach to the inside of the card, centering from top to bottom and place about 1/4″ from the score line. Make sure to line it up so that when the card is closed it covers the window completely.

Stamp with the floral image onto the basic white card stock. You want to make sure it shows through the window when the card is closed.
Colour the image using Petal Pink and Soft Succulent Blender Pens. Stamp the sentiment in the bottom right corner with the Soft Succulent Ink Pad (I did this after taking the picture). Once completed, attach to the closed portion of the inside folded card.

Take the second Basic white card stock and stamp your sentiment and floral image. Although I didn’t, you could also colour the flower image on the inside of the card as well.
Once completed, you can then attach to the card stock to the inside of the inside folded card stock.

To decorate the card front, I stamped my sentiment with versa mark ink then covered it with silver embossing power. I then used the heat tool to melt the powder. I love how it just adds a little bling with that shine. Once completed I attached it to the card front with dimensionals.
I also stamped three small floral and two leaf images on coordinating card stock then die cut them out to attach to the card front. For added bling, I added Genial Gems to the three flower centres and a couple to the top of the card. I also stamped the same floral image to the envelope
TIP: These powders come in sets of three different colours (silver, gold & copper) or (black, white & clear)
Supplies Used
You can see all of the products below by visiting my store online, just click here. All purchases using my monthly Host Code will be automatically entered into my monthly draw. Each month’s a new host code will be posted on the main page on my blog. The May host code is KW643MGF.
- Petal Pink card stock (#146985)
- Card Base – 8 1/2″ x 5″
- Scrap – Die Cut flowers
- Soft succulent card stock (#155776)
- Inside fold card – 5″ x 7″
- Sentiment Strip – 3/4″ x 4″
- Scrap – die cut leaves, window frame
- Basic White card stock (#159276)
- 3 1/4″ x 4 3/4″ (cut 2)
- Ink Pad – Soft Succulent (#155778)
- Silver Embossing Power (#155555)
- Heat Tool (#129053)
- Stamp Set – Forever Blossoms (#151547)
- Dies
- Cherry Blossoms (#151456)
- Layering Ovals (retired)
- Adhesives
- Multipurpose liquid Glue (#110755)
- Dimensionals (#104430)
- Genial Gems (#155500)

Do you love to craft? Do you enjoy saving money (20% or more) on future purchases? I mean who doesn’t right? Well this is a great time to become a demonstrator. For just $135.00 CAD, you create your own personal starter kit by choosing $206.00 worth of products of your choice. What better way to stock up on Stamps, Dies, card stock, ink pads, designer series paper and more. You can even choose the new Cutting and Embossing machine as part of your Starter kit.
I would love for you to join my team of Canadian Stampers and you can do that just by clicking here. However, time is running out. You can become a demonstrator at any time but the Join + promotion ends on May 31st where you can choose $71.00 of extra free products, just for signing up. Don’t wait too long, sign up before the end of the month and start shopping.
I hope you have enjoyed this post, please like and follow my blog to see future posts.
As always, I invite you to try your hand at making this card and I would love to see a picture of your creation.
Would you like to be added to my email newsletter? please provide your contact information here
Leave a Reply