Today I want to share with you a technique to make four card fronts from one piece of card stock. I first saw this technique made by Beth Roy, who is a Stampin’ Up! demonstrator and just knew I had to try it. It was a little bit intimidating to think about, when you first get started but it is actually very easy to do. Although I chose to make Christmas cards because Christmas is just 58 days away and mailing cards comes even sooner. If you haven’t started making your Christmas cards yet, this is a great way to get started.
To make these cards
This technique could be made using whatever stamps you have on hand and you’ll be making 4 cards at the same time. I recommend choosing all your colours and stamps in advance so you are all ready to get started.
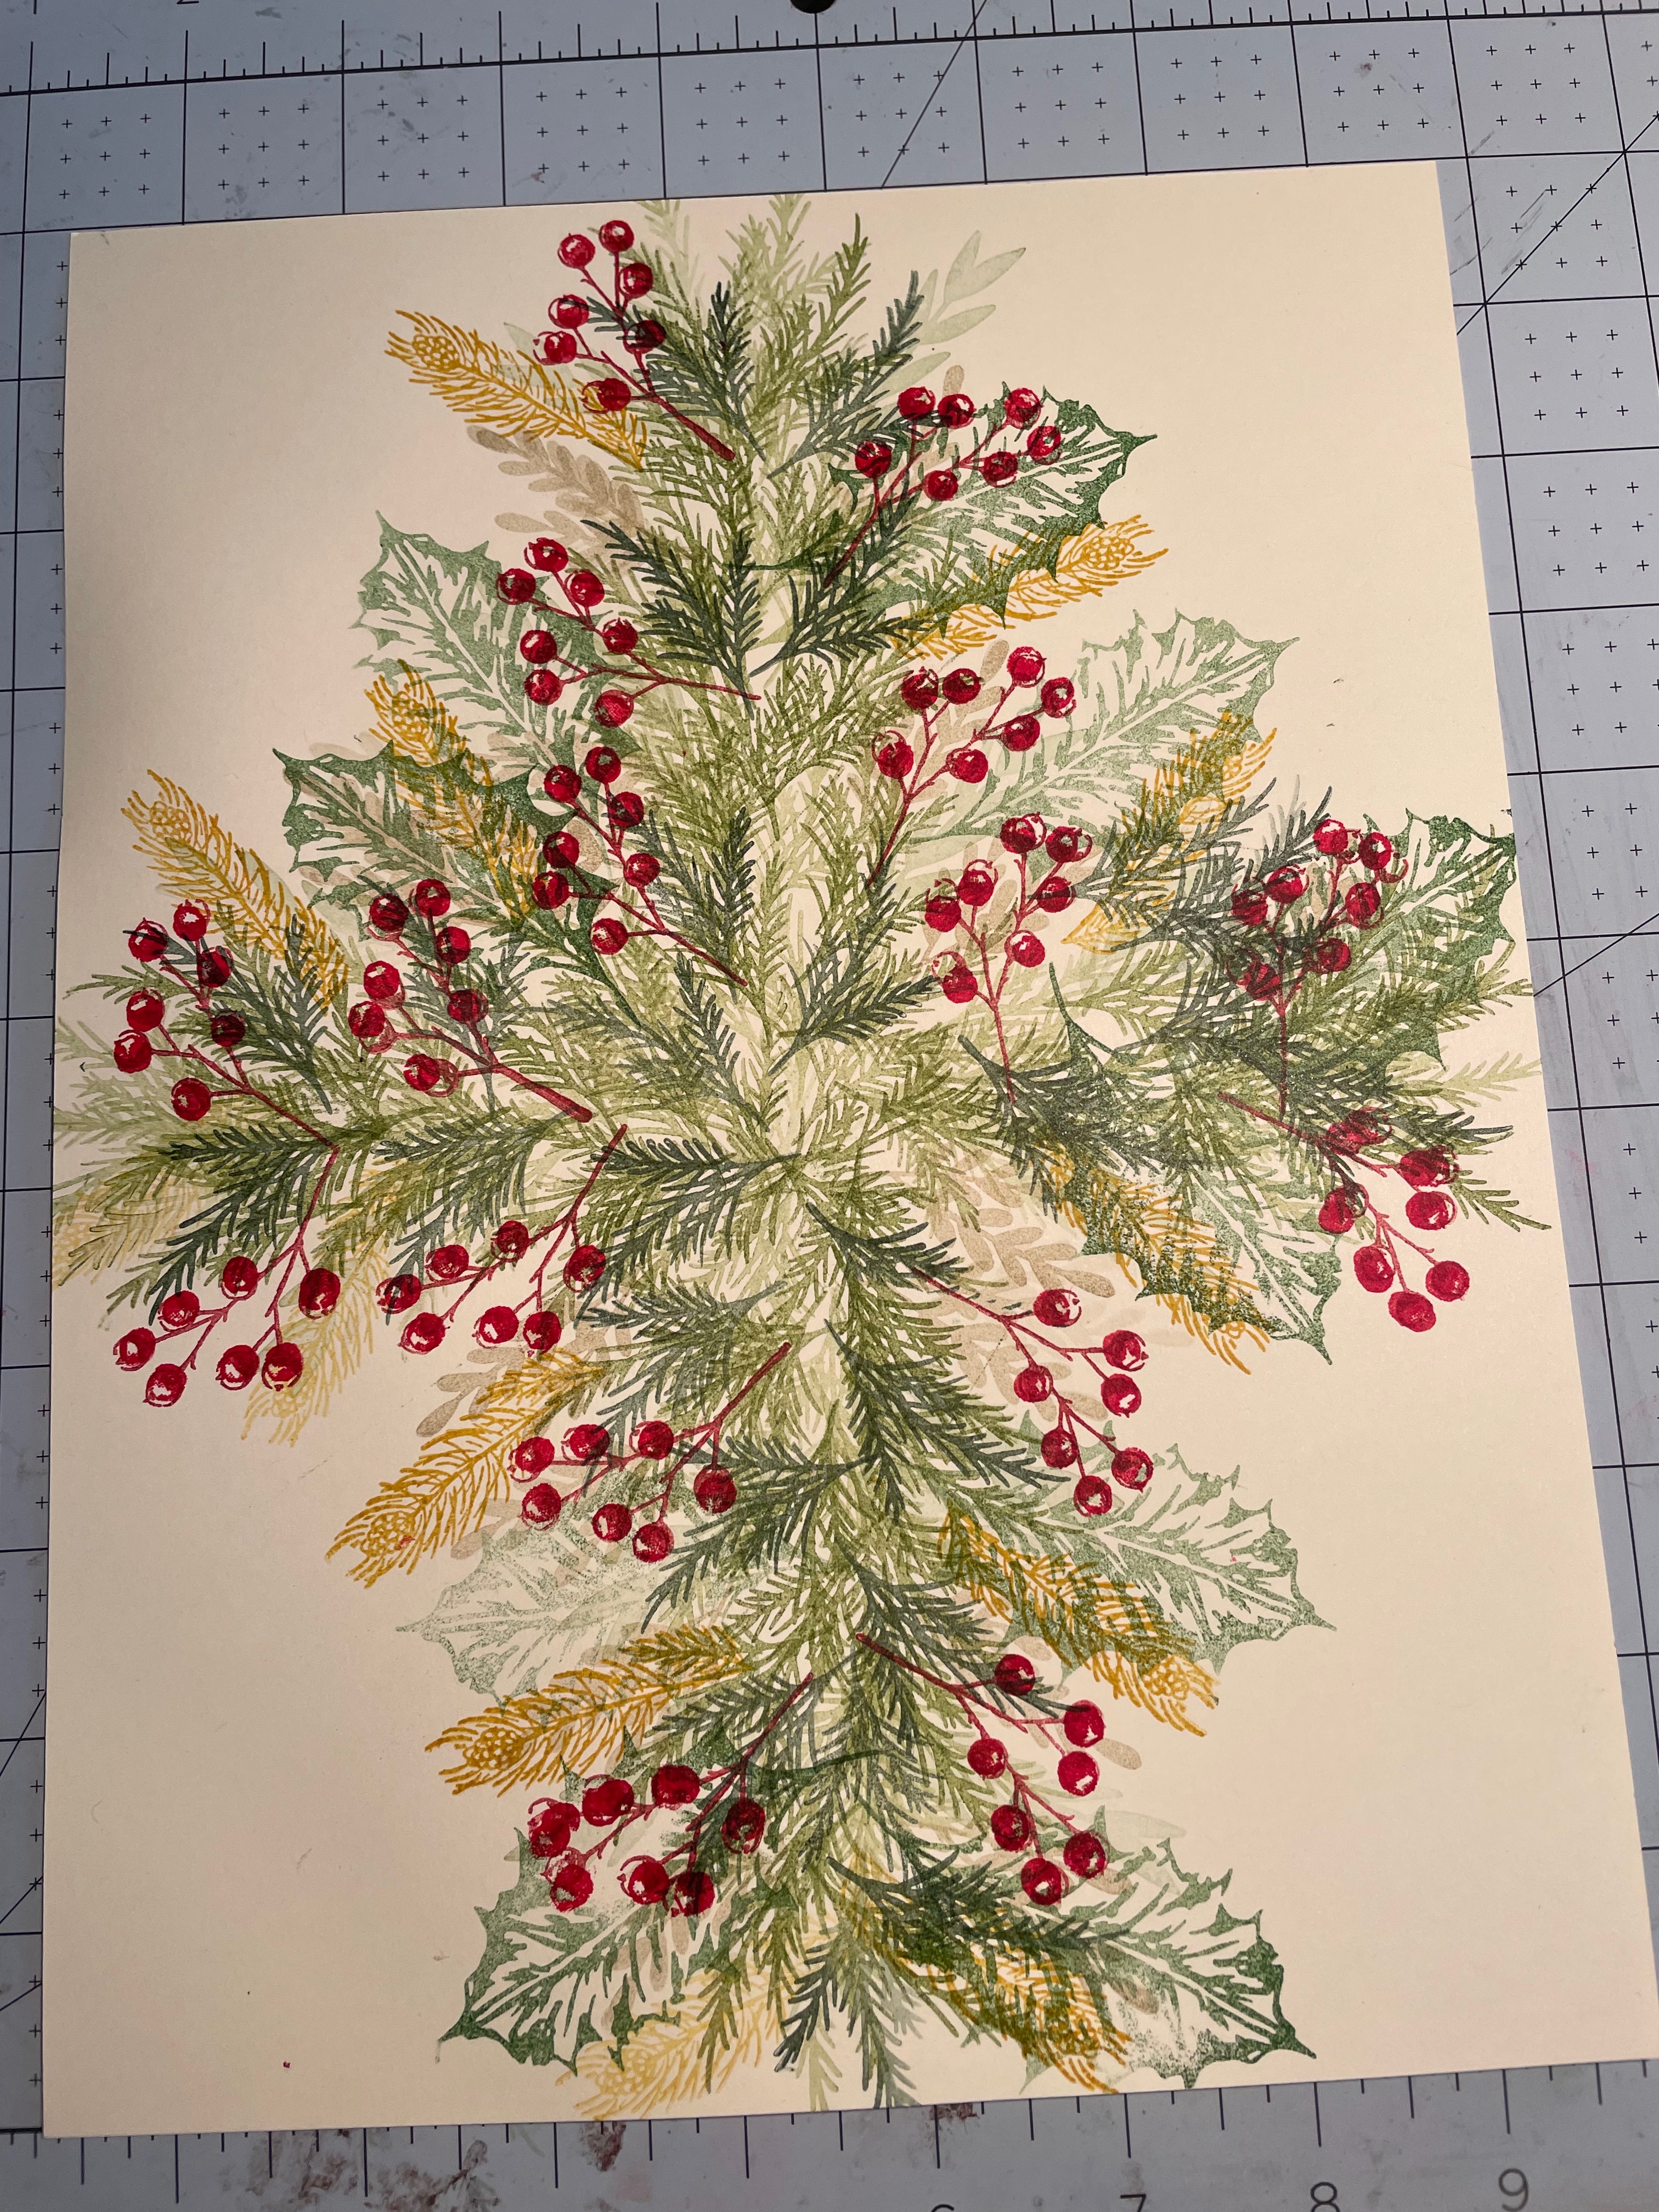
I placed a piece of 8 1/2″ x 11″ on my table. I chose Very Vanilla card stock for this technique but you could stamp on white card stock too.
Now it’s time to stamp. I stamped the leaves and berries from the following stamps; Poinsettia Petals, Leaves of Holly and Christmas Banner.
I randomly stamped the leaves down the middle of the page vertically and then did the same across the middle of the page horizontally. I used a variety of stamps and colours to create this layout. As you can see, there is lots of overlapping but that’s ok.
I used the following colours to make it colourful. In this instance I used Cherry Cobbler, Poppy Parade, Bumble Bee, Garden Green, Soft Succulent, Sahara Sand and Old Olive but again, you can use whatever colours and stamps you have on hand.
The intention is to leave the four outside corners blank so you can stamp your sentiments there.
My finished piece looks a little busy but that’s ok. It’s now time to cut it down to make your four cards. Vertically I cut the paper at 4 1/4″ and then cut the two pieces at 5 1/2″. I then placed each piece back in my paper trimmer and trimmed it so that’s each piece was 4 1/8″ x 5 1/8″.
TIP: If you have an edge that looks a little messy, that it the edge to trim.
I then cut pieces of Poppy Parade at 4 1/4″ x 5 1/4″ to use as a mat. This is optional but I like the look of the matting on a card and the colour matches the berries. After adhering my pieces to the matting, I adhered them to my card base of Soft Succulent.
While my intention was to stamp the greetings in the blank spots directly, I noticed a little smudge on one card piece. We try, but inky fingers sometimes get in the way, right?
So to hide my smudge, I stamped and cut out my greeting using the Banner stamp/die bundle. I popped dimensional’s on the back and added them to the card front, conveniently covering the smudge.
For the top right card, I decided to add a little ribbon, just because, then stamped my greeting from the Leave of Holly Stamp set. I flagged both the ends and then sponged a bit of colour around the greeting to make it stand out a bit.
As you can see, I did stamp my greetings directly onto the card front, for the bottom two cards. I used the Leaves of Holly (left) and the Poinsettia Petals (right) stamp sets.
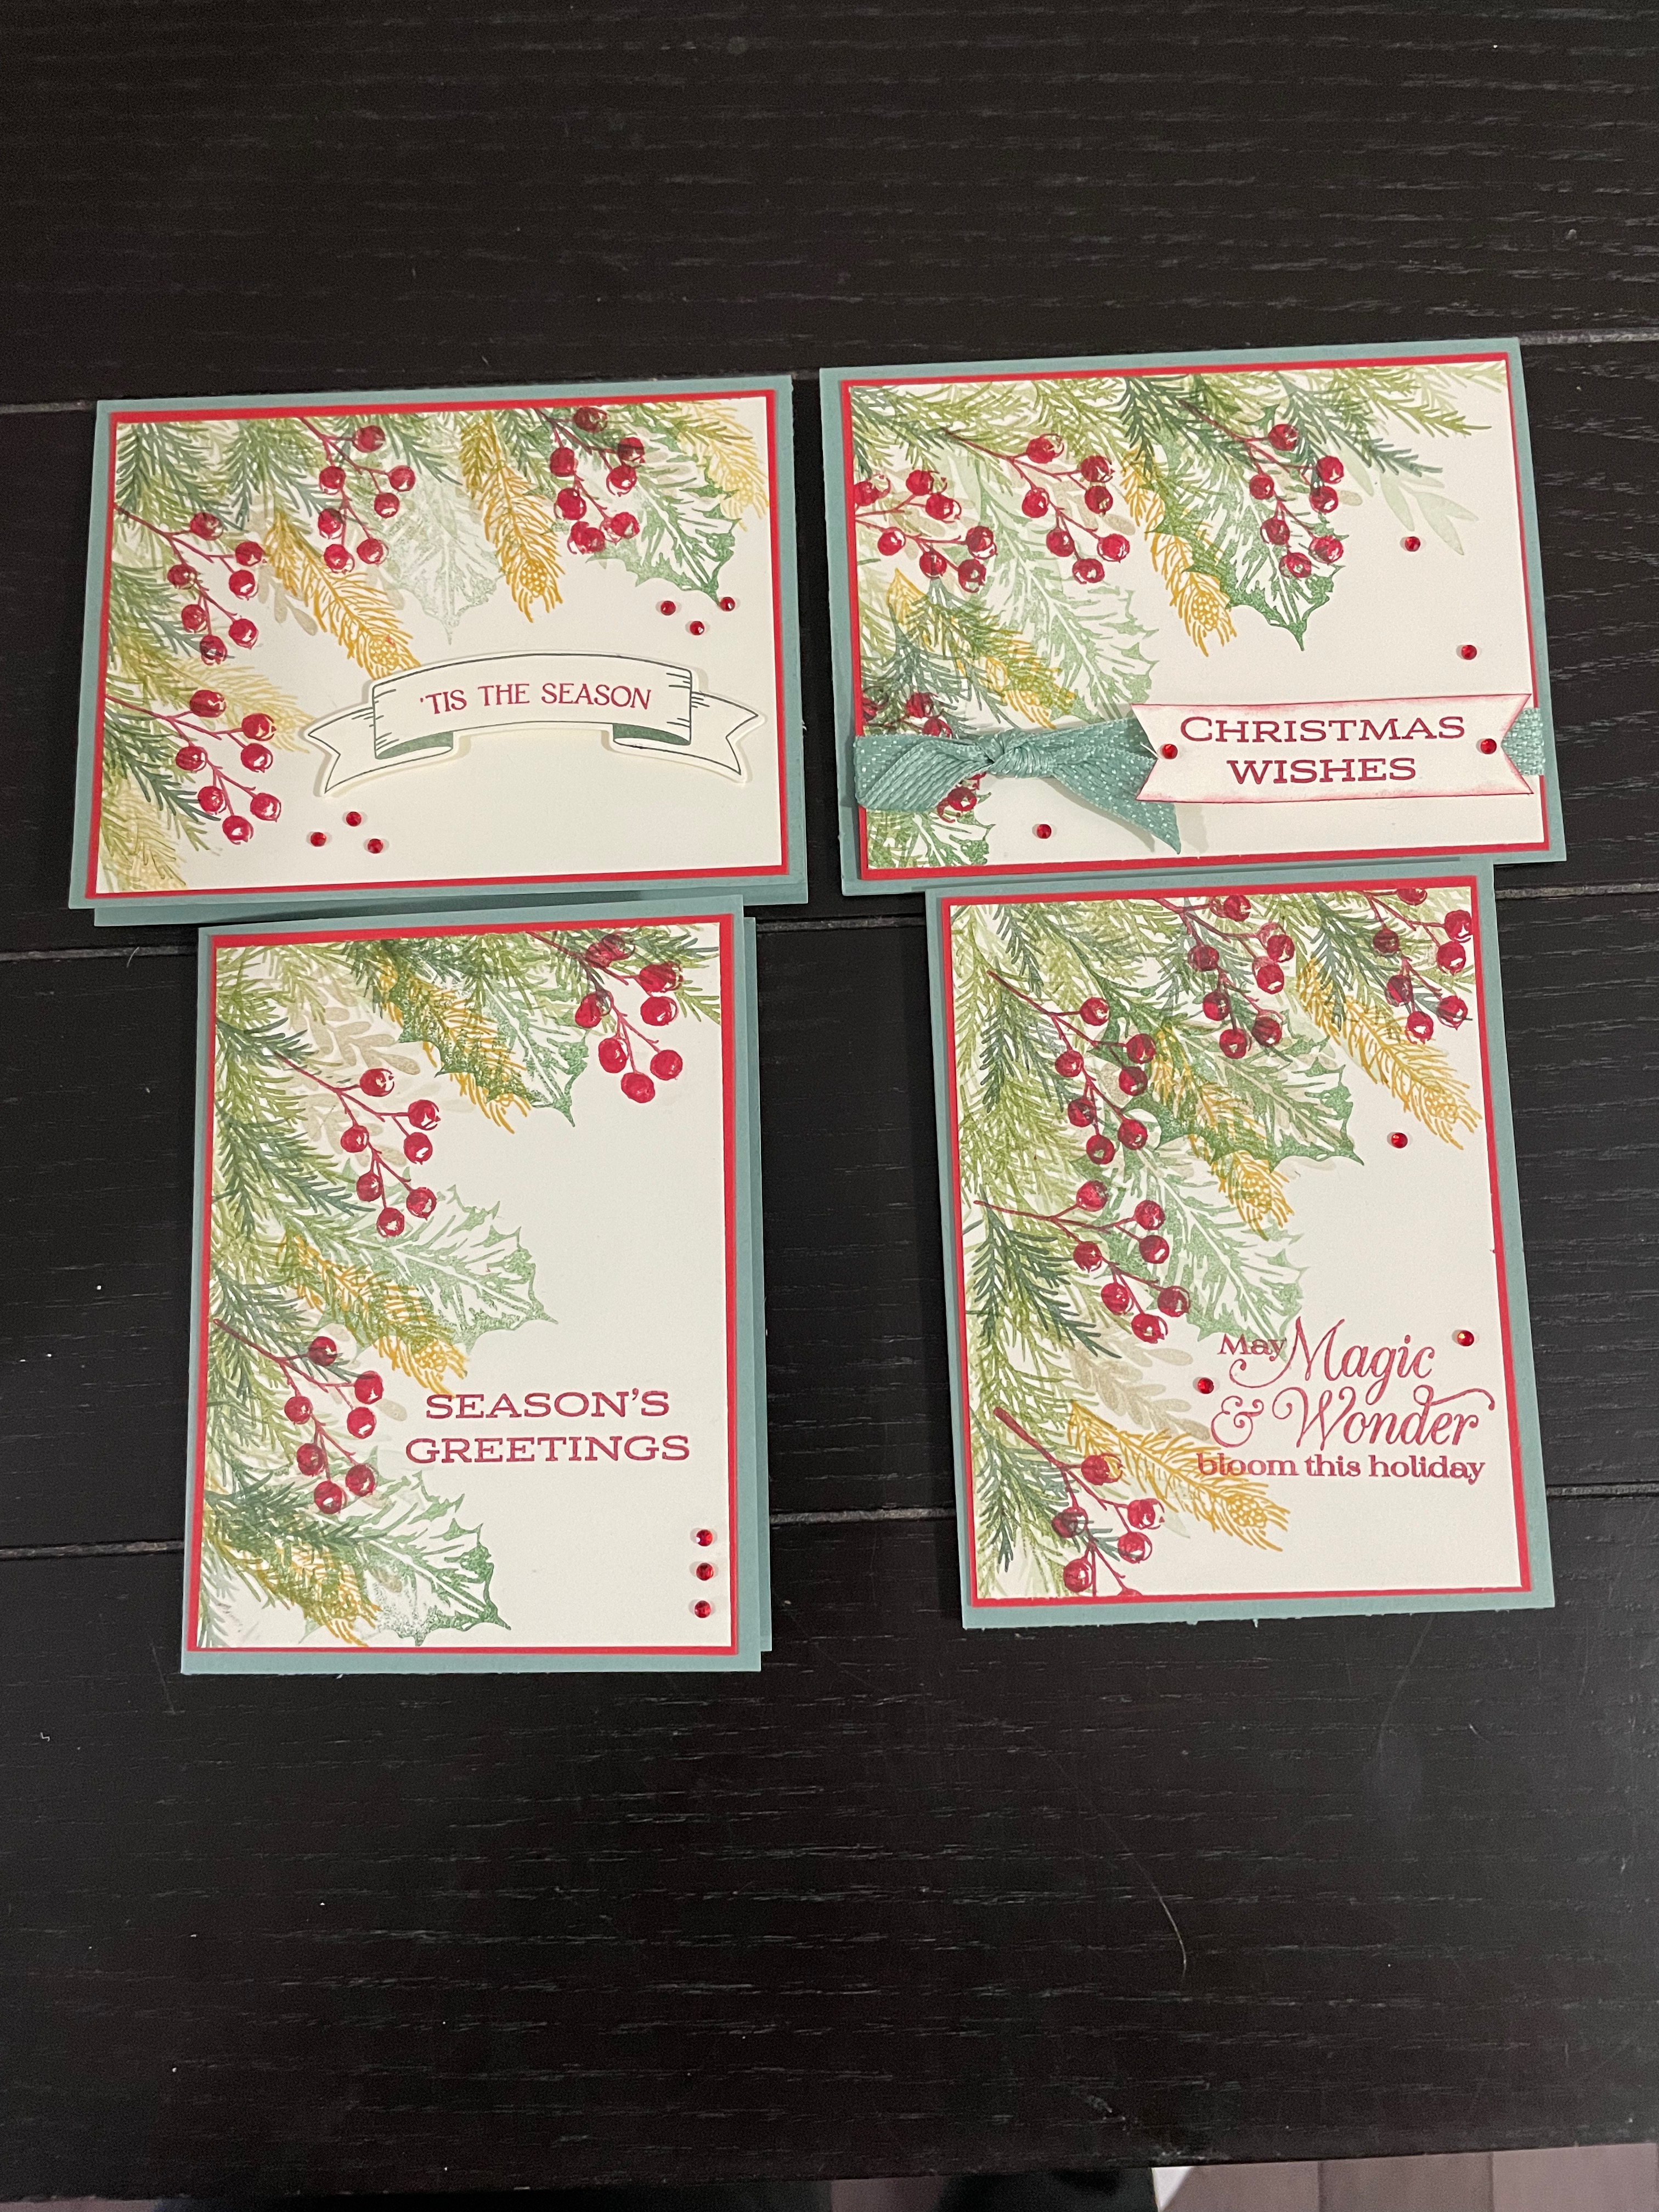
Of course, my cards are never finished until I add a little bling for added sparkle. I used the Red Rhinestones for this. They sparkle and are not too big. I hope you will give this a try and send me a picture of your completed cards. It was quick and easy to do and now I have four more Christmas cards to mail out this holiday season.
To purchase any of the products used to make this project, visit my ONLINE STORE. You can purchase the stamp and dies separately or purchase the bundle and save 10%. We all love to save money right?
When shopping, please use my current Host Code – NNXZ6EGA before closing your order, if your order is under $200.00. If your order is over $200, do not use the host code as you will earn your own rewards. I appreciate your business so for anyone who shops with me, I will send you a gift and thank you card from me.
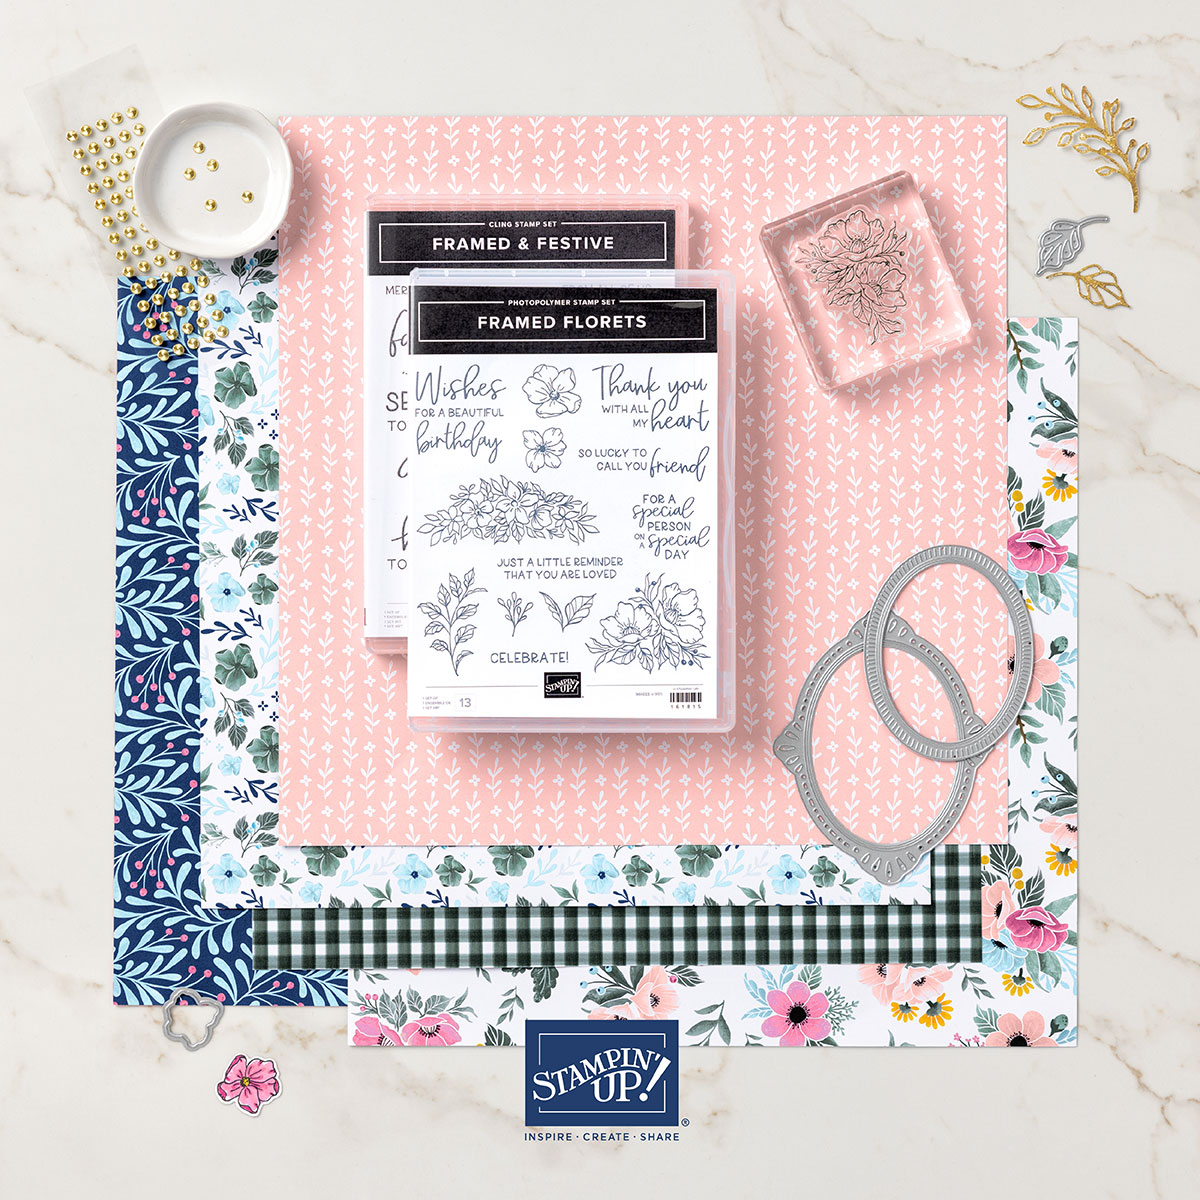
Starting Tomorrow, Nov 1st, this lovely collection of products will be available to purchase.
All of these lovely products can be ordered separately or you can purchase the entire collection and receive it all.
The following exclusive products are only available while supplies last:
Framed & Festive Cling Stamp Set Item #160888 $23.00
Fitting Florets Designer Series Paper Item #161814 $12.00
Gold Adhesive-Backed Swirls Item #161822 $8.50
The following products will be available for purchase in the Mini Catalog starting January 2023:
Framed Florets Bundle Item #162407 $54.00 10% off Bundle!
Framed Florets Photopolymer Stamp Set Item #161815 $23.00
Framed Florets Dies Item #160623 $37.00
To see more information about these these products, check out the YouTube video below;
I love this technique! Your cards are beautiful!
Thank you, I cannot wait to try this again. I am thinking spring flowers would look stunning