I love making custom cards for people with a specific request. Recently I was asked to make a custom card for a couple who were travelling to Europe. This person wanted to tuck in some Euro’s as a gift for their trip. Isn’t that a wonderful way to wish someone Bonne Voyage? Anyways, I was happy to do so. I had so much fun making this card, I decided to make a second card as well.
Customer requested card
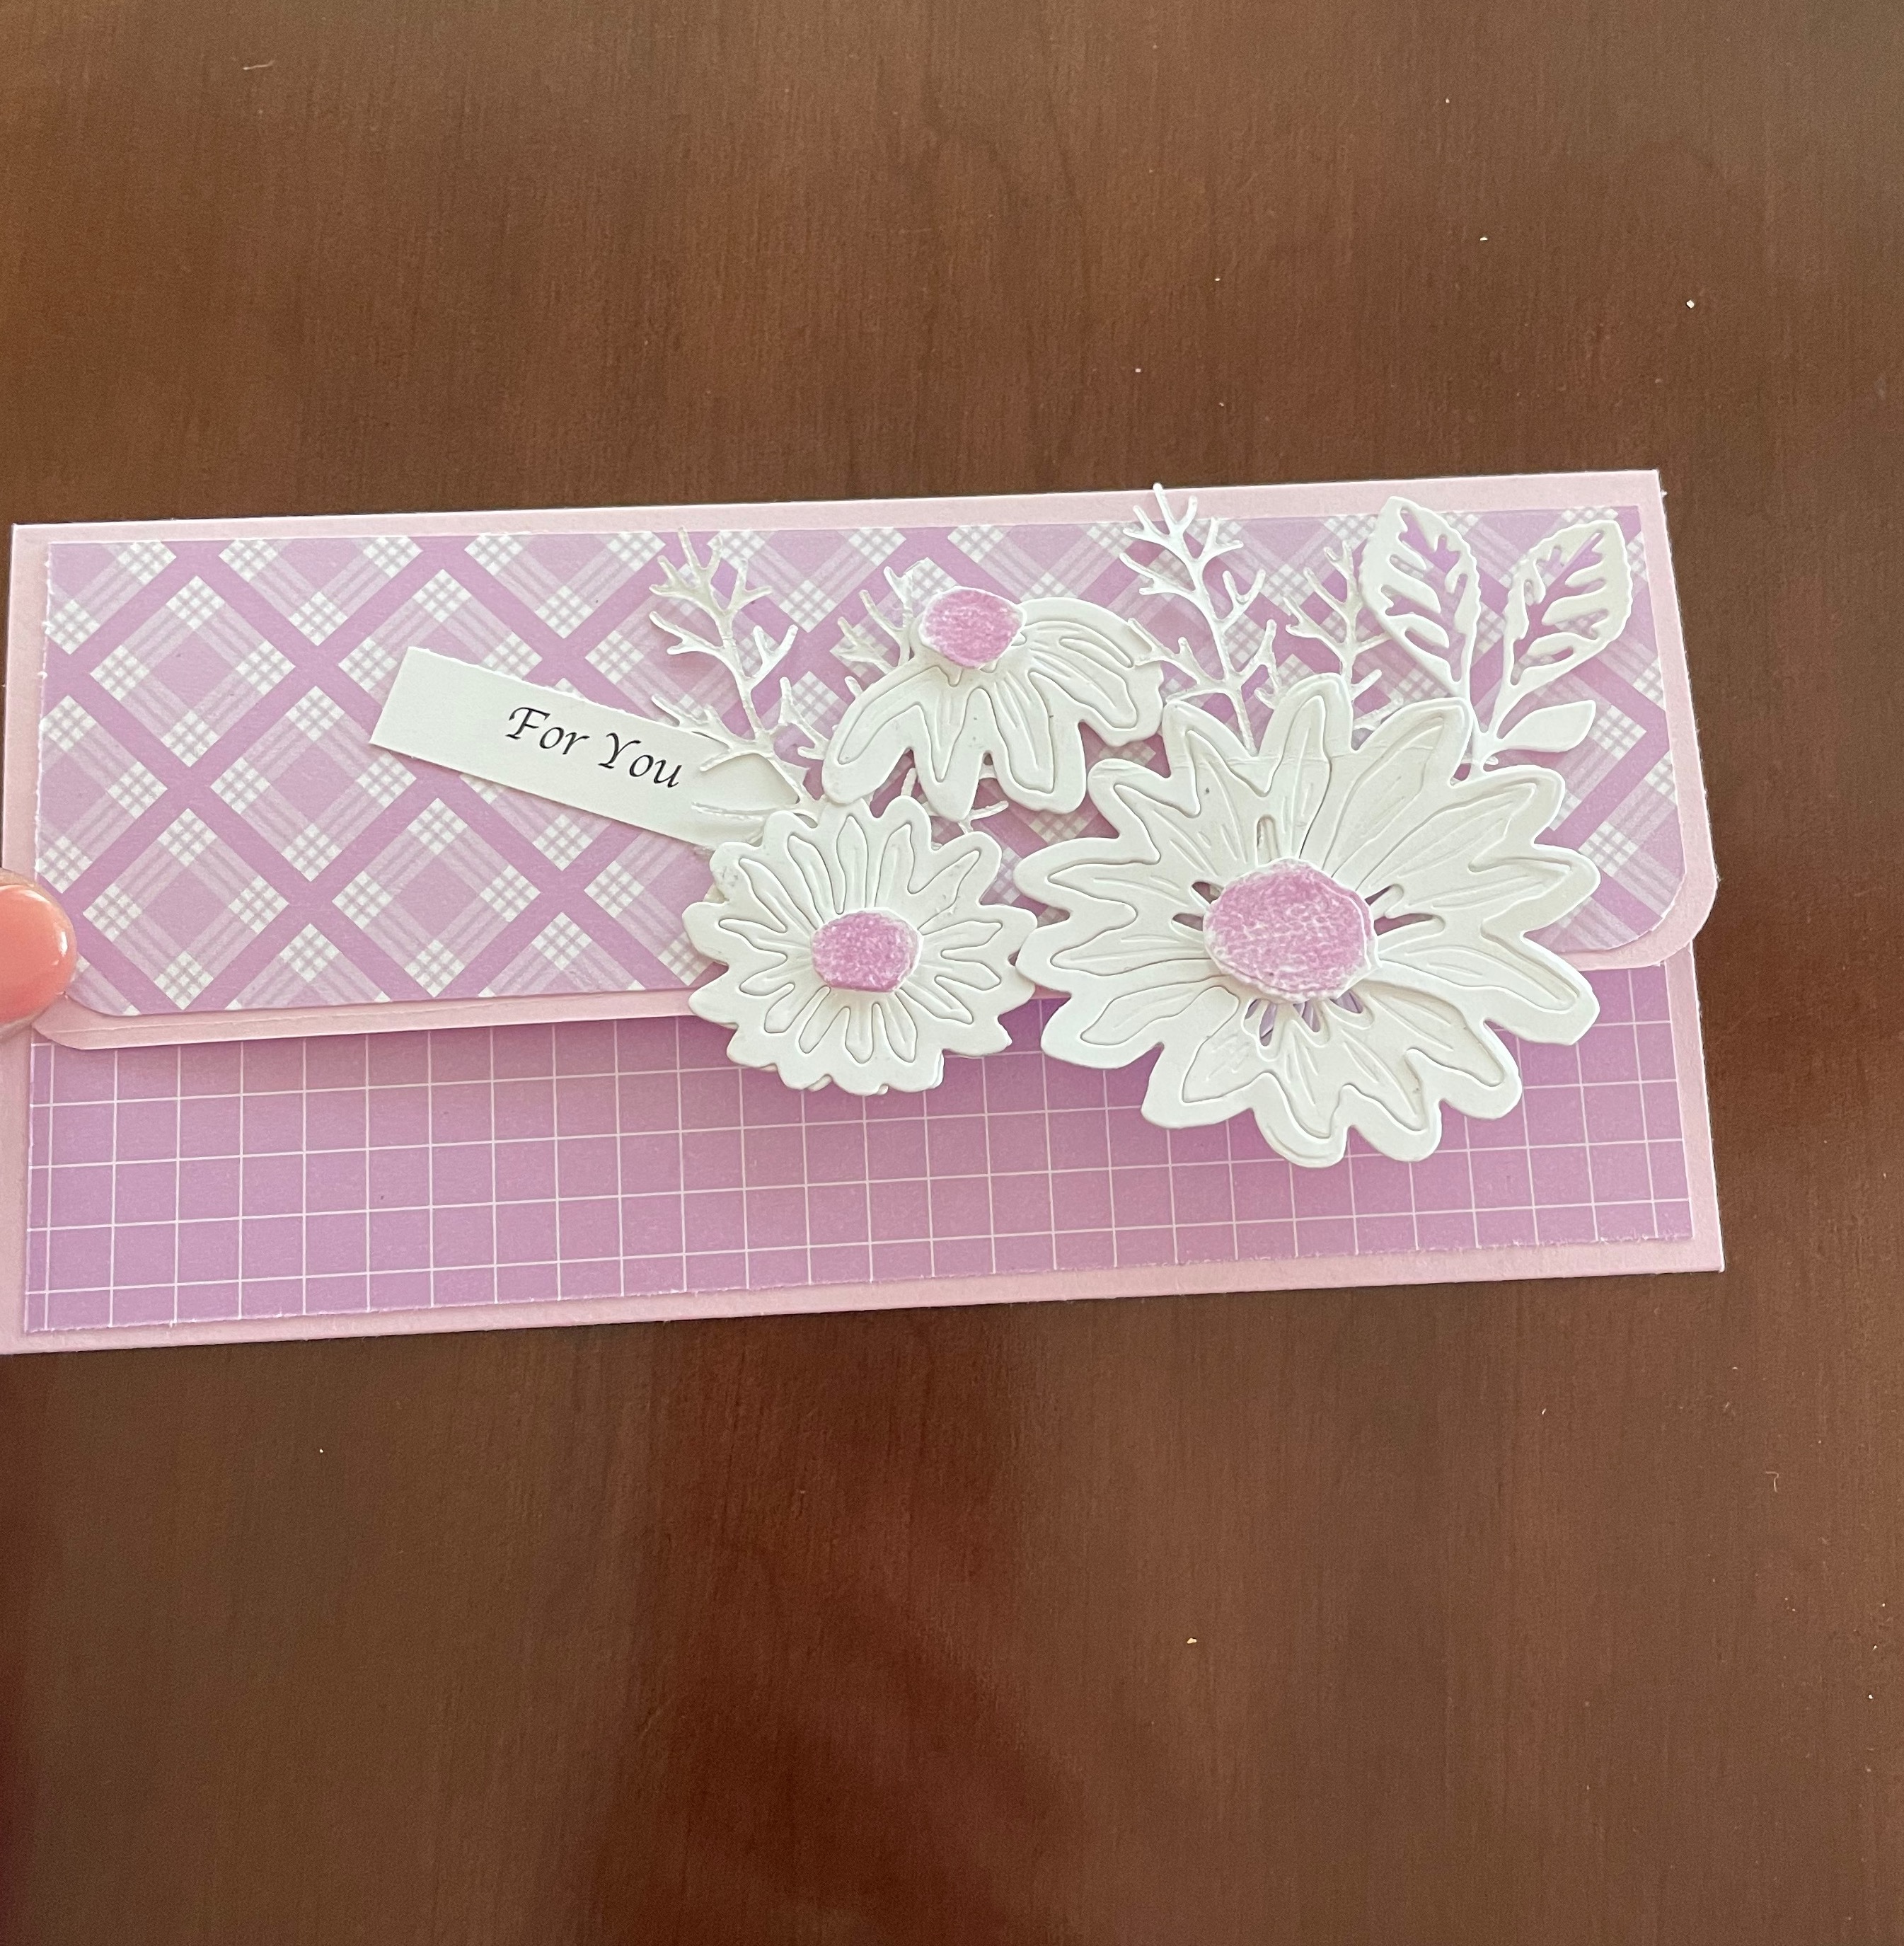
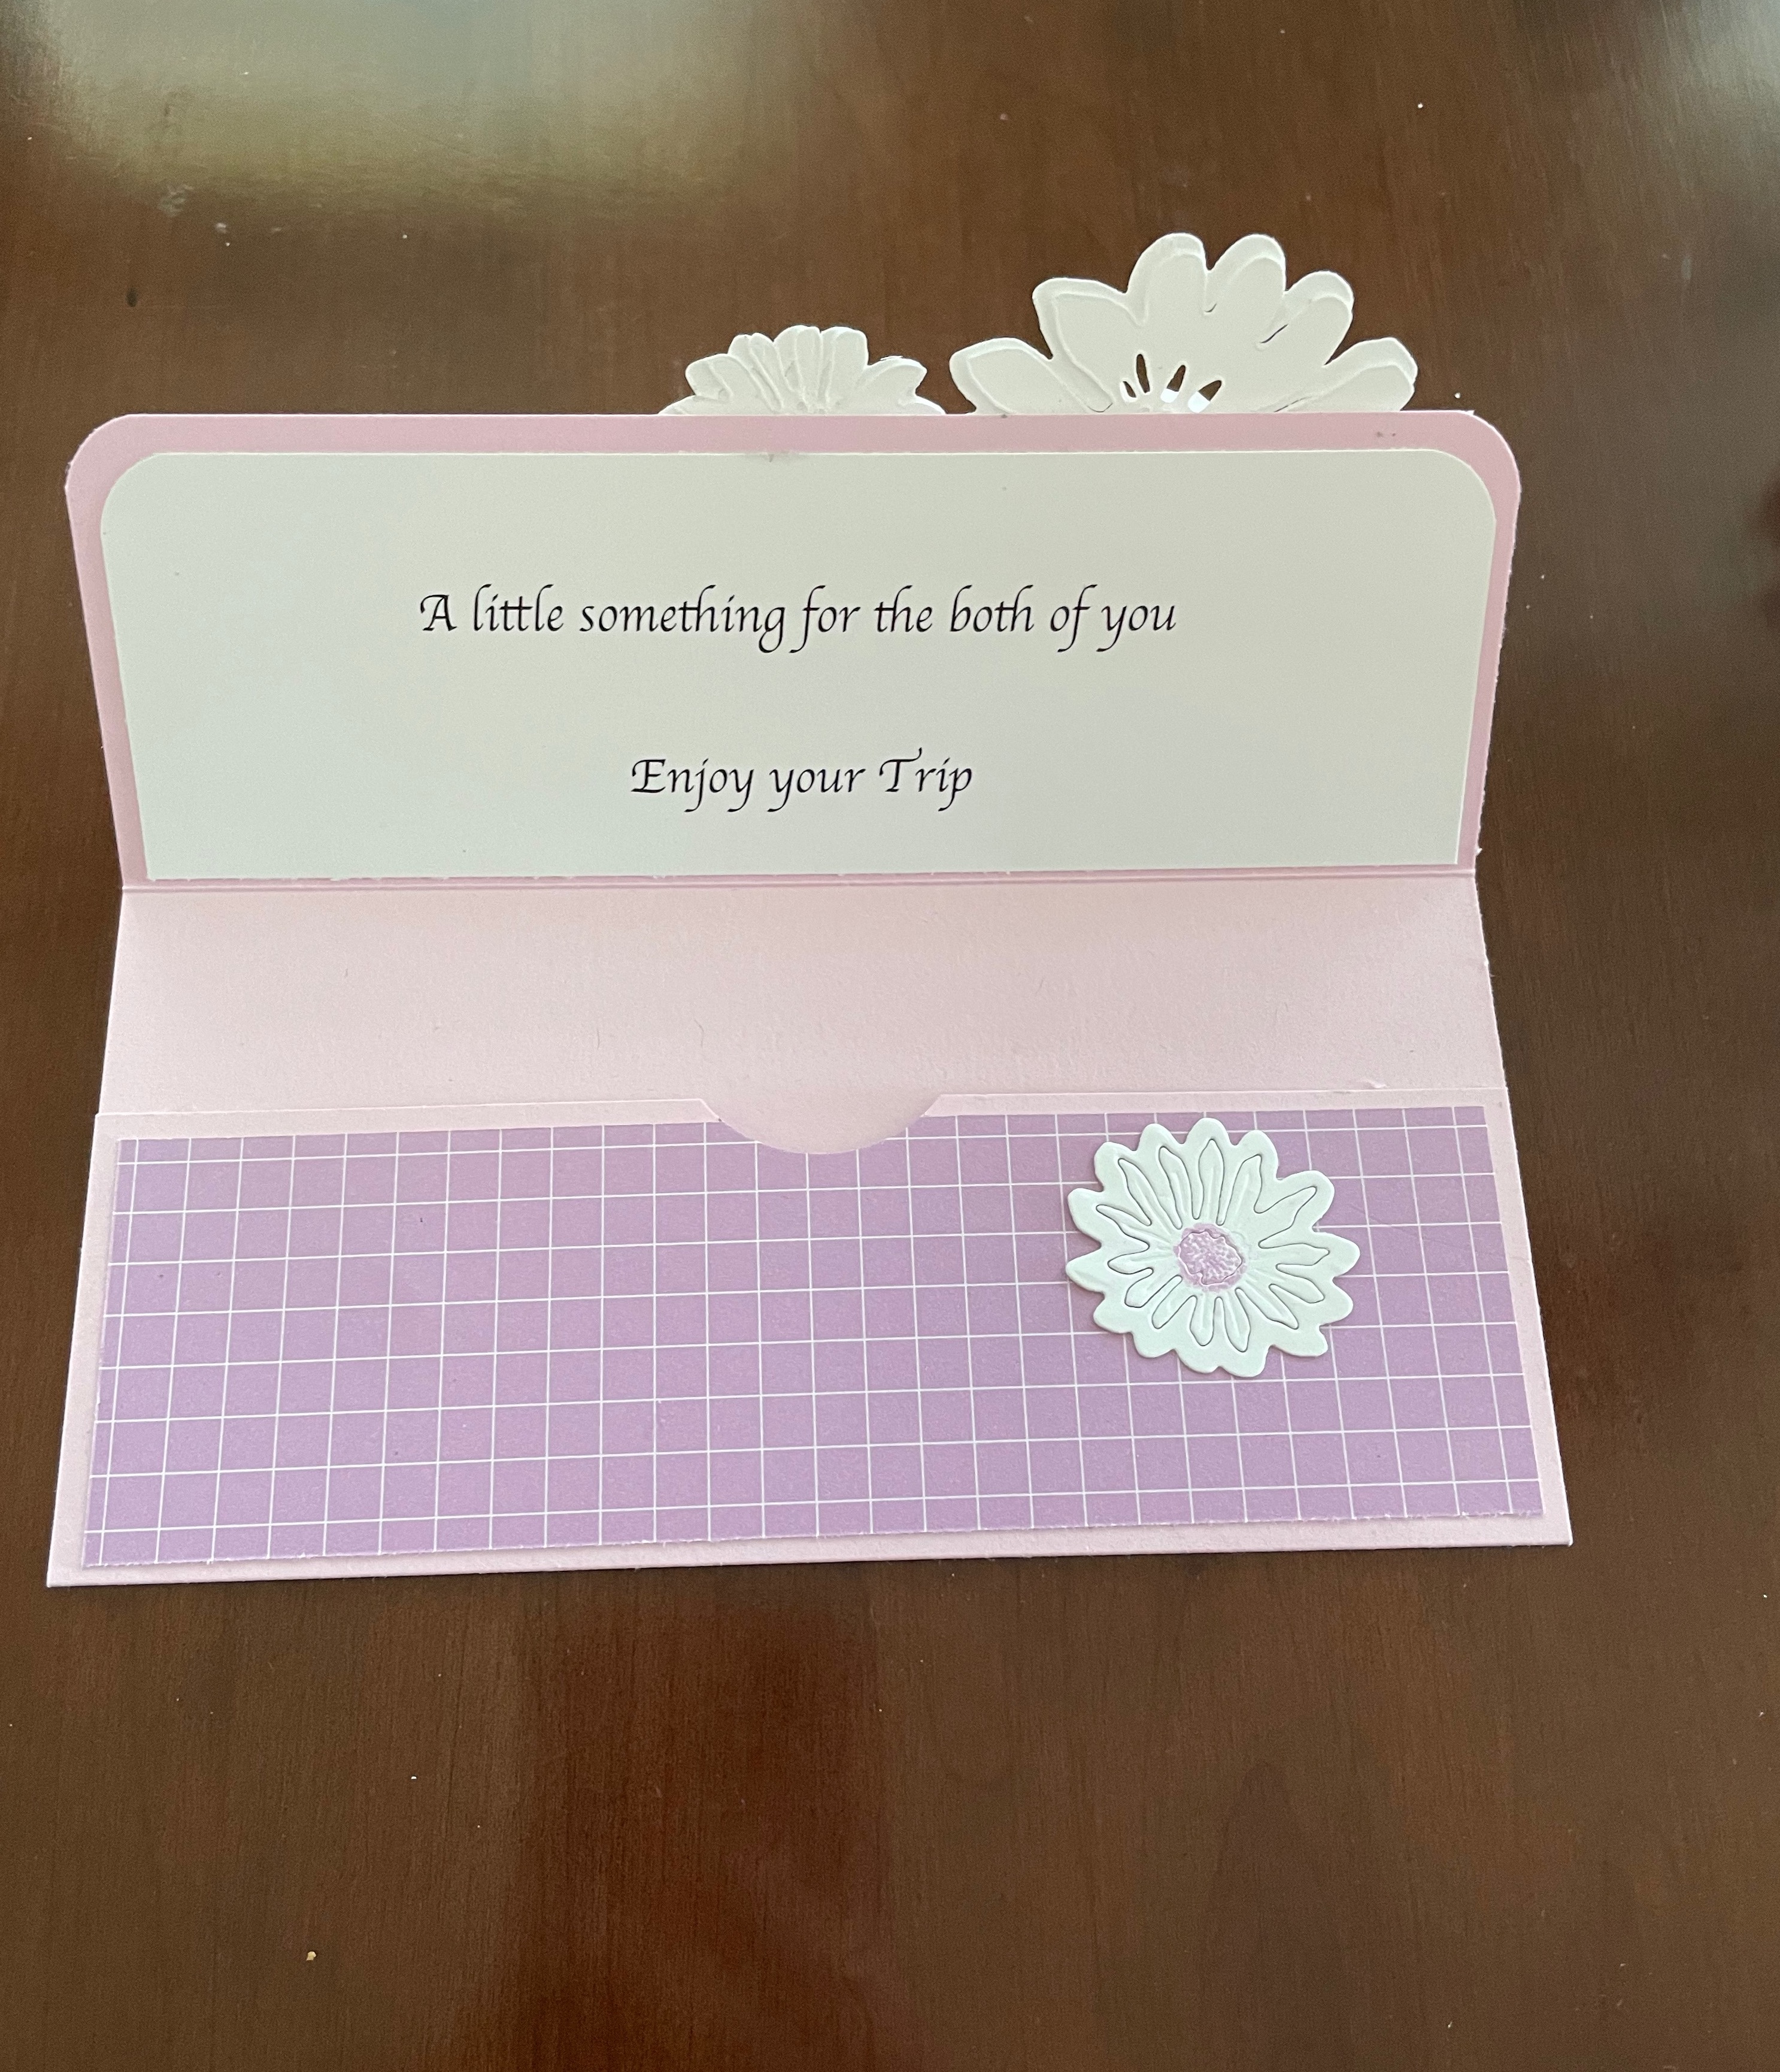
My customer requested a pink card with daisies. I used the Bubble Bath card stock as my card base and the Dandy designs designer series paper for the card front. This lovely paper is retired now, however any designers series paper you have on hand will work just fine. I die cut out the lovely Cheerful Daisies and leaves and applied to the card front. For the inside, I actually typed up the requested greeting on my computer and printed it on card stock before adding it to the inside of the card as shown below.
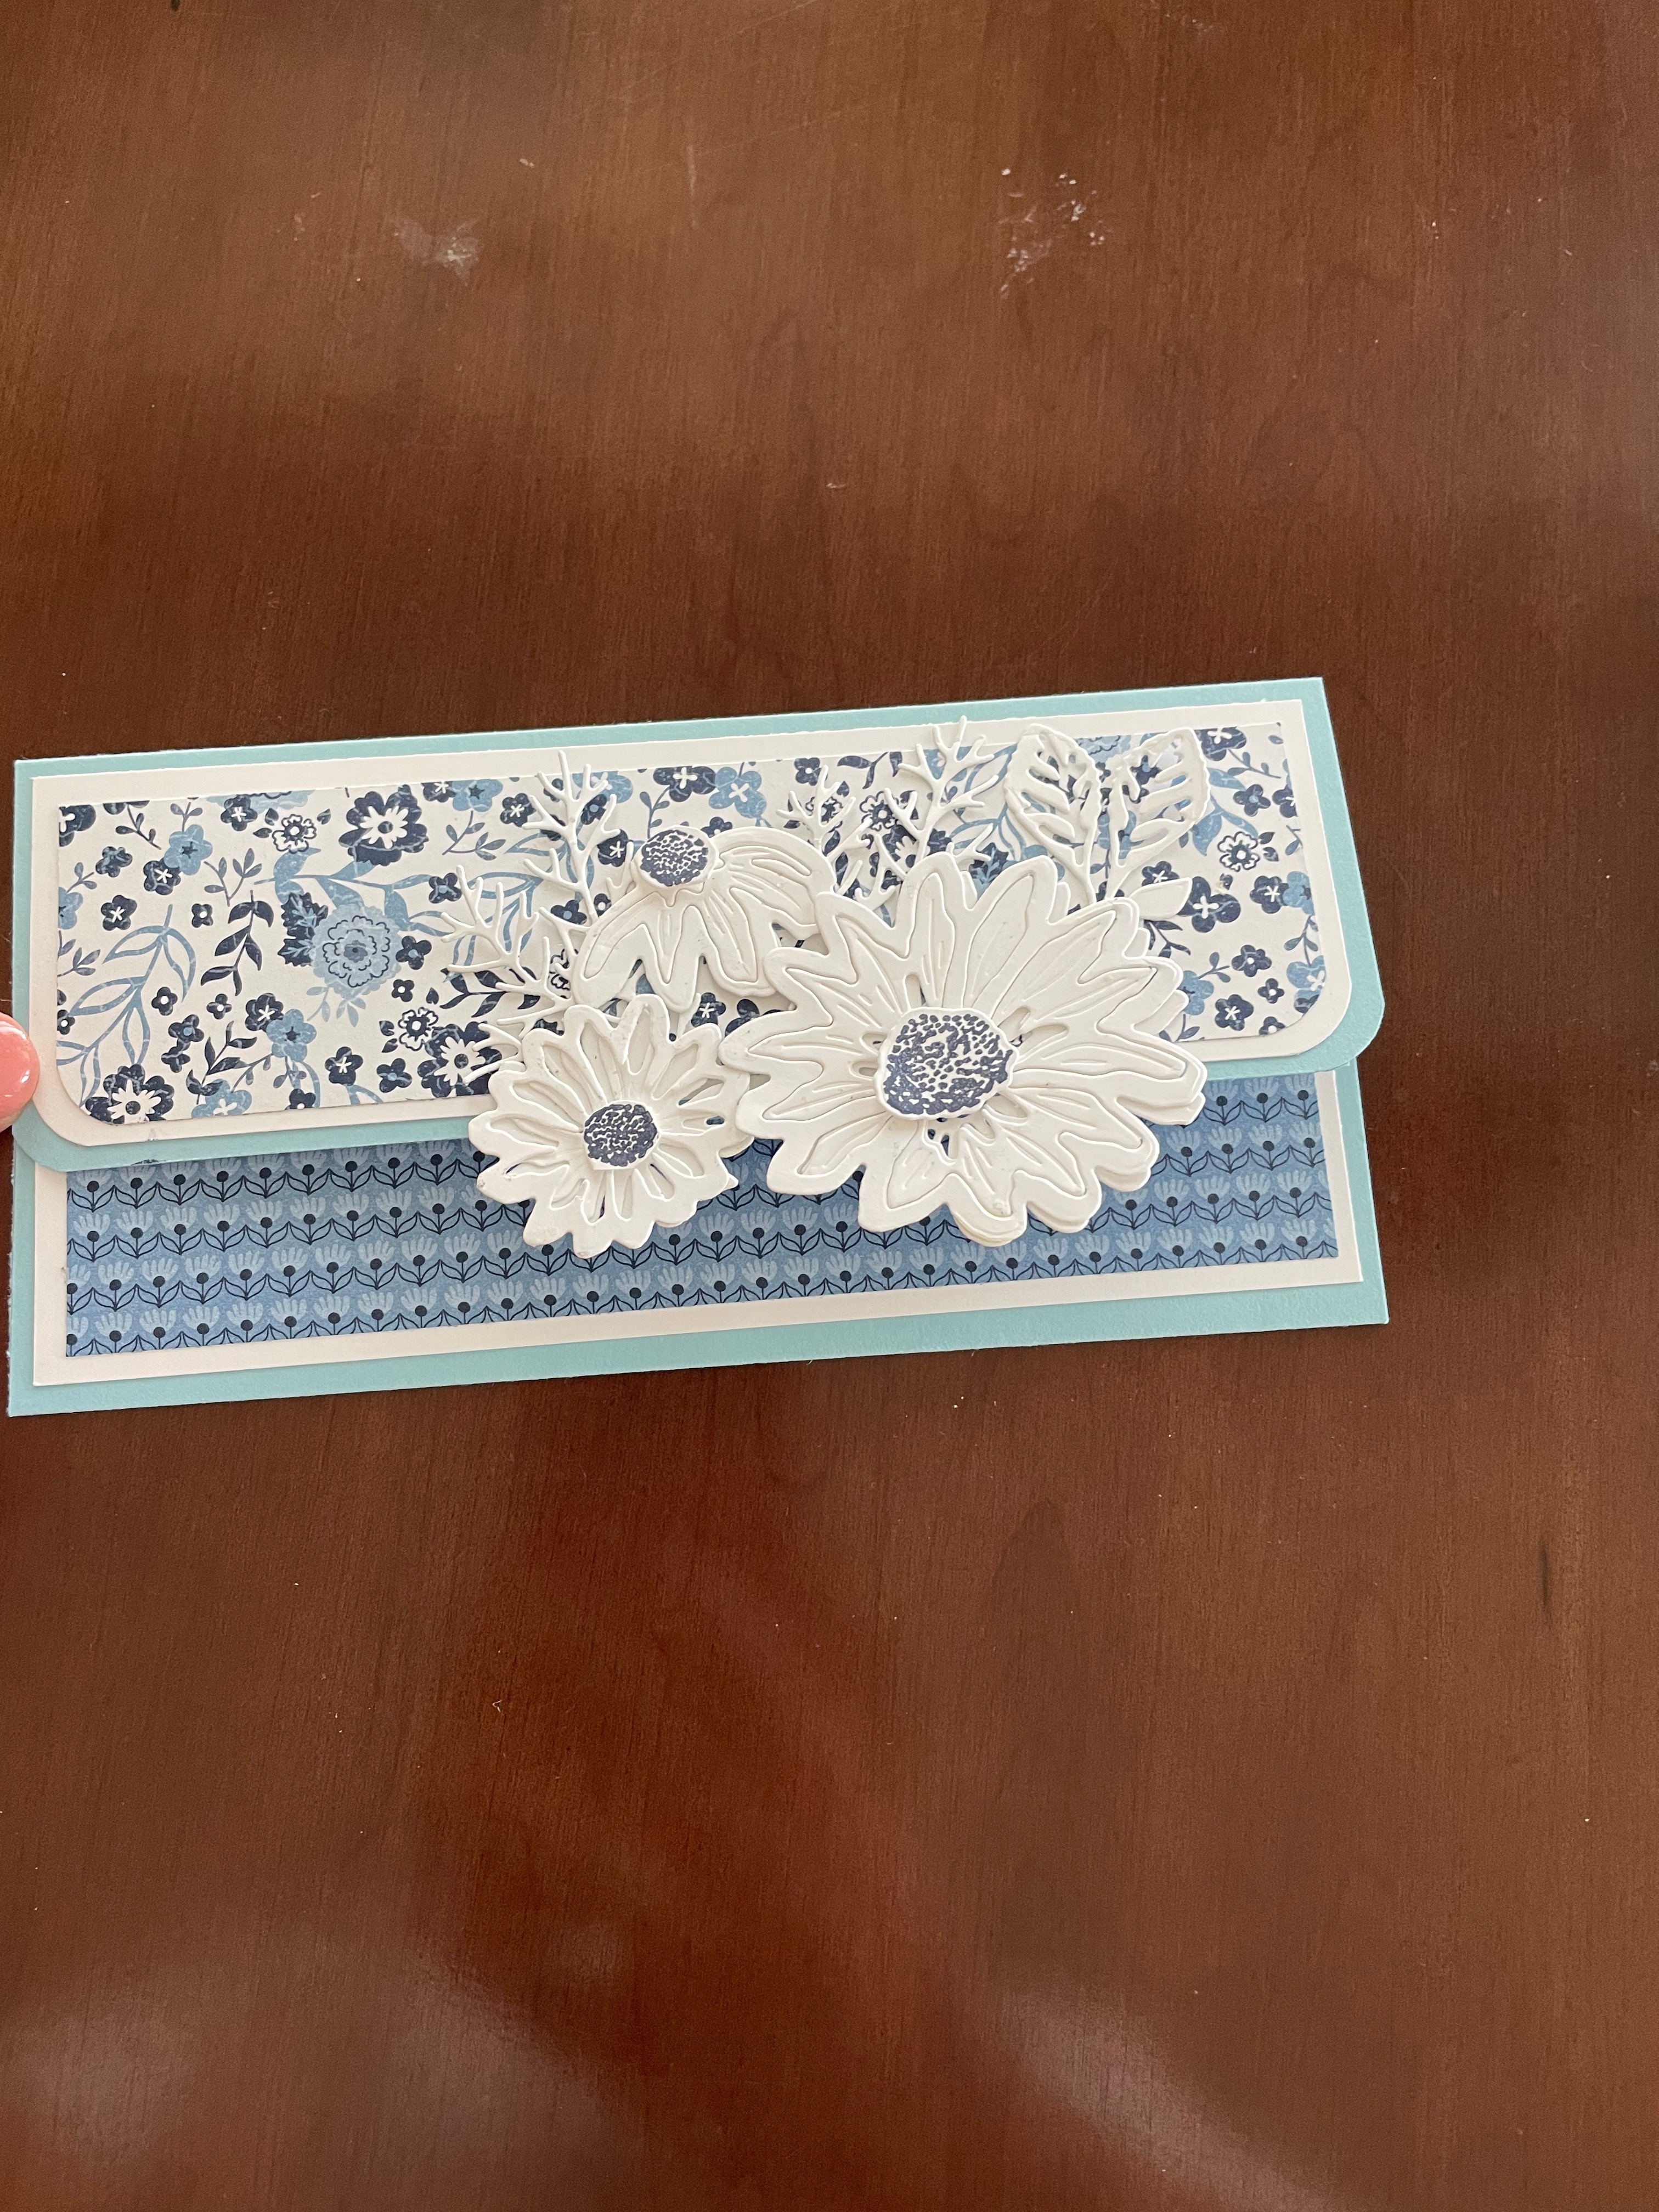
So after making the first card, I decided to go ahead and make a second card the same way. For this card I used the new Boho Blue card stock as my base. This time, I used the Countryside Inn designer series paper from the new annual catalogue. I just love this paper, and I also love how this double sided paper is so versatile. For this card, I used the floral pattern for the top and the other side of the same sheet of paper for the bottom. It works so well together. On this card I also added a white matting behind the designer series paper for a slightly different look. I left the inside blank so a hand written note can be added at a later time.

These cards are slightly larger in size, measuring 3 1/2′ x 7″, they wouldn’t fit into one of my standard envelopes so I decided to make my own envelopes.
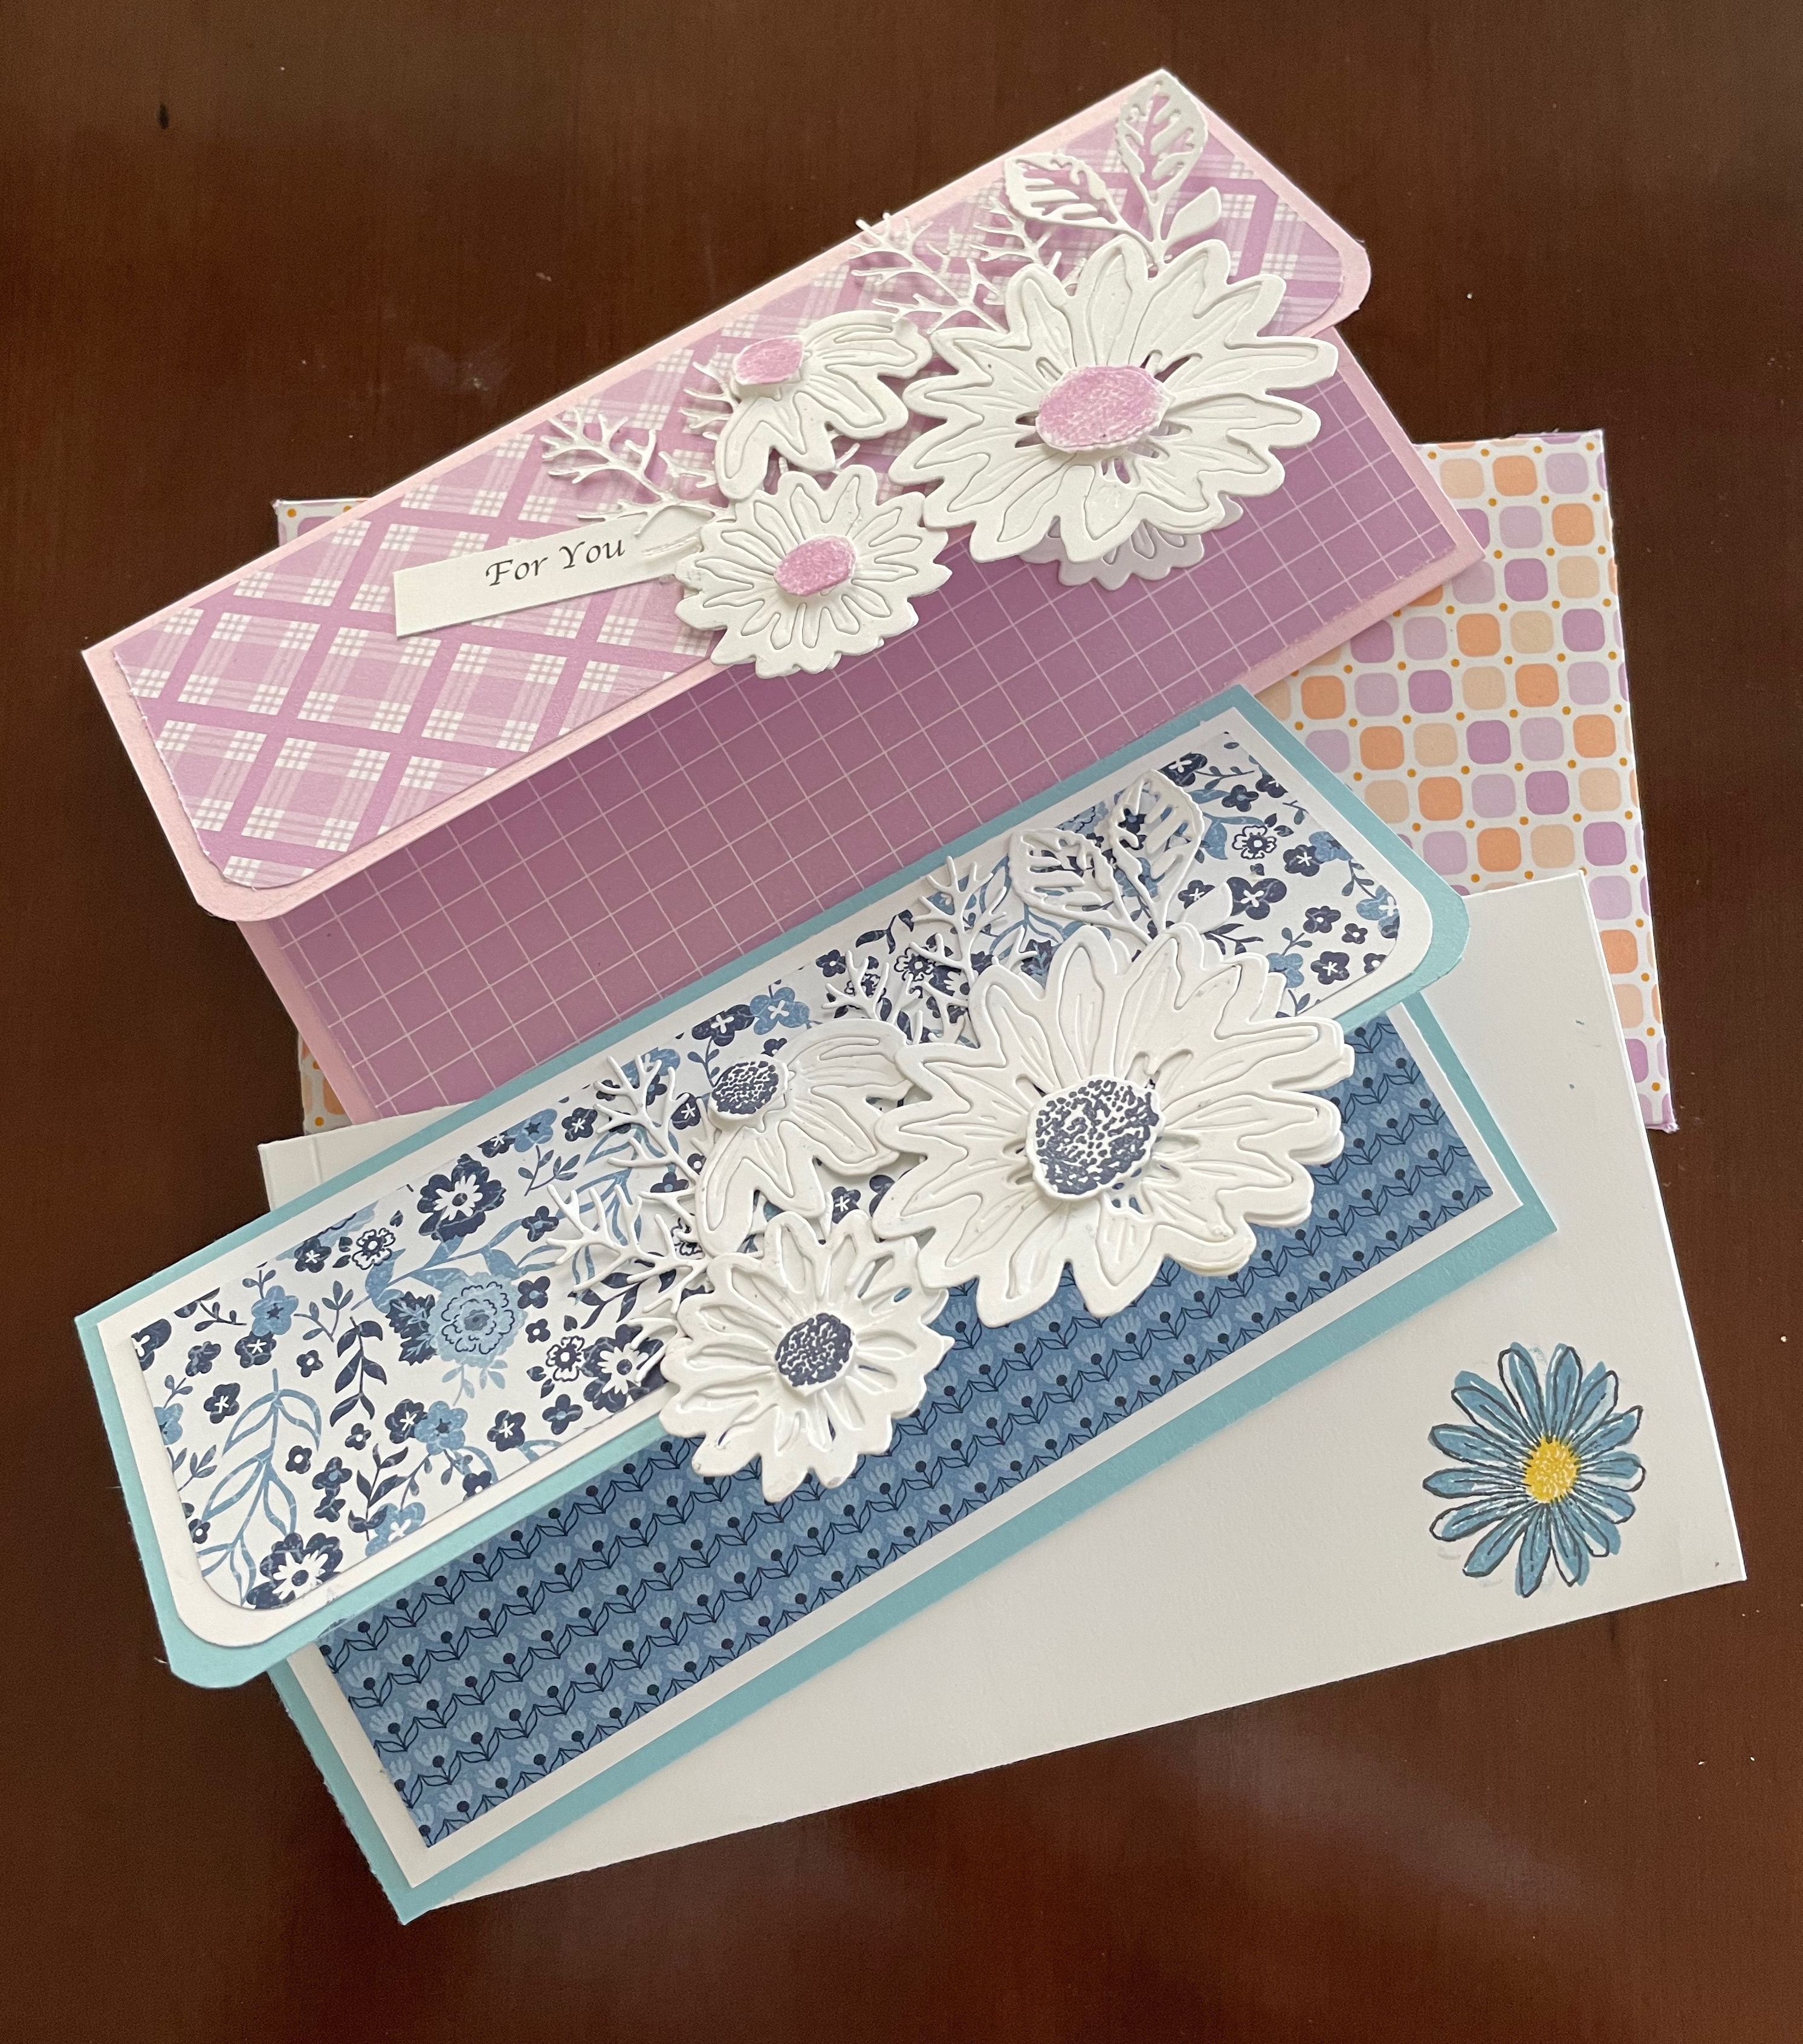
For the Pink card, I used some of the retired Dandy Designs paper to create my envelope and although you can’t see it in the picture, I punched out a label for the front using my Decorative Label punch and adhered it to the front.
For the Blue card, I used Basic White card stock and stamped a daisy to the front on the envelope.
CARD MEASUREMENTS
Card Base
- 8″ x 7″
- Score on the 8″ side at 2 1/4″ then turn around and do the same at the other end
- Fold inwards and burnish the folds with a bone folder
- Punch a partial circle in the center of the bottom flap
- Add Tear and Tape to the each side of the bottom flap and fold upward to seal
Basic White – Scrap paper to die cut all the daisies and leaves.
Designer Series Paper
- Top – 2″ x 6 3/4″
- Round the bottom corners of the flap
- Bottom – 2″ x 6 3/4″
Optional – To add a mat behind the DSP, use the measurements above for the matting and cut the DSP 1/4″ smaller.
ENVELOPE MEASUREMENTS
- 8 1/2″ x 9 1/2″
- Score at 2 1/4″ and 6 1/4″ on the 9 1/2″ side
- Turn and score 1/2″ at the bottom and 3/4″ at the top on the 8 1/2″ side
- Fold and burnish all the score lines.
- Cut away all four of the corner rectangles, leaving the middle two flaps for the top and bottom of your envelope
- OPTIONAL: Round the corners of the two flaps for a nicer look but that optional.
- With the small score lines at the top and bottom, add Tear and Tape to one side of the paper and fold inward over the other side to close up the envelope
- Add Tear and Tape to the bottom flap and fold to close.
- Add Tear and Tape to the top flap but DO NOT REMOVE the paper until you are ready to seal the envelope.


")
 Designer Series Paper")


Leave a Reply