[vc_row][vc_column][vc_column_text]As crafters, we often see a project that inspires us to CASE it and create something similar. CASE stands for “copy and share everything”. This is just one way how we can learn from easy other or get inspired. I recently saw a card on Pinterest which was made by Jamie (https://.stampinupwithjamie.cm) back in Dec 2023. I loved her colour choice and card design and it inspired me to make something similar. While I am using a different stamp set on my card, the colours are more or less the same. I love a black and white look and the colour Pool Party just gives it a nice alternative colour without coming across as harsh!
The stamp set I am using for this card is from the Notes of Nature bundle which can be found on page 43 of the new Jan-April mini catalogue. This lovely bundle comes with 9 different stamps and 9 different dies. It’s well worth taking a look at. My “Hello” greeting on the front of the card came from the Thoughtful Moments Bundle. I did a recent post on this where I show you step by step how to create all the lovely words this bundle has. If you haven’t seen it, check it out.
Ok, let’s get started
To create this card,
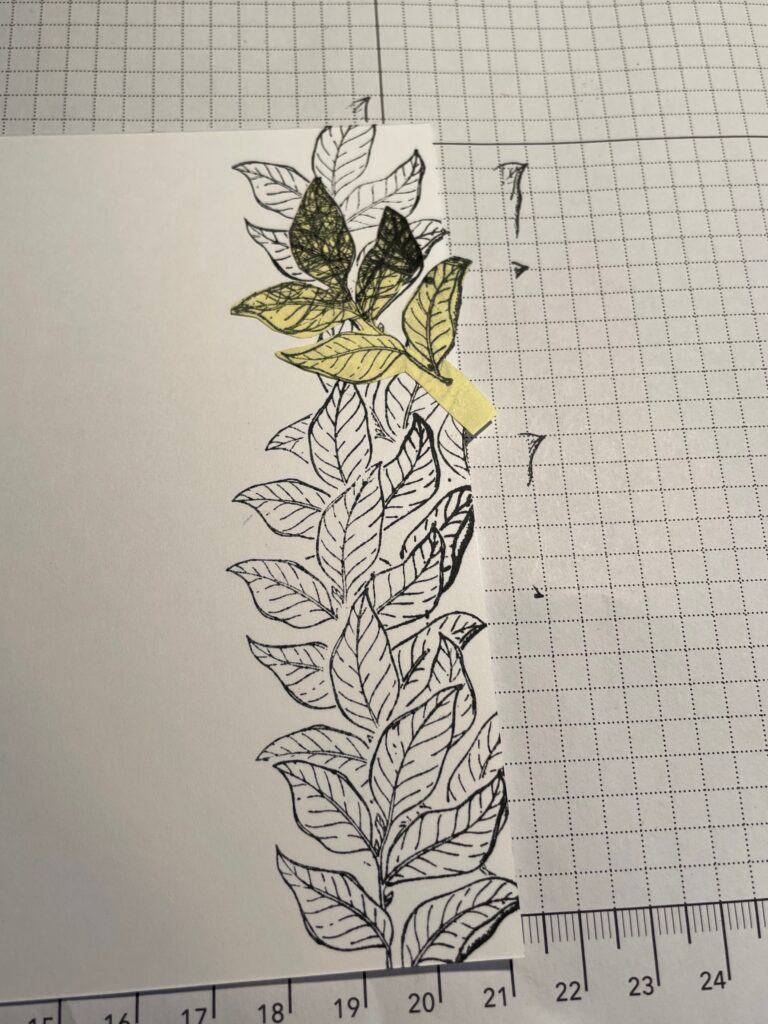
I employed the masking technique to make this card. I first stamped the leaf image on a post it note making sure the stem was facing the adhesive part since this part will become my handle. I cut around the leaves to create my mask. On my card stock I stamped one image, then covered it with the mask. I then stamped the next image. This technique is so easy and it prevents the leaves from overlapping and looking messy. As I work my way up the edge of the paper, you can see what I mean. The leaves look both in front or behind the other leaves without looking messy. As you can see, my images are stamped at various angles for a fuller look.
TiP – You will notice as you go that the mask gets covered in ink and as you move the mask, so will your fingers. When you are done, carefully remove the mask and go wash your hands before you touch the card stock.


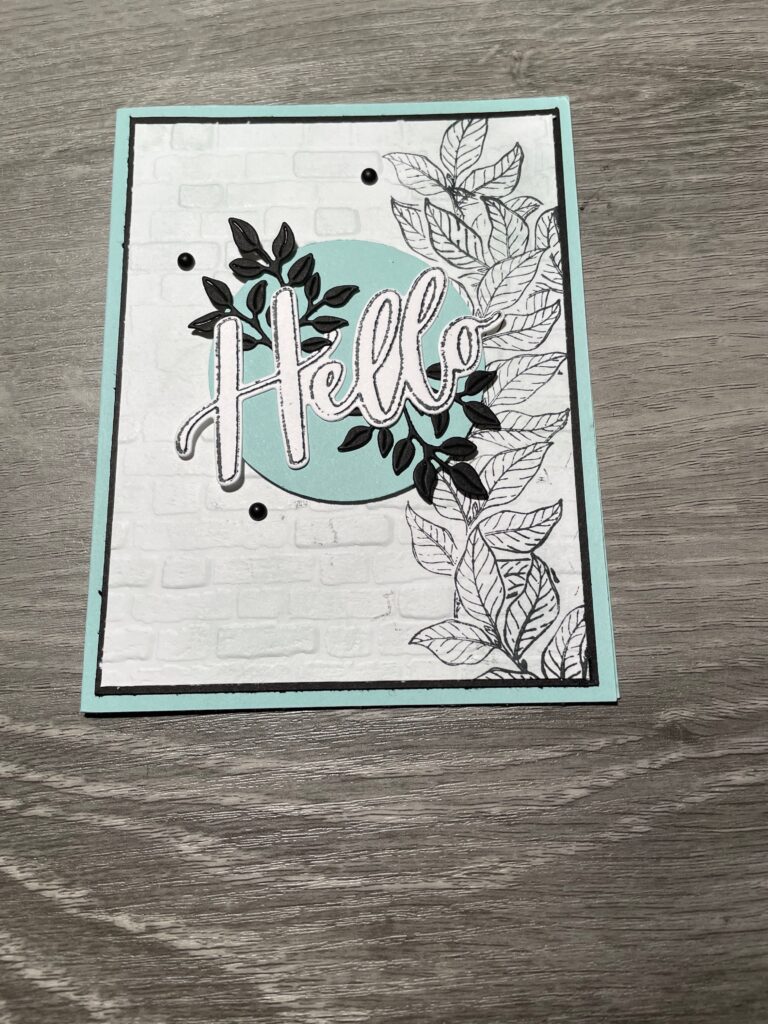
Now once your hands are clean, take your card stock and run it through the cutting and embossing machine with an embossing folder. I used the Brick embossing folder to create the textured background. Sadly this folder is now retired but any embossing folder you have on hand will work. I very lightly used a blending brush in Pool Party over the bricks to help enhance the texture of the bricks, but this isn’t necessary with other embossing folders.
I then assembled my card using the black matting and the Pool Party card base.
For my front greeting, I die cut out two of the leaf dies from the same Notes of Nature bundle and adhered them to the back of my “Hello”.
The circle I used was the 2 3/8″ circle punch. I then glued the greeting down onto the Pool Party circle and adhered the circle to the front with dimensional’s.
I finished off my card front with a few black mat dots to keep with the black and white theme. Yes I know Pool Party is not black or white but it still has that look.
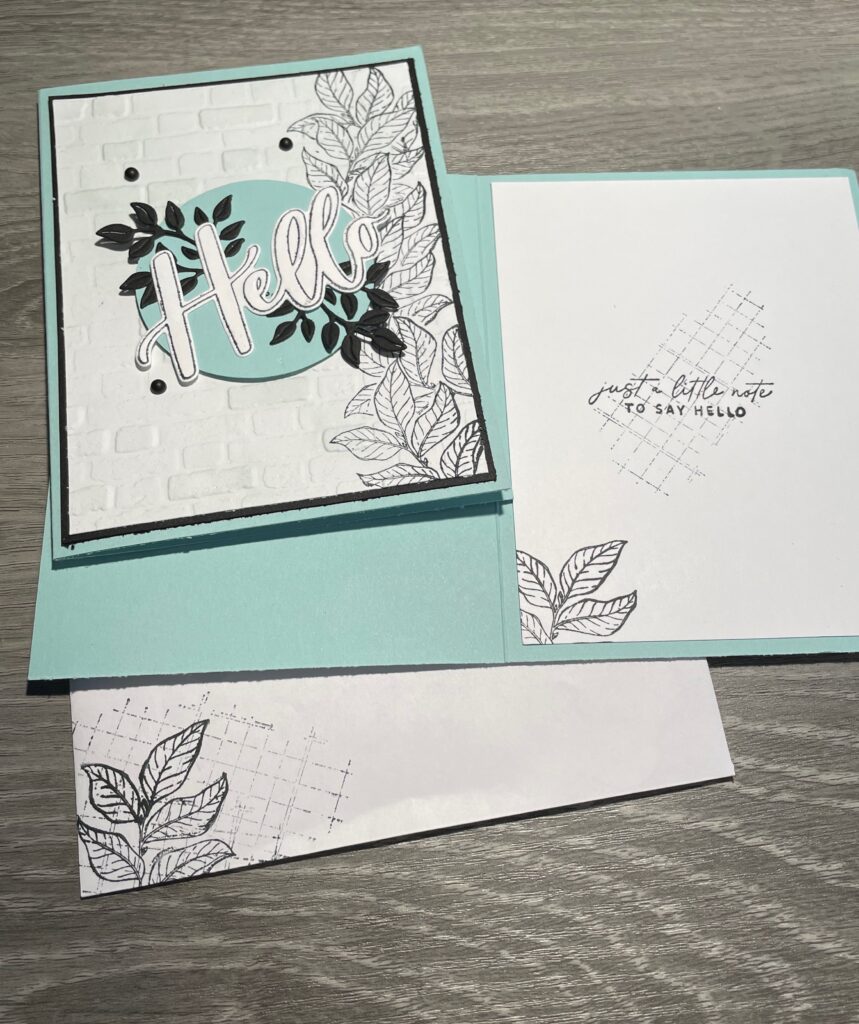
For the inside of my card, I stamped the leaf in the bottom corner. For the center of the card I stamped one of the background stamps, stamping off once so it’s not too dark. I then stamped the greeting full strength on top.
I have to say, I love that look on the inside of cards which has a subdued background and the greeting is on top at full strength.
I repeated that by stamping my envelope the same way.
I have to say I am really pleased with this card and have already made several more.
Product List
")


 Circle Punch")


Visit my ONLINE STORE at any time, to see all the amazing products or to purchase supplies. Before you close your order, don’t forget to add my current Host Code – 9KSAZCJ2 if your order is less then $200.00. Everyone who places an order with me using the host code, will receive a thank you card & gift in appreciation.
If your order is over $200, DO NOT use the host code since you will earn your own Stampin’ Up! rewards with your order. You will still receive a thank you card and gift from me in appreciation.
You can place your order directly online at any time. However, if you are not comfortable placing orders online, I will be happy to place an order for you. Please contact me at susanbeale@canadianstamper.ca to discuss.
[/vc_column_text][/vc_column][/vc_row][vc_row][vc_column][html_block id=”11646″][/vc_column][/vc_row]
Leave a Reply