[vc_row][vc_column][vc_column_text]Hello my crafting friends.
Today I want to show you how you can use one stamp set and create several cards with completely different looks just in time for Easter.

The Easter Lilies stamp and die bundle can be found on page 26 of the Jan-April mini catalogue. It comes with 10 stamped images, including some lovely sentiments and a nice background stamp which I have yet to use.
You can purchase the stamp set separately but the coordinating dies allow you to cut out the stamped images. I love how cut out dies, give you added dimension on your cards and projects. As an added bonus when you purchase the both the stamp and dies as a bundle, you save 10% and who doesn’t love to save money…
These images make some lovely cards and I cannot wait to share them with you.
In order to create a card you need to prepare everything ahead of time. Now if you prefer to do each stage as you go along, that is perfectly fine. Personally, I like to gather everything I need in advance so it’s easy to assemble later. This is also how I prep for my card classes so I can keep everything organized as I go. The advantage of doing all the prep work in advance is now all the mess is out of the way and you can work with a clean table top (and clean hands) when you put your cards together
So after cutting all my card bases and setting them aside, my next stage was to stamp the numerous images. As you can see below, the dies fit over them perfectly. Once I had them all cut out, it was time to colour them. Using my blender pends I added a bit of colour in Soft Sea Foam, Daffodil Delight, Flirty Flamingo and Fresh Freesia, just to give them a little colour. Although not pictured below, I also stamped and die cut the large leaf for my cards.
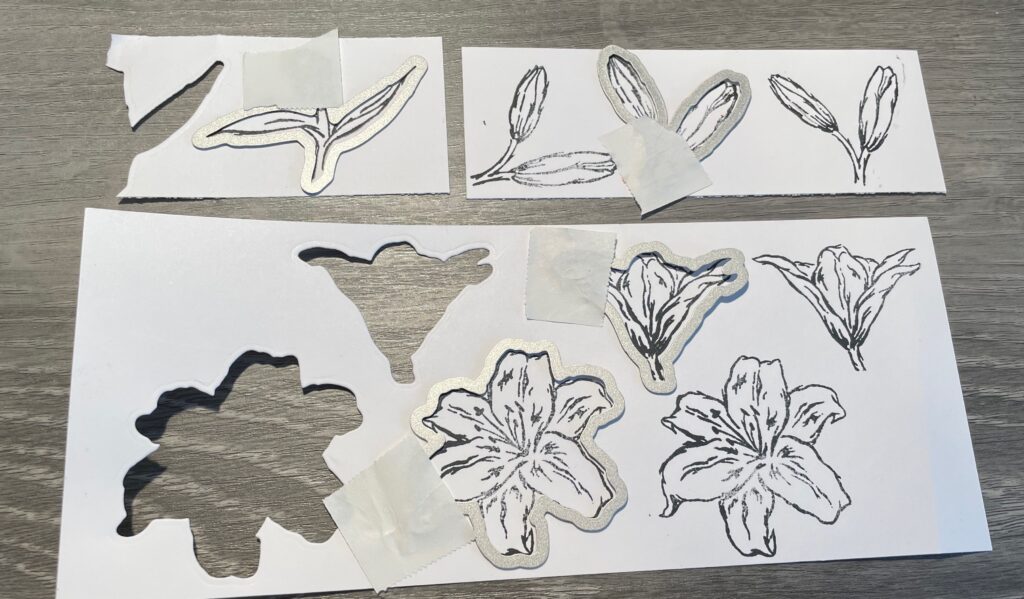


So now that I have all my die cuts done. I arranged my stamped cut outs on the various card fronts to get an idea of how I want them to look. They looked nice but then I decided to emboss the front of the cards for added texture and interest. I chose the Cross Hatched embossing folder which is just one of a set of 3D Embossing folders (and one of my favourites). I love how it just gives a little added interest to the card front instead of it being just plain white.
So now that is done, I want to show you my finished cards. Below are the cards I made using this one stamp and die bundle. I hope you like them.
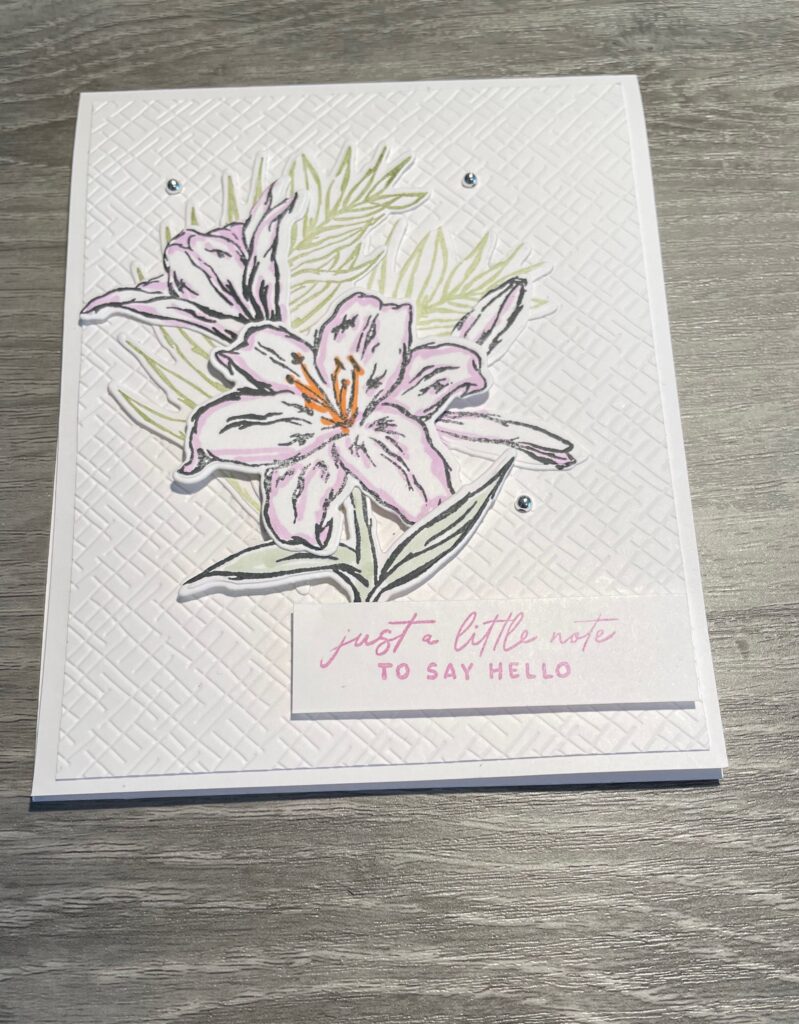
This is the first card I made. I like the white on the white card base. It just gives a nice clean look with just a hint of the fresh freesia colour.
I stamped my greeting in the same colour and added a few silver pearls which I believe are retired now for a little bit of glitter. You cannot really see it but the flowers were covered in Wink of Stella for some added sparkle.
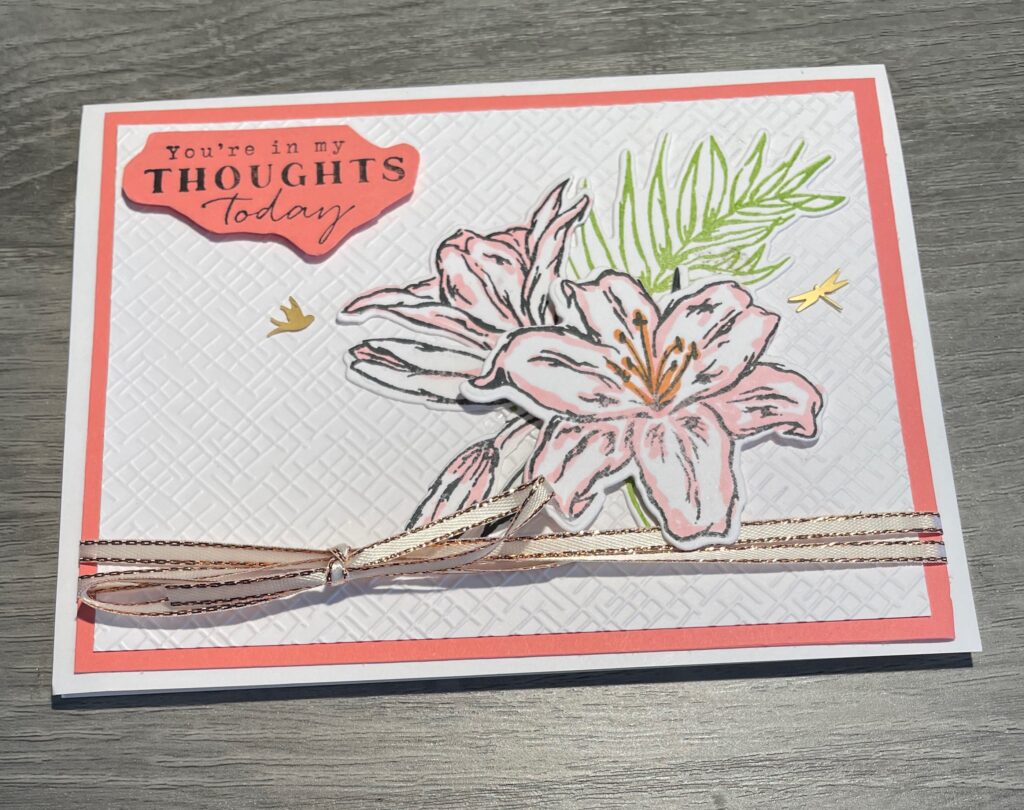
For my second card, I matted the embossed piece with the coordinating card stock in Daffodil Delight. I used the Double Oval Punch for my sentiment and the added a couple of adhesive backed dragonflies and birds. I added a bow of yellow twine as well.
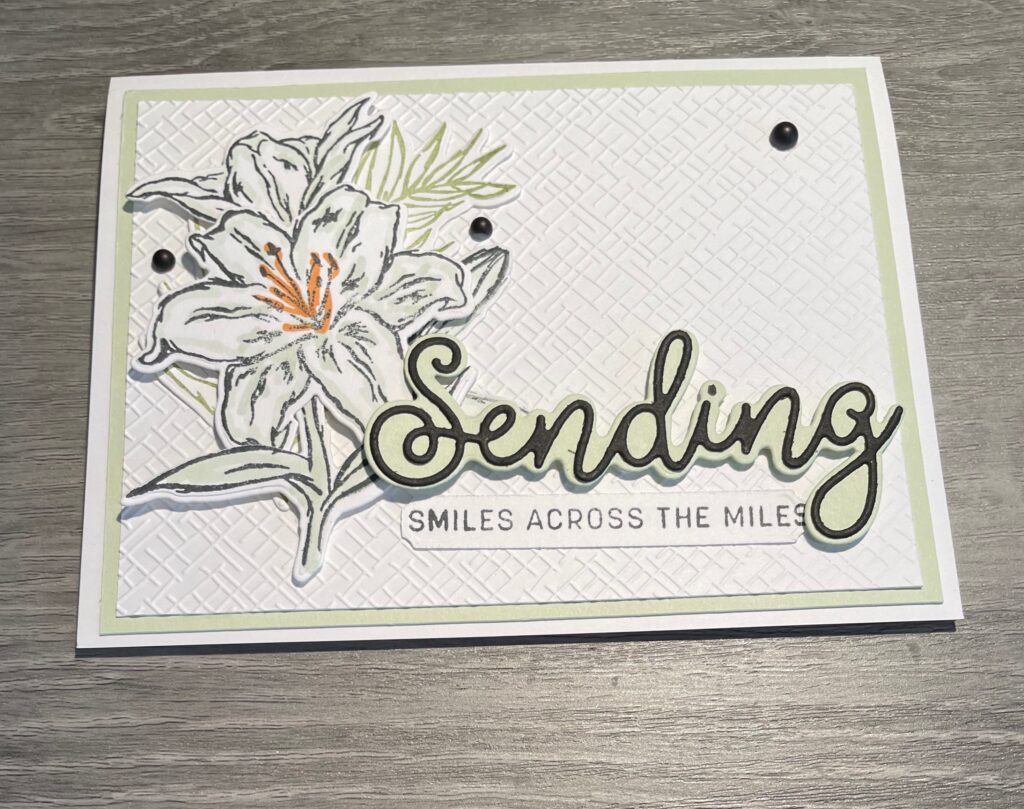
For my third card, I matted the card in Soft Sea Foam card stock and used the Sending Smiles bundle for my greeting.
A few black matted dots were added and card is complete.
This card was also matted in the coordinating Flirty Flamingo card stock. I stamped my greeting and fussy cut around it before adhering it with dimensional’s. I also wrapped the gold edged ribbon (also retired) around the card front before adhering to my card base.
I finished off the card by adding a couple of adhesive backed dragonflies and birds to the front.
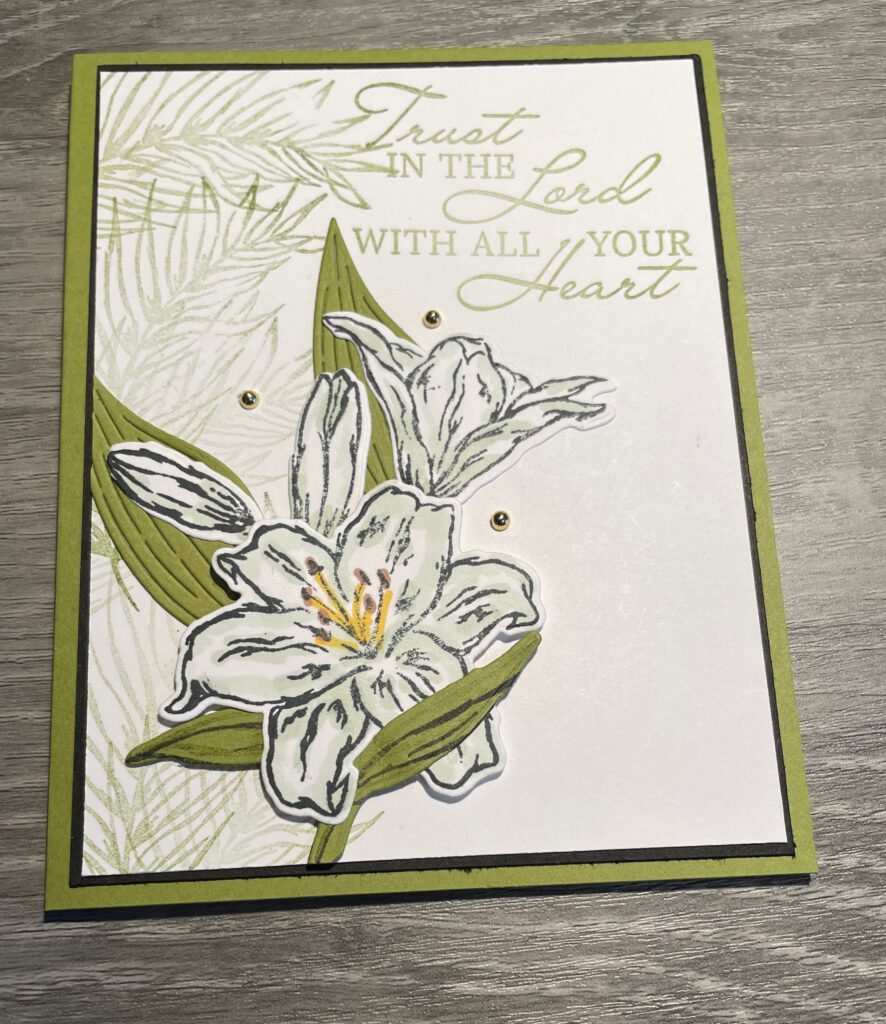
Now this card, I made a while ago when I first got this set. I stamped the leaves and the greeting in Old Olive on basic white card stock then matted it in Black and added to the Old Olive card base.
I then stamped and coloured the floral images as I did above but this time I also die cut out the stem and leaves
After arranging and adhering the images I added some gold pearls for a little added glitter.
As mentioned above the pearls are currently retired but that doesn’t mean you cannot use what you have on hand right?
Product List
")


To purchase any of these products, visit my ONLINE STORE at any time, to see all the amazing products or to purchase supplies. Before you close your order, don’t forget to add my current Host Code –9KSAZCJ2 if your order is less then $200.00. Everyone who places an order with me using the host code, will receive a thank you card & gift in appreciation.
If your order is over $200, DO NOT use the host code since you will earn your own Stampin’ Up! rewards with your order. You will still receive a thank you card and gift from me in appreciation.
You can place your order directly online at any time. However, if you are not comfortable placing orders online, I will be happy to place an order for you. Please contact me at susanbeale@canadianstamper.ca to discuss.
PAPER PUMPKIN CHANGES
THIS ONLY APPLIES TO SUBSCRIBERS WHO PURCHASE MULTIPLE MONTHLY KITS. Currently, all Paper Pumpkin kits ship individually, even if they’re going to the same destination. Starting with the February 2024 kit, Stampin’ Up has revised their shipping approach. All orders containing three or more kits from a single subscriber account will ship together in a single, larger package. For now, kits going to the same address but from different Paper Pumpkin subscriber accounts will still ship individually.
This update to shipping means added protection for the kit boxes and fewer tracking numbers to juggle. Delivery timelines for grouped kits will remain the same as if they had been shipped individually.
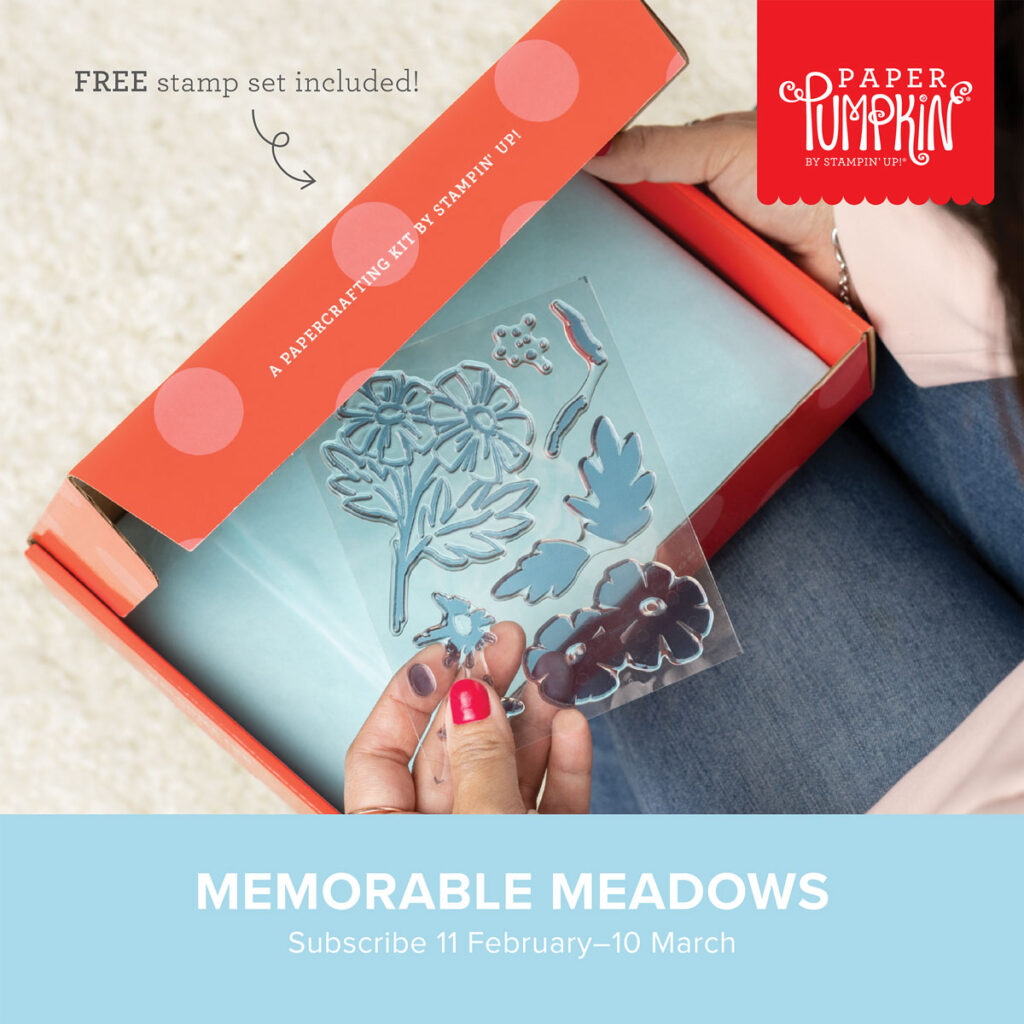
Memorable Meadows Paper Pumpkin Kit
Be inspired by the beauty of nature with the March Memorable Meadows Paper Pumpkin Kit. Each March subscription kit includes a FREE gift—an additional photopolymer stamp set that can be used with the kit and all your crafting projects!
You will be able to send elegant thank you, birthday, or thinking of you cards to friends and family all year long!
This kit perfectly coordinates with the Meandering Meadows Suite Collection (item 162745), which you can shop in Online Exclusives while supplies last. Plus, each March subscription kit includes a FREE gift—an additional photopolymer stamp set that can be used with the kit and all your crafting projects!
Subscribe by 10 March to get all this all-inclusive kit. CLICK HERE to subscribe
[/vc_column_text][/vc_column][/vc_row][vc_row][vc_column][html_block id=”11646″][/vc_column][/vc_row]
Leave a Reply