[vc_row][vc_column][vc_column_text]Hello my crafty friends.
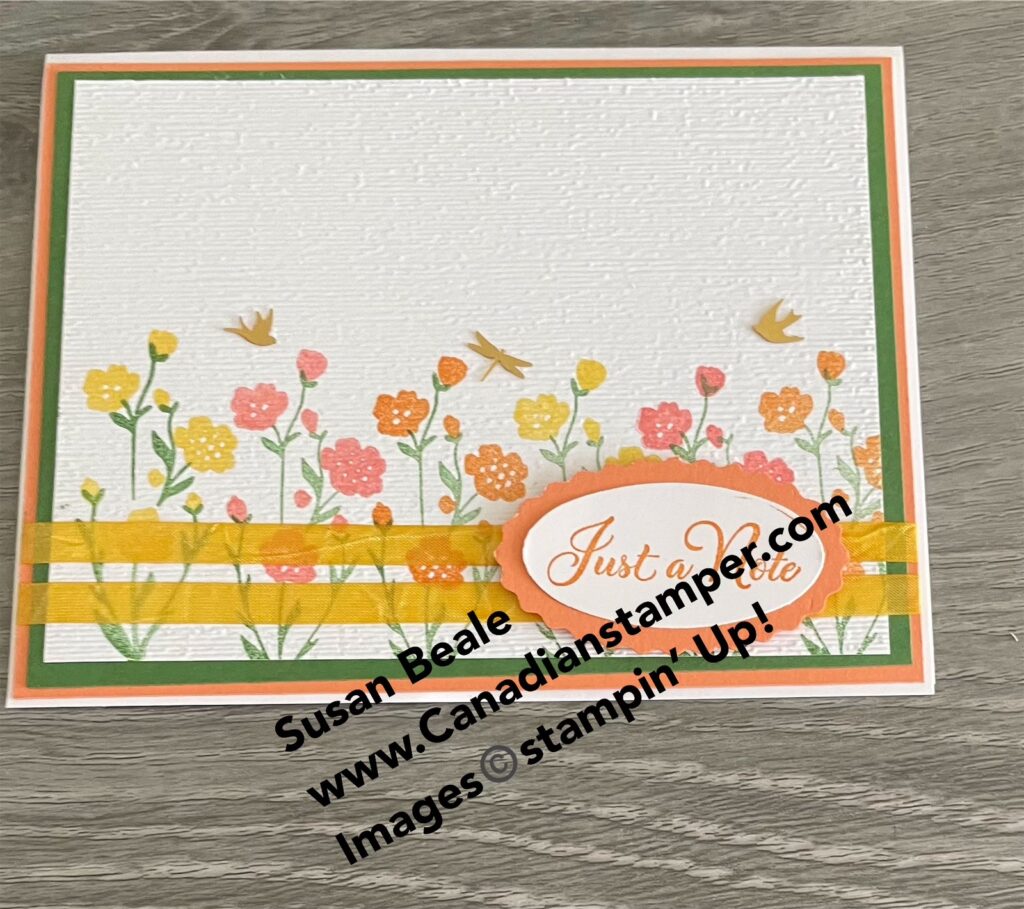
Today I would like to show you how I made this card using the softly Sophisticated stamp set. The bundle includes the Softly Sophisticated Stamp Set and the Softly Sophisticated Embossing Folder.

I chose this product as a free Sale-a-bration item from a recent order I made. I wasn’t over impressed with the stamp set Initially. I found it a bit simple compared to other stamp sets I have, but I really liked the embossing folder that came with it as part of the bundle. Once I received it, I decided to play around with it and created a card as part of the Global Design Challenge #433. This challenge changes every week and to date, I have never participated. In an effort to expand my horizons, and challenge myself to get out of my comfort zone, I decided to use this challenge and make a card. Besides, I just love these colours!
So after several false starts, I came up with this card. This set comes with two step stamping which I really love. I didn’t really notice that until I got it home and took a closer look at the stamp. I really like the two different sets of leaves and two different floral stamps, one for each set.

To create my card, I stamped the green leaves, or branches across the bottom of the page. I then took the floral stamp which lines up perfectly to fit over leaves and stamped across the pages in the three colours. I then embossed the basic white with the (retired) linen embossing folder. I wanted a very subtle texture and felt the coordinated embossing folder wouldn’t work for this card.
I matted it with Garden Green and decided to add a second mat in Pumpkin Pie to tie in the colours. I then coloured some (retired) white crinkle ribbon with daffodil delight and added two strips across the bottom to simulate a fence ( sort of). For added bling, I added some of the lovely Adhesive Backed Dragonflies and birds because gardens attract them right?
For my greeting, I used the Go To Greetings stamp set to make this a generic card to be sent later. I stamped my greeting on Basic White than used the double oval punch to punch out both the matting and the greeting.
I love how it just seems to scream spring to me which I hope will arrive early.
Product List

Sale-a-bration ends Feb 29th
There is still time to earn your free products with your purchases and there are three ways to do that!
SHOP
For every $60 purchase you make from either of the current catalogues, you will earn a FREE item from the $60 brochure. For Every $120 purchase you make, you can earn a FREE item from the $120 brochure or 2 free items from the $60 brochures. There is no limit to how many free products you can earn.

Purchase a pre-paid subscription for Paper Pumpkin and it also counts towards earning FREE STUFF.
Subscriptions can be for 1 month, 3 month, 6 month or even a 12 month so if you haven’t given Paper Pumpkin kits a try, now is a great time to do so.
HOST
Gather your friends, fellow crafters and family and host a party. It can be virtual or in person. All Qualifying orders will earn you Stampin’ Rewards based on the entire party’s combined total. You can used these rewards toward host exclusive products or toward building your own starter kit to become a new Stampin’ Up! demonstrator. Just to give you an idea;
- $200 in sales give you 10% in rewards
- $375 in Sales gives you 12% in rewards
- $550 in Sales gives you 14% in rewards
JOIN
Join now and build your starter kit by selecting $165 worth of products for just $135 (with free shipping). But it gets even better!
During Sale-a-bration ONLY, you can also choose from two options to add to your starter kit FREE!

Option 1
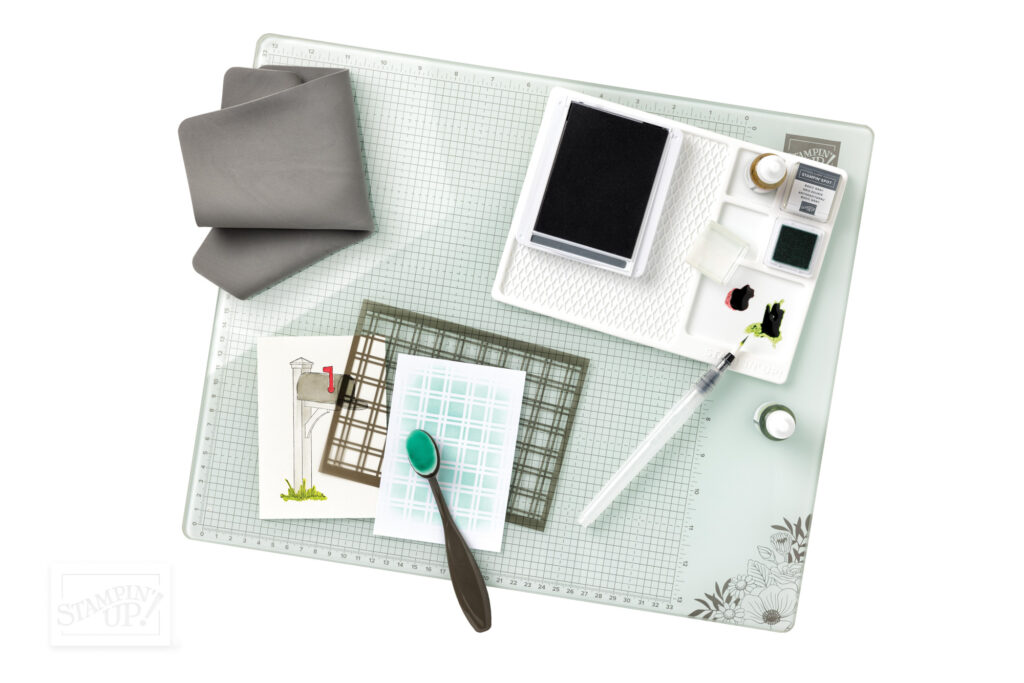
Choose the Stampin’ Glass Mat Studio (value $82)
Glass Mat – 17″ x 14″ heavy-duty, safety-tempered glass with raised nonslip rubber feet,
Silicon Mat – 8 3/8″ x 6″, nonslip multiuse mat, waterproof and heat resistant
Cleaning Cloth – 8 1/4″ x 8 1/4″, reuseable cleaning cloth, just add water and wipe
Option 2
Choose your choice of $41 in FREE products to add to your starter kit (value $41)
[/vc_column_text][/vc_column][/vc_row][vc_row][vc_column][html_block id=”11645″][vc_separator color=”black” style=”double” wd_hide_on_desktop=”no” wd_hide_on_tablet=”no” wd_hide_on_mobile=”no”][/vc_column][/vc_row][vc_row][vc_column][html_block id=”11646″][/vc_column][/vc_row]


Leave a Reply