If you are a paper crafter, you probably are like me. You have lots of scraps in your arsenal of crafting supplies just waiting to be used. Today I would like to show you how you can use up some of those scraps by creating a Floating Strip card.

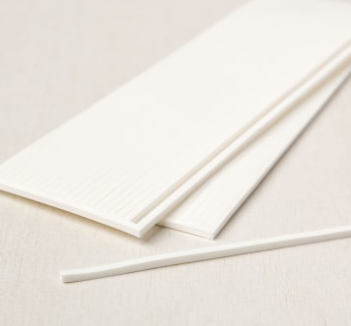
I first took a wide strip of window sheet and as you can see I positioned each strip of card stock randomly across the sheet. I had planned to make several cards at once but if you were only going to make one card, a 4″ x 4″ piece would be all you need.
Each strip has a small gap of approximately 1/8″ between them, if you wanted to measure but I just eyeballed it. The strips range between 1/4″ to 3/4″ in width. Once I was happy with how it looked, I adhered the strips using Stampin’ Seal but you could use Tear and Tape as well.
Tip: DO NOT USE LIQUID GLUE, or it will get sloppy and messy looking. The liquid glue when “squished” will flow out onto the gaps and you don’t want that.
Once everything was attached, I placed my largest Stitched circle die over it and ran it through my Cutting and Embossing machine.
I think I ran it back and forth 2-3 times to get a good cut through the window sheet. Even then, it didn’t cut right through. I had to use my snips to lightly trim around the edging which was clearly marked, so it was easy.
Tip: When placing your die, make sure the top and bottom of the circle die are lined up so they are on card stock, and not on the window sheet gap part or your shape will not be a perfect shaped circle when it is cut out.
I chose to cut out circles but you could cut out any shape you wanted. I forgot to take a picture of my die placement but this is what it all looks like when it was cut out.

Flipping over the cut out circle, I added Foam Adhesive strips along the window sheet and behind each strip of card stock so it won’t show through the gaps. You could also use regular dimensional’s but I like how the strips work so I used those. I then adhered the circle to a piece of 4″ by 5 1/4″ piece of Basic White for my card front.
NOTE: Foam adhesive strips are only 1/8″ thick and come in 9″ strips. They are flexible and can be shaped around curved areas. They also work well when creating shaker cards so I am told. I haven’t tried making a shaker card yet so I may have to give that a try.
Below are three different options for decorating, but really you can decorate any way you wish.
White on white
I cut out a floral piece in black card stock and adhered it to the front of the circle. I stamped my greeting and added a mat to match the floral piece. I that adhered with dimensional’s along with a few black mat dots
Bright and colourful.
I added a colourful mat to this card so my card front is a little smaller. I stamped my greeting on the card front and placed the circle so it runs off the side of card front. Once adhered, I just trimmed off the excess part of the circle
More subdued.
Similar to the middle card, but the only difference is the colouring of the mat and the stamped greeting. A more subdued look just by changing the colour of the mat.


My card base is a 4 1/4″ x 11″ piece of Basic White card stock and was scored it at 5 1/2″. I then folded it in half and burnished it with a bone folder to give it a good crease. Once my card front was completed, I adhered it to the card base. I love how the strips appear to be just “floating” on the card front since you don’t really see the window sheet behind it.
Supplies used to make this card include card stock and window sheets and whatever stamp set you have on hand. How easy it that? I love the foam adhesive strips as well, they are so versatile. If you don’t have those, I highly recommend them. Should you wish to purchase the supplies used to make these cards, please visit my online store by CLICKING HERE.
With the “Last Chance” product promotion going on right now, products are selling out quickly. Retiring products (clearly marked) will disappear on May 2nd. As people stock on those products they are also purchasing other products not retiring, so you might see “low inventory” here and there. Don’t forget to check out the Clearance Rack while you are there. Some products have savings of up to 60%.
Now that you’ve enjoyed this post…..
- Whenever you need crafting supplies, just CLICK HERE – You’ll be redirected to my Stampin’ Up! shopping page!
- Thank you for using my Current Host Code 4JMJR99N when your order is under $200.00. All orders placed with me, will receive a gift from me as a thank you. I appreciate your support.
- Be inspired, CLICK HERE! to see even more crafting projects
- Shop the CLEARANCE RACK with discounts up to 60%
- Download The United Through Creativity Digital Download FREE from Stampin’ Up!
- Contact me to receive my Monthly Newsletter, CLICK HERE

Susan Beale
Independent Stampin’ Up! Demonstrator
Ontario Canada
Email: sjbeale@canadianstamper.com
- Website: https://canadianstamper.com
- Facebook: https:facebook.com/canadianstamper
- Instagram: http://www.instagram.com/canadianstamper
Reader Interactions