While I am loving the new July-Dec 2022 mini catalogue, Today I took some time to make up a few cards using the Celebrate Sunflowers stamp set from the annual catalogue. This is one of my favourite stamp sets and I have used it over and over again.
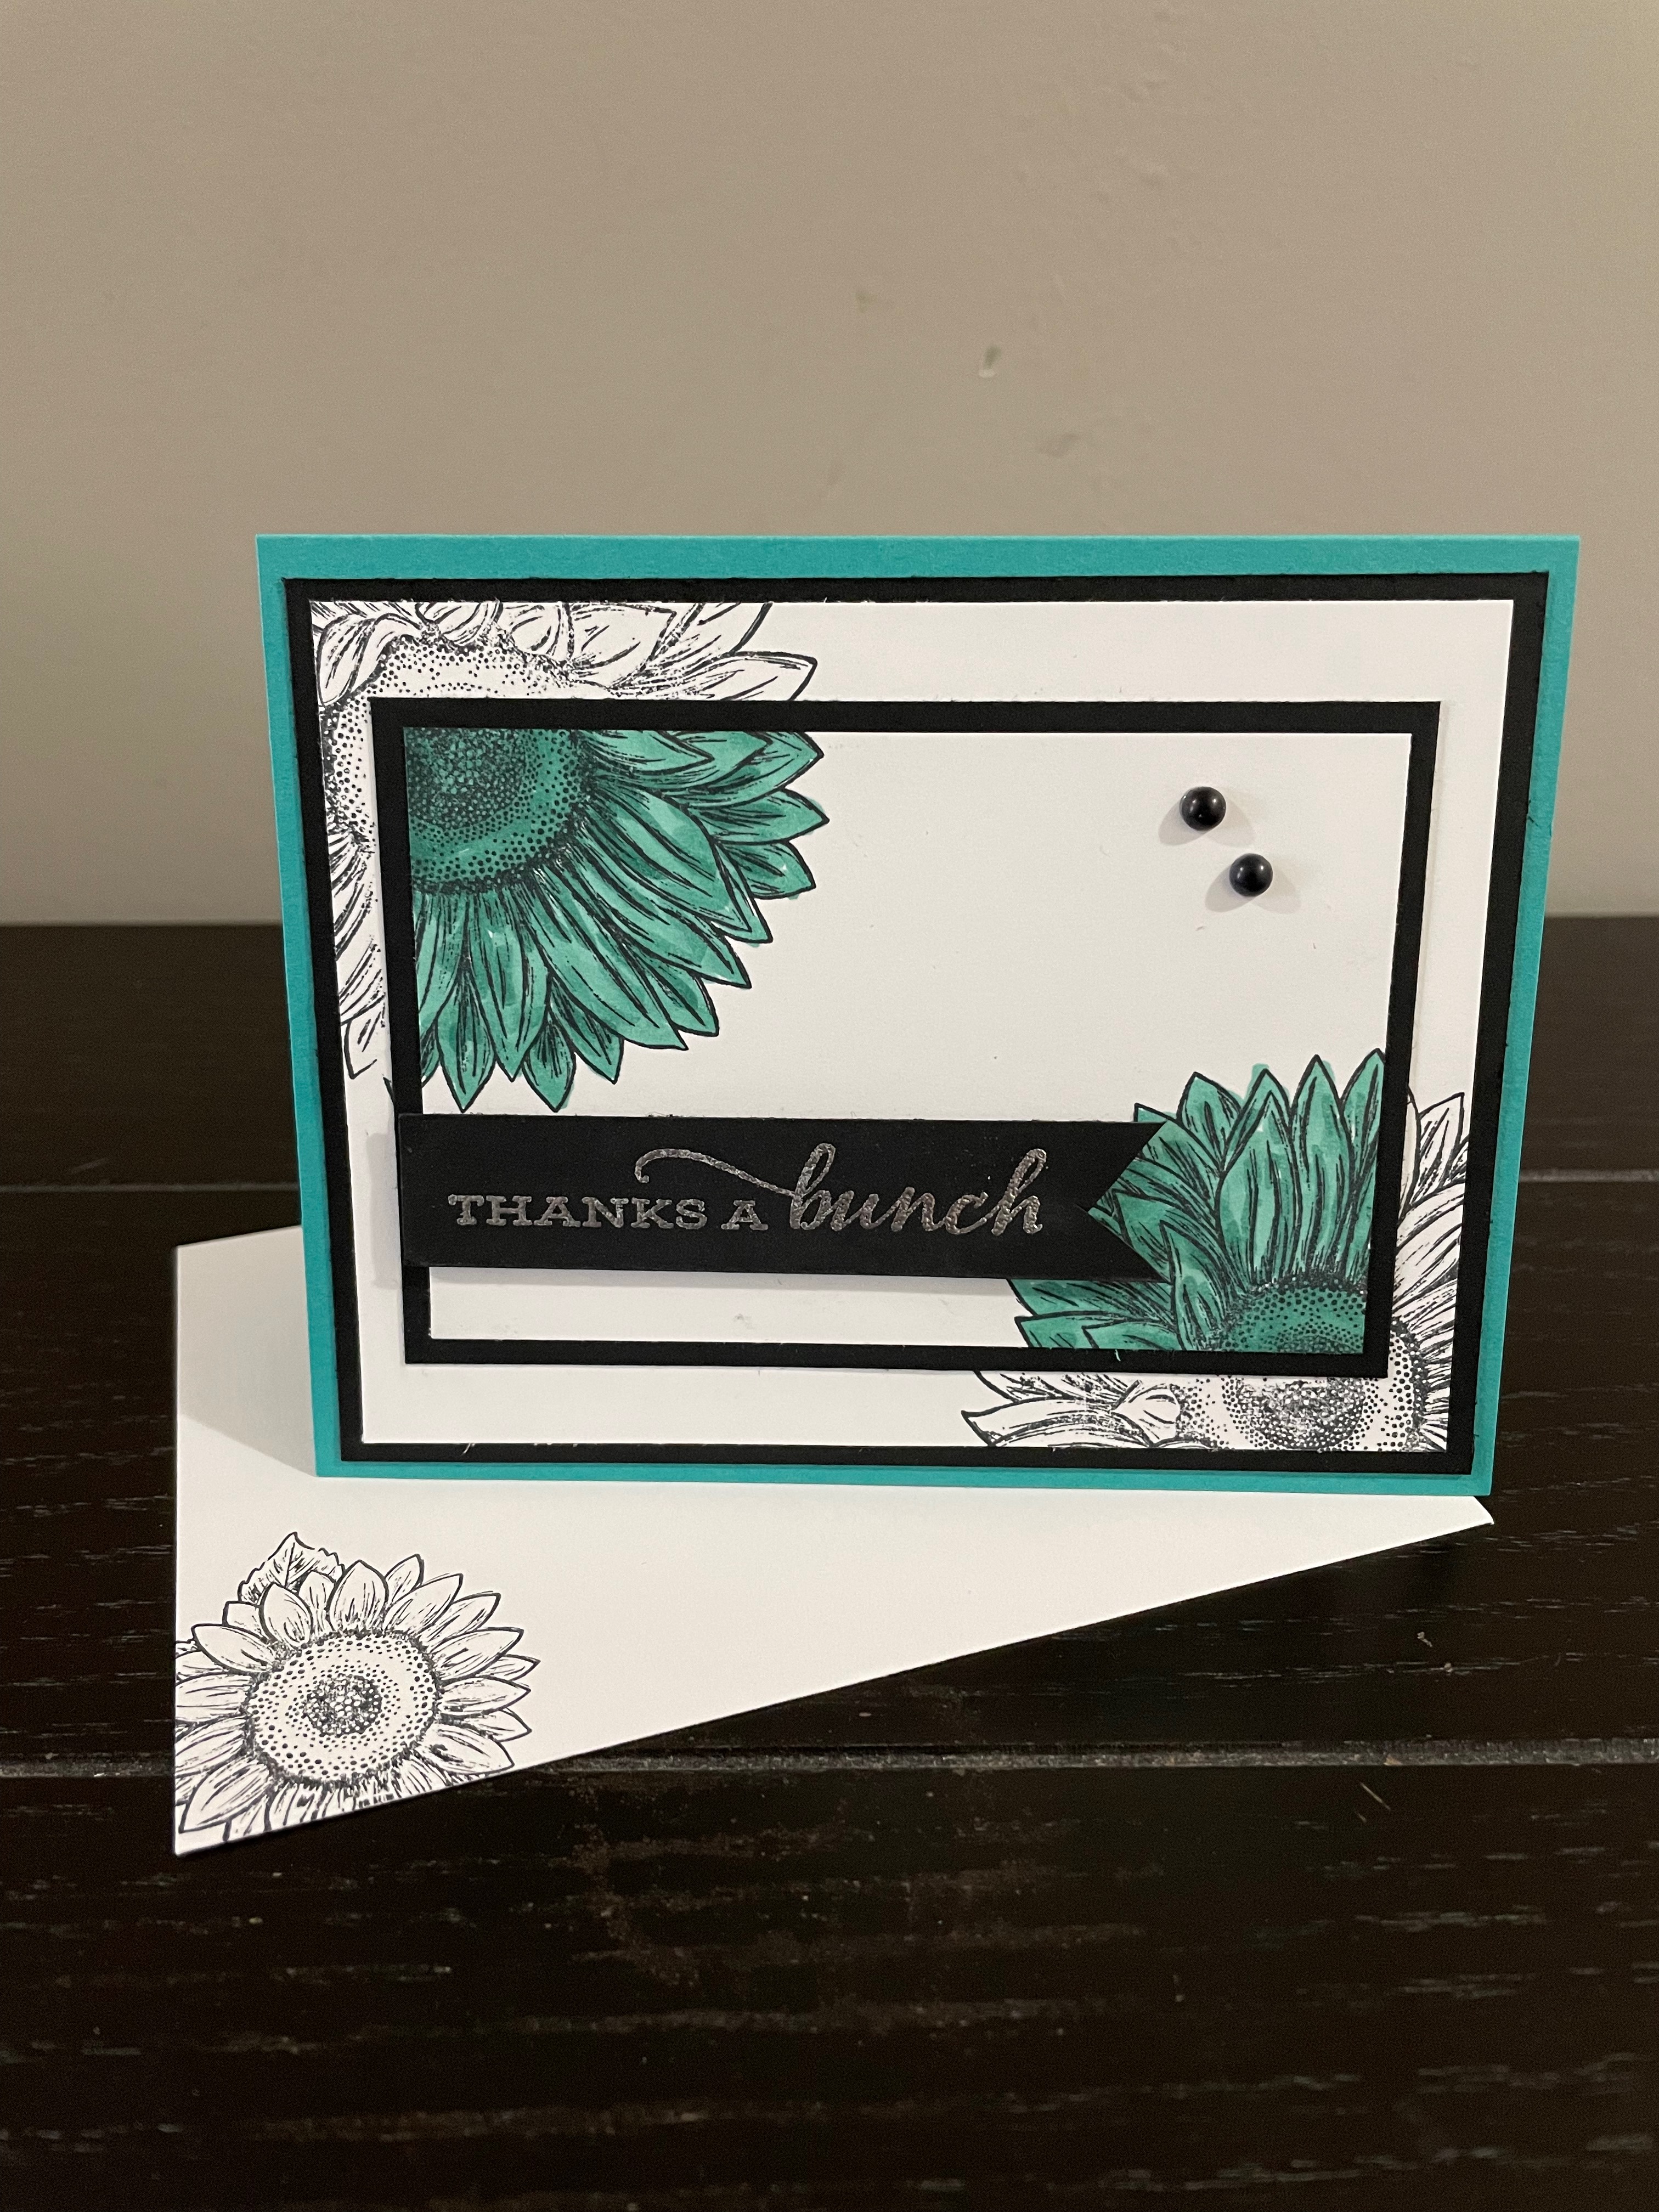
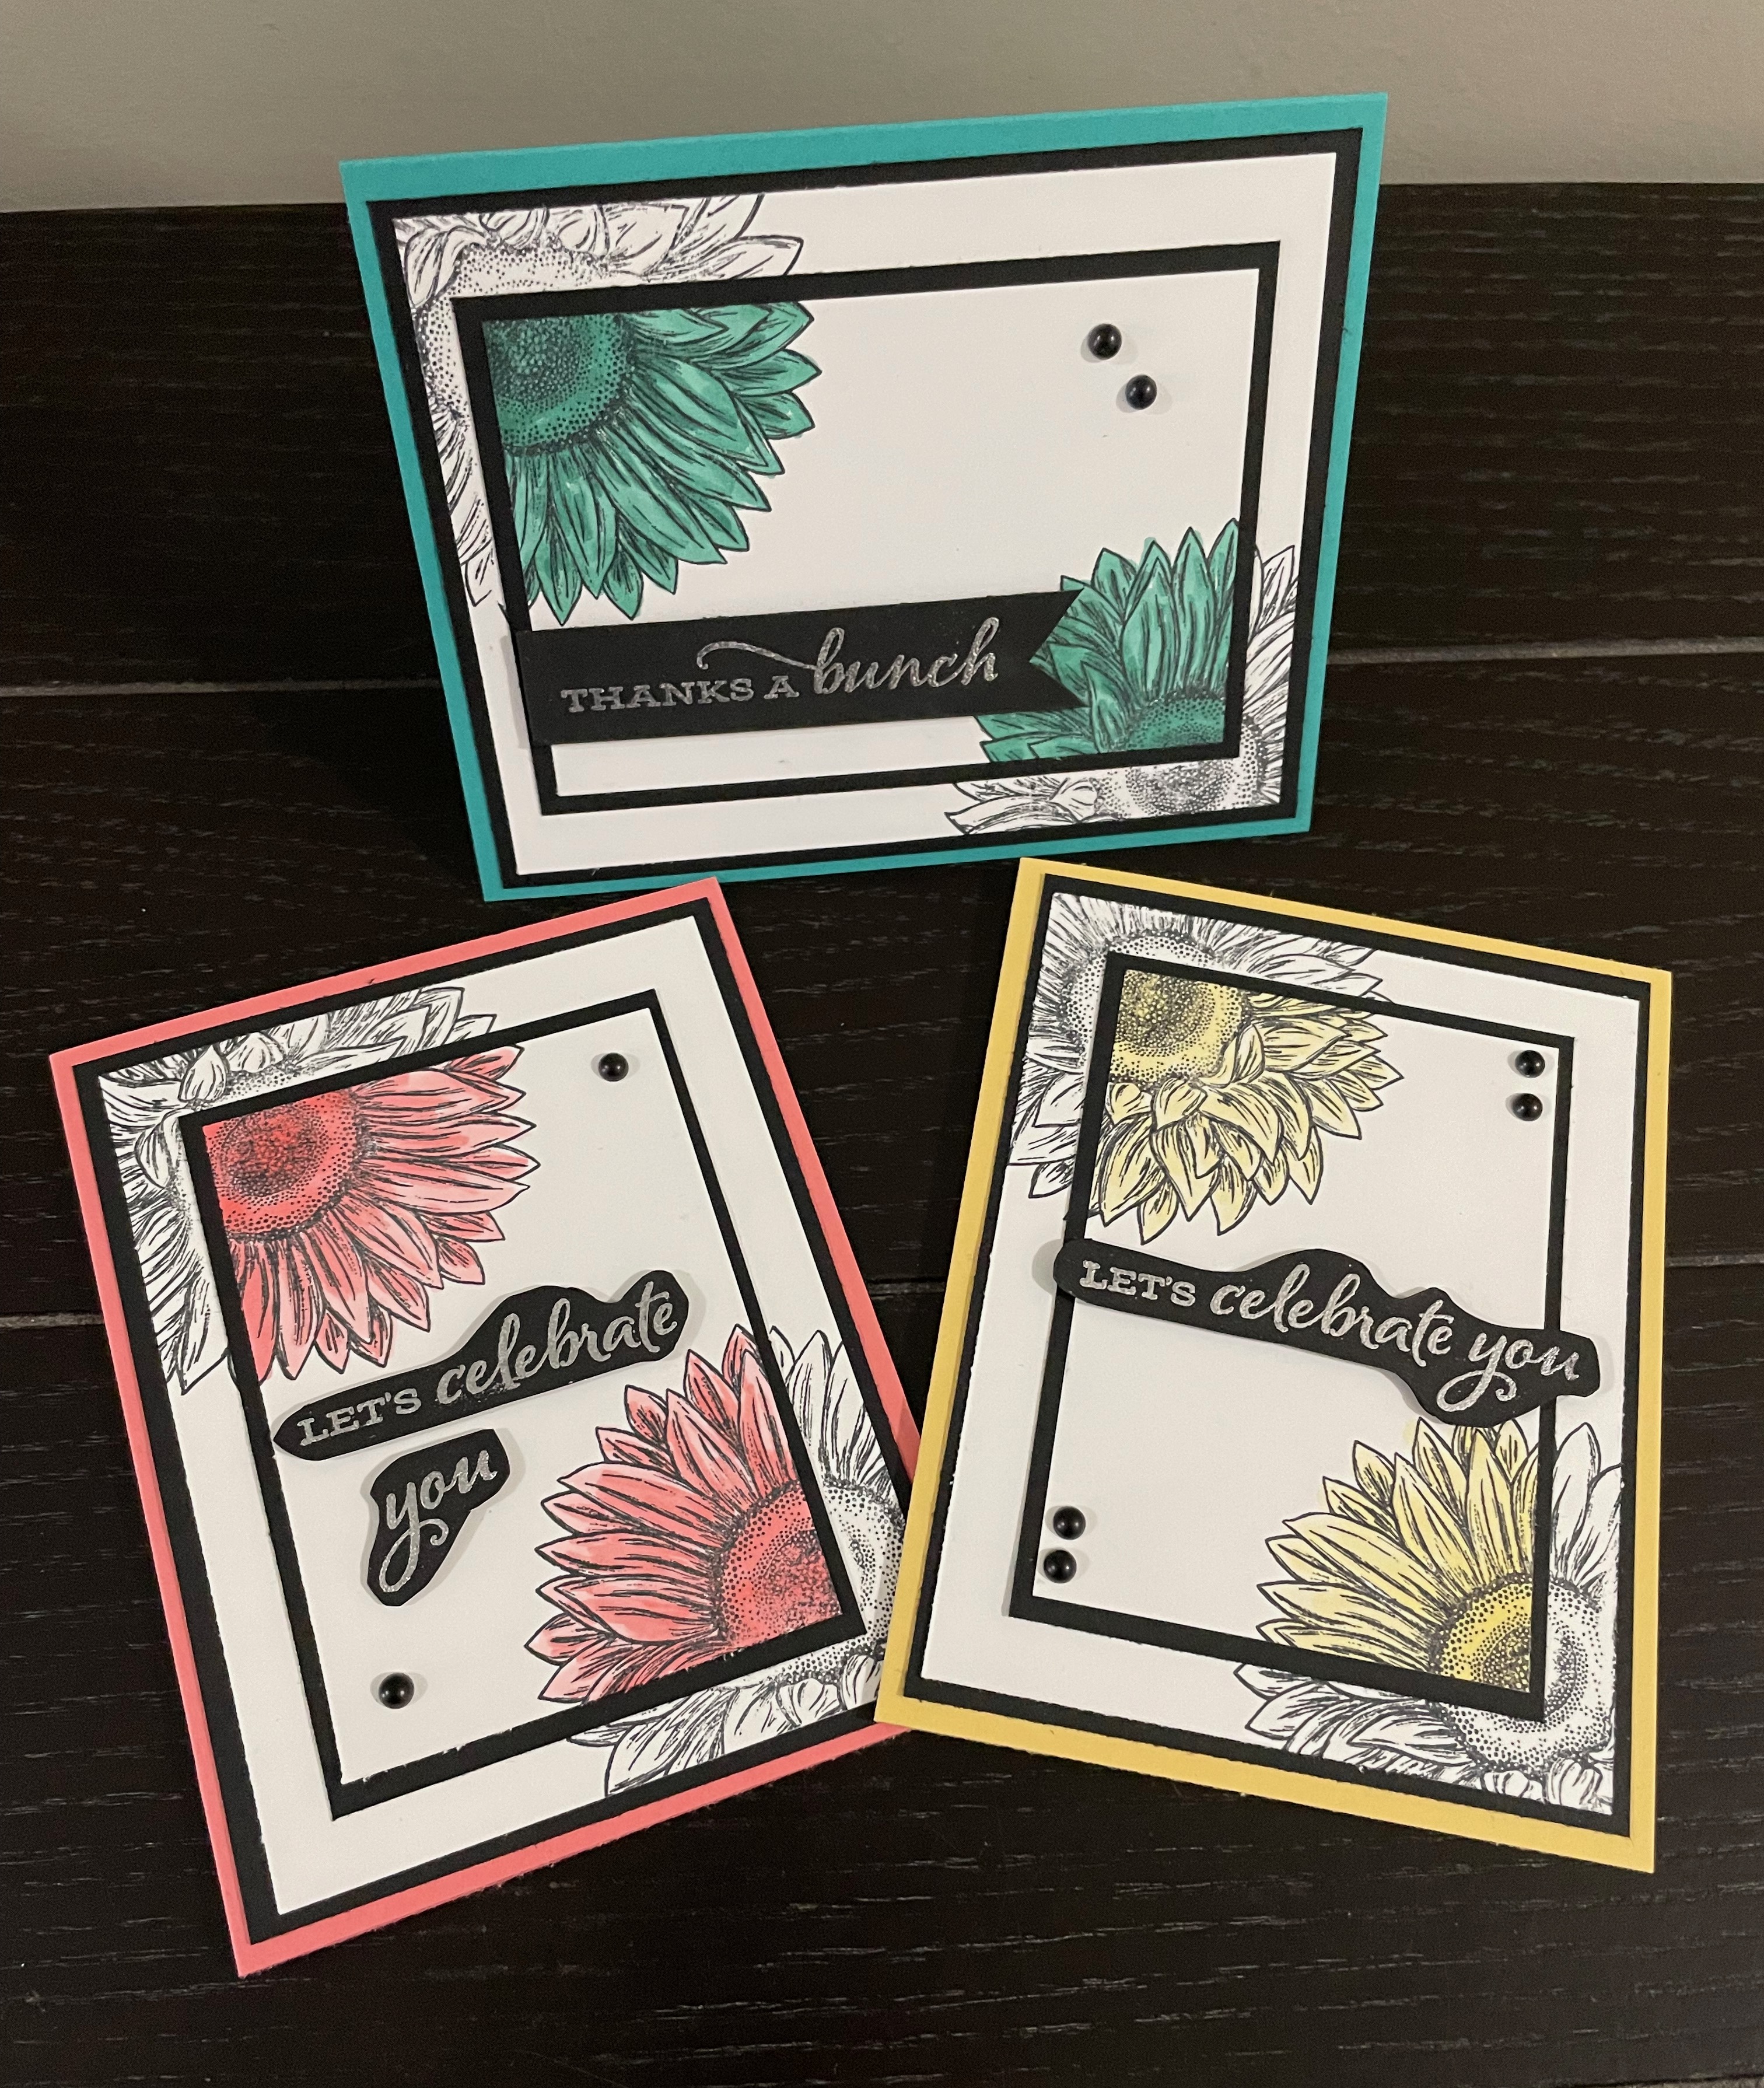
So today I have made up three cards using this same technique. It’s called a Spotlight card or layered card frame and it is also one of my favourite technique cards. I just love how the floral image is carried over with only a partial colouring. For this technique I recommend using a larger image so you don’t have any trouble with the image overlapping.
It looks so cool and yet is really quite easy to make.
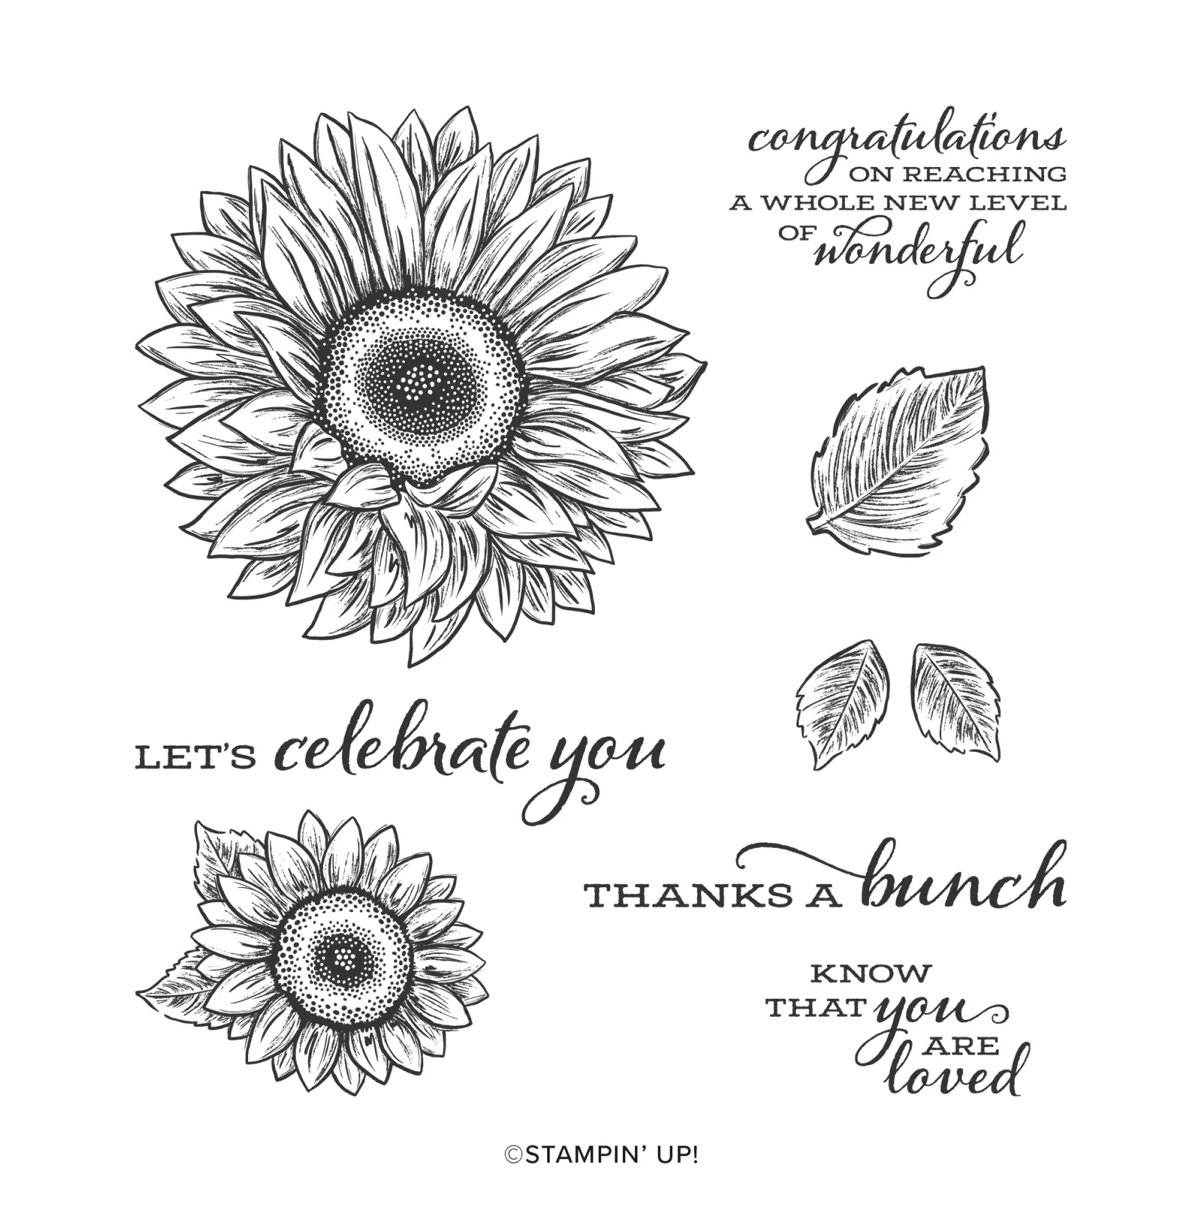
As you can see, the detail of these flowers make for a stunning image and the sentiments fit so many occasions.
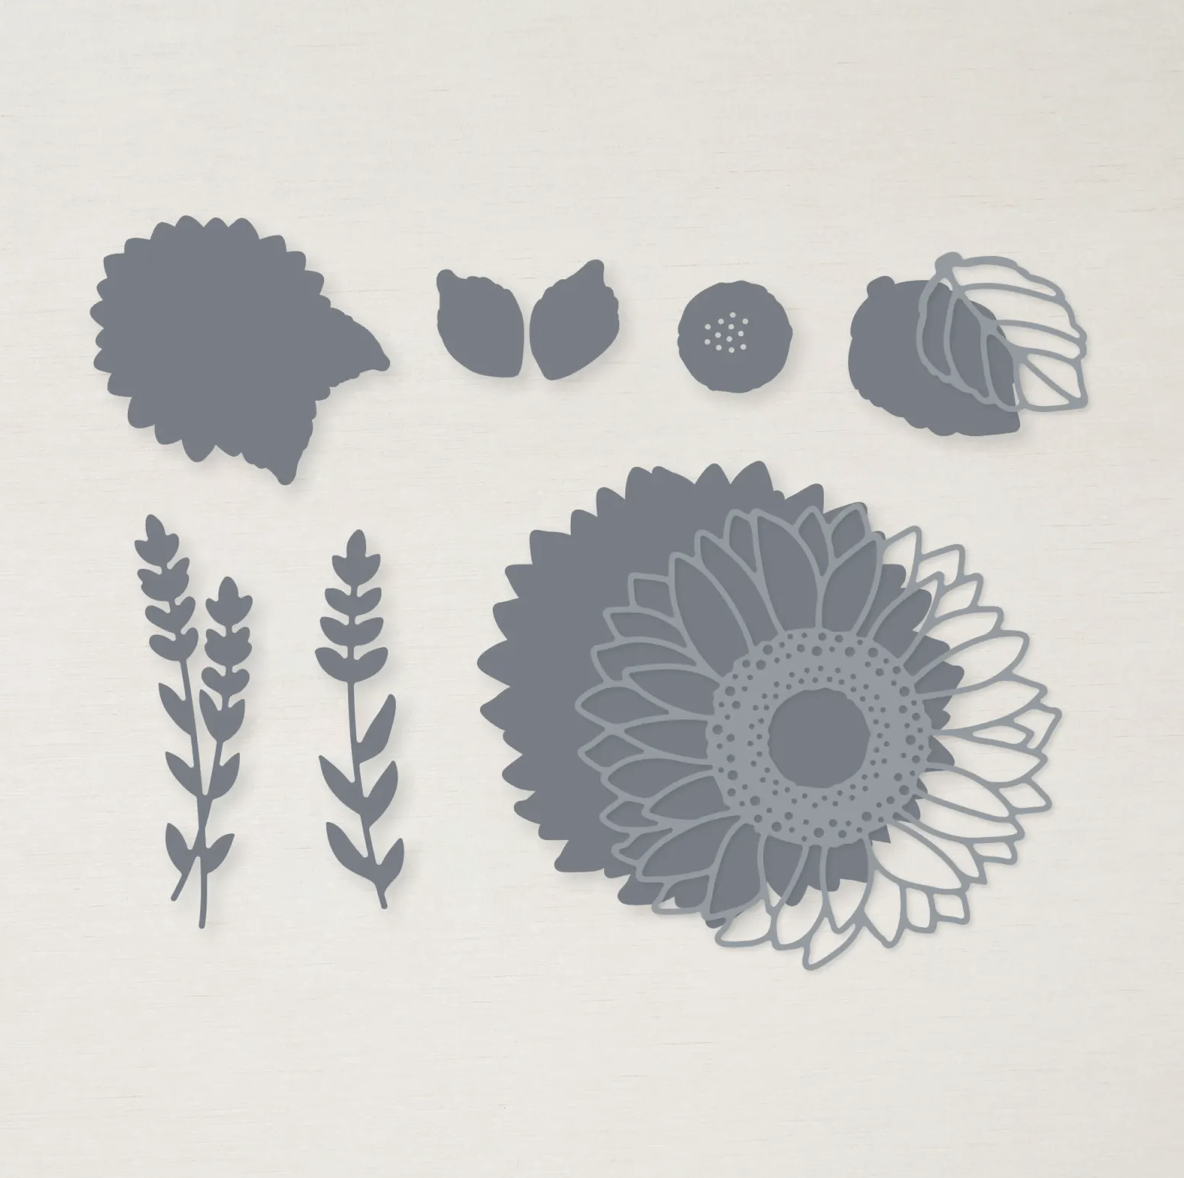
Although I didn’t use the coordinating dies for these cards, you can see how well they coordinate with the stamp.
To make this card
Score your card base at 4 1/4″ and crease with a bone folder. Adhere the black mat (layer 1) to card front and set aside.
Position the smaller white piece (layer 2) in the center of the larger white piece (layer 1). To secure so it doesn’t move, I placed a glue dot on the back of the small piece which will be removed later. Stamp the flower so it overlaps both pieces. Don’t worry if there is a small space that doesn’t get stamped. It will be covered with the matting when you assemble it.
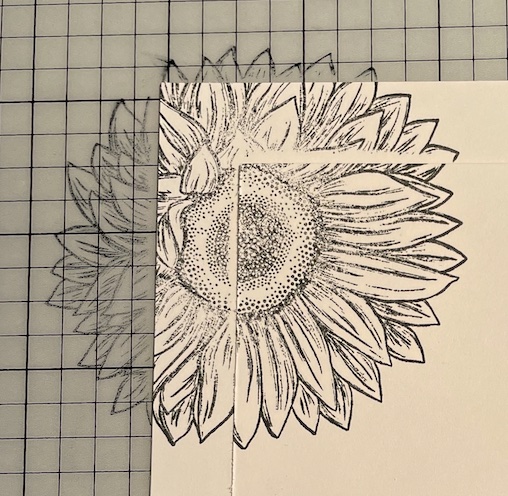
TIP: If you use a stamparatus, it will help with positioning and you can go over your stamp a second time if it’s not 100% clear.
Once you are happy with your stamped image remove the glue dot on the back to separate it from the larger piece of card stock. Colour only the floral image on the smaller card piece. Once done, adhere the smaller piece to the small black mat piece (layer 2). Adhere to the larger white piece (layer 1) making sure to line up the two images. You can now adhere to the black card front.
TIP: Using liquid glue for this step will give you a little wiggle room as you align the smaller layer with the floral image.
So easy right? I have even made cards with three layers, using this technique and it looks just as amazing!
For my sentiments, I stamped my greetings with Versamark ink onto a strip of black card stock. I then heat embossed it with white embossing powder. I then trimmed them and adhered to the card front with dimensional’s. For the inside of my card, I stamped the smaller floral image in the corner and on the front of the envelope for added interest. Black mat dots were also added to the card fronts for a little added bling.
As you can see in the picture below, each card’s greeting is just a little bit different. Should you wish to give this a try, I would love to see your completed card.
Supplies Used
- Card Base – Bermuda Bay – 5 1/2″ x 8 1/2″
- Inside of card – Basic White – 4″ x 5 1/4″
Layer 1
- Basic Black – 5 1/4″ x 4″
- Basic White – 5″ x 3 3/4″
Layer 2
- Basic Black – 3″ x 4 1/4″
- Basic White – 2 3/4″ x 4″
Sentiment
- Basic Black Strip – 3/4″ x 3″
Stamp Set – Celebrate Sunflowers
White Embossing Powder
Heat Tool
To purchase this lovely stamp set, CLICK HERE to visit my online store. When shopping please use my current Host Code – K3Y2QXUM and you will receive a free gift and thank you card from me. If you decide to purchase both the Stamp set and Dies (highly recommend), your purchase would qualify for a FREE product from the Sale-a-bration brochure. We all love free stuff right? However Sale-a-bration Free products are only available while supplies last so don’t delay.

Speaking of Sunflowers, the August Paper Pumpkin kit, includes both Sunflowers and a free gift. This kit includes elegant watercolor designs, TWO Classic Stampin’ Spots for a Two-Step stamping experience, and the all-new twist technique to make your floral designs come alive. Use the two Stampin’ Ink Spots to stamp the flower center and the petals, then turn and stamp again for a more detailed floral image! Don’t worry, Kits always come with detailed instructions complete with pictures.
And the August Paper Pumpkin Kit includes 8 Gold Foil Honeycomb Sheets as a FREE gift that will add the perfect golden accent to any card or project. You can use them as one sheet or cut them up for accenting!
But don’t wait, the deadline to subscribe is in just two days. You must subscribe by Aug 10th to get this kit. You can subscribe MONTHLY or you can subscribe by purchasing a PREPAID KIT, for 1, 3, 6 or 12 months. Just click on one of the links to subscribe.
This kit includes:
- All the supplies you need to create 9 cards: 3 each of 3 designs; and coordinating envelopes.
- An all-occasion stamp set to express words of gratitude, friendship, greetings and beautiful wildflower designed images.
- Specialty Vellum honeycomb shape pre-cut pieces.
- 2 Classic Stampin’ Spots (Crushed Curry and Soft Suede) for a Two-Step stamping experience with a twist!
- Paper pieces and embellishments with watercolor designs and images.
- Mini Stampin’ Dimensionals.
- FREE GIFT: 8 Gold Foil Honeycomb Sheets
Completed card size: 5-1/2″ x 4-1/4″ (14 x 10.8 cm)
Leave a Reply