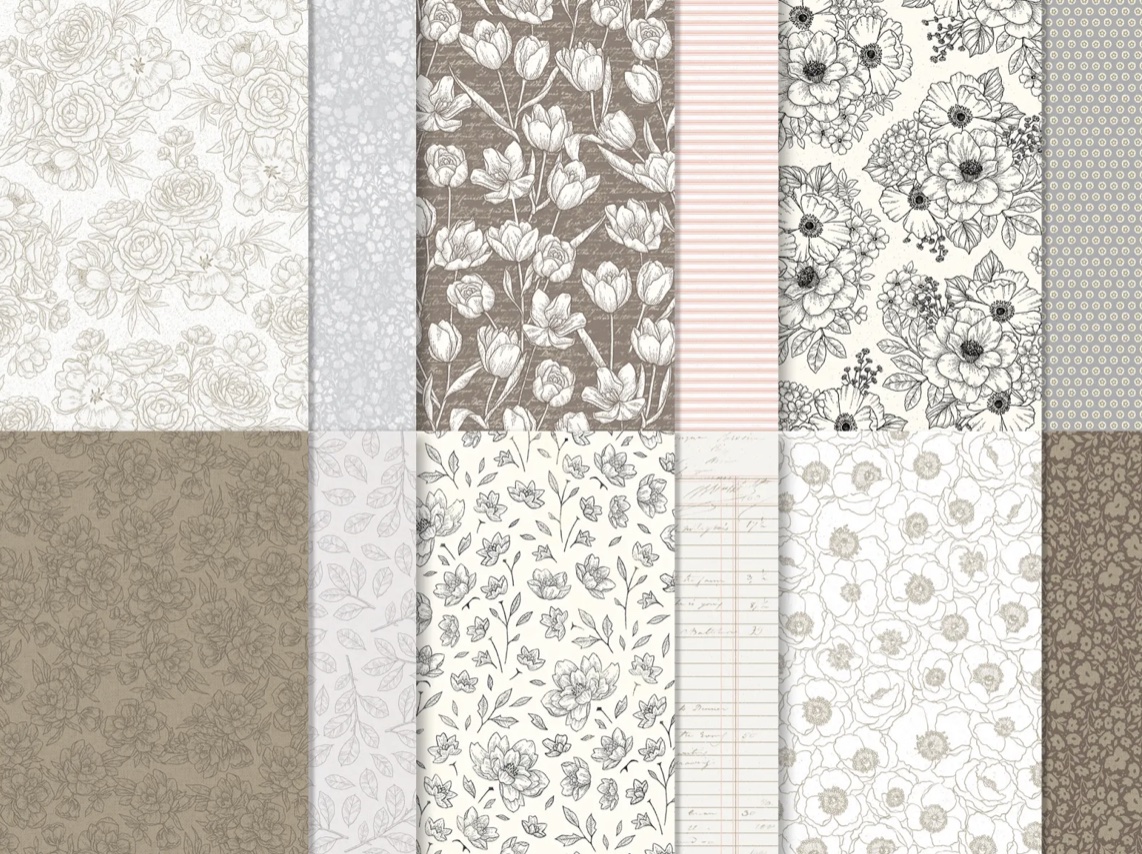
Wow! it’s been a while since I have posted anything but I am back from vacation and today I would like to to show you a quick and easy gift card holder you can make in very little time. This adorable card includes two pockets, one for a gift card and another for your greeting and it all lies flat so it easily fits into an envelope. I chose the gorgeous Abigail Rose designer series paper for this card. I just love how this paper looks when applied to cards.
To Make this card
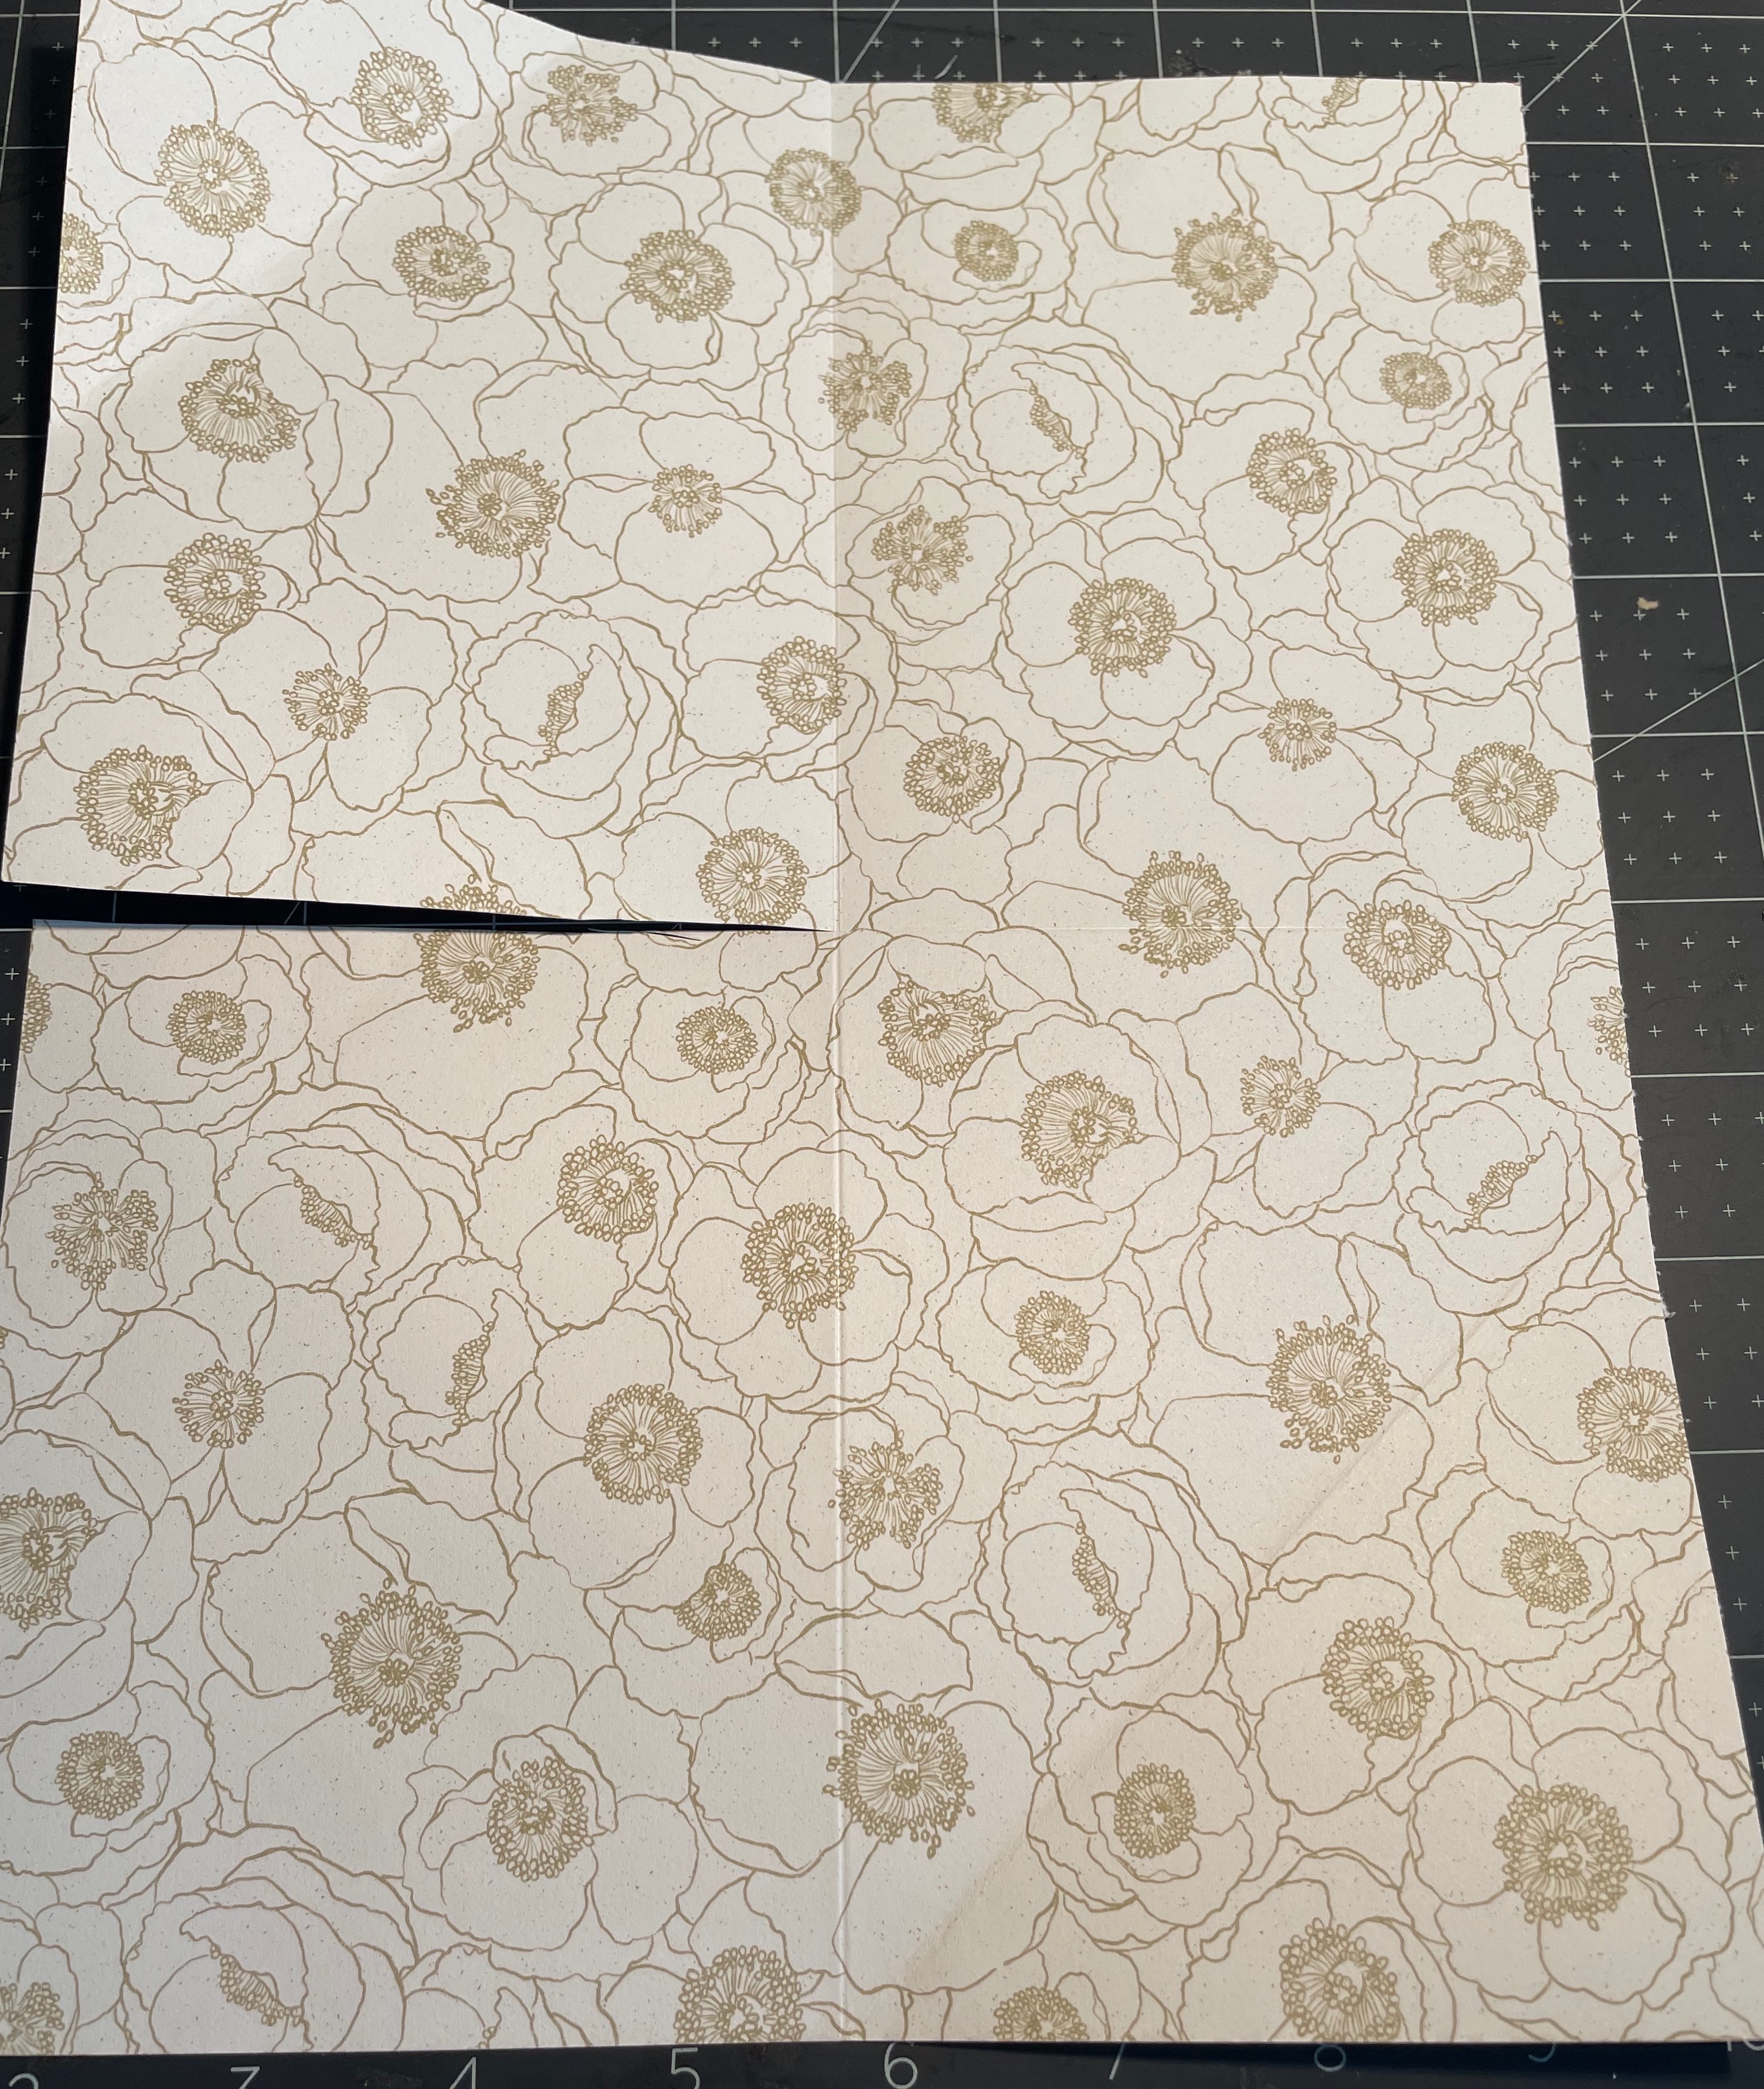
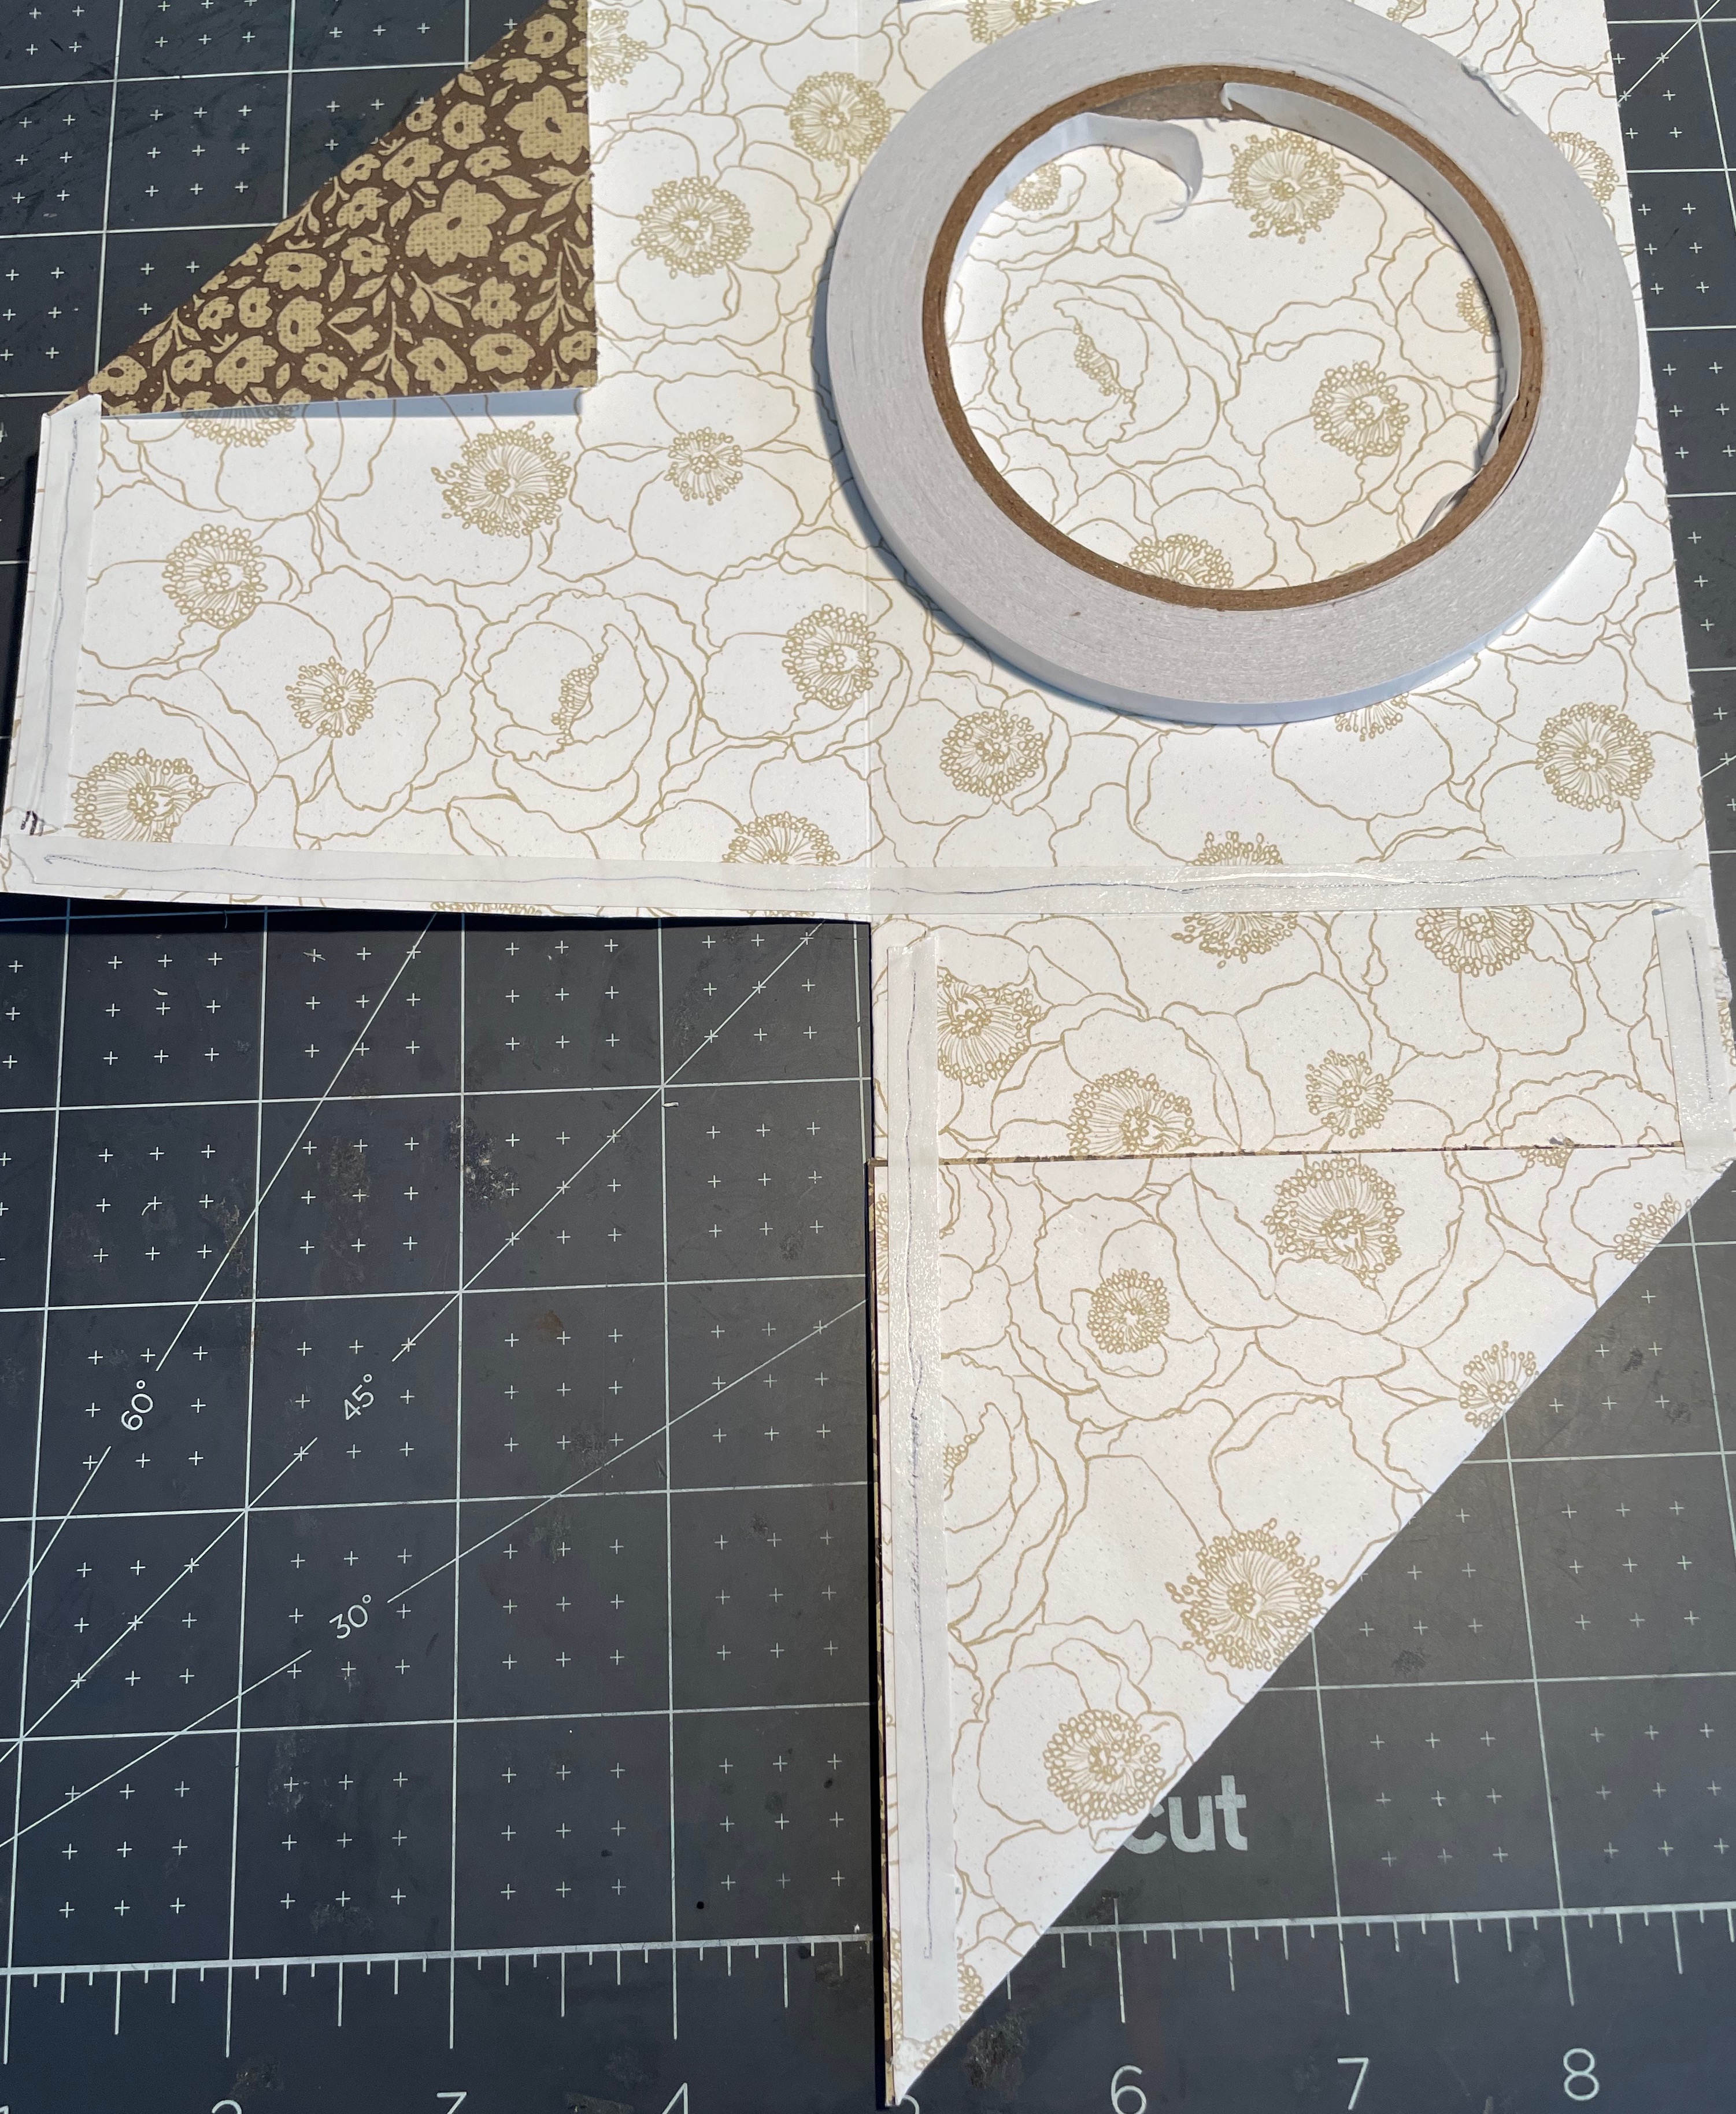
Place the pattern, you want to see as the finished card facing up then score the paper in half as follows;
On the 8 1/2″ side, score down the paper at 4 1/4″. On the 11″ side, score down the paper at 5 1/2″
With the 8 1/2″ side at the top, cut along the horizontal score line at the 5 1/2″ mark until you meet up with the vertical score line as shown.
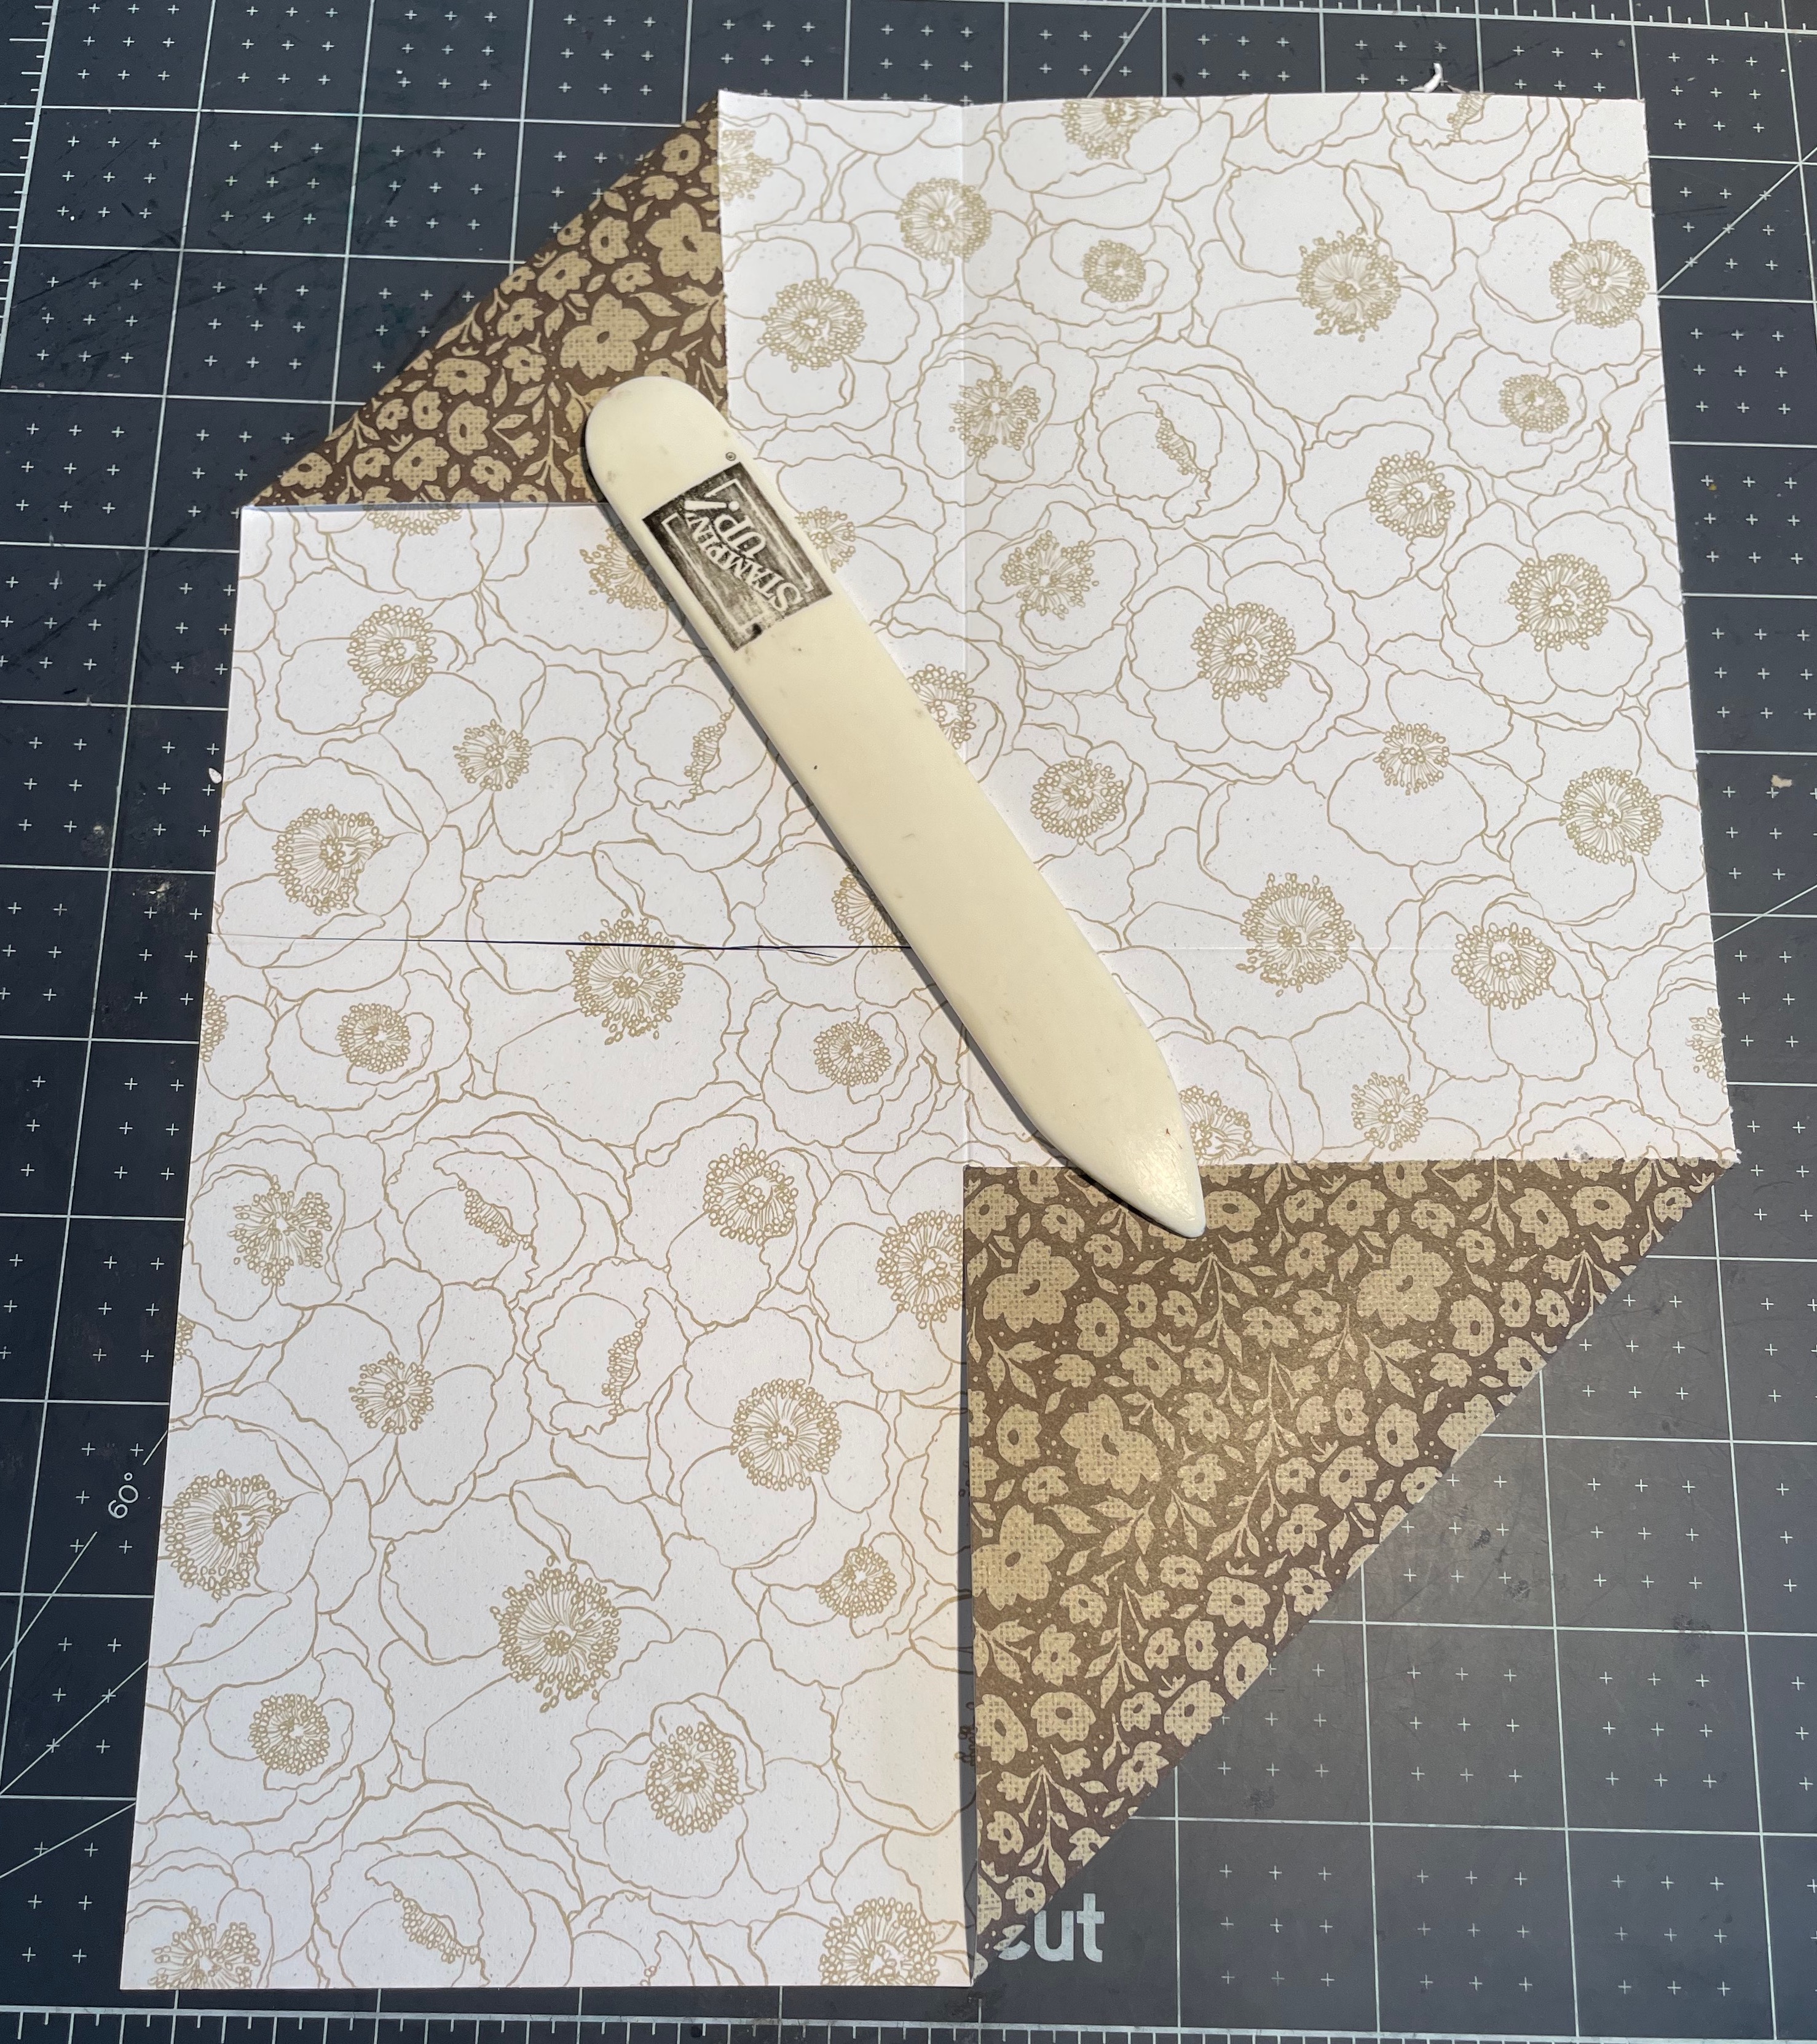
From the top left corner, fold your paper inwards so it is approx 1 1/2″ from the middle score line.
From the bottom right corner, fold the paper inwards right to the vertical score line.
Burnish both folds with the bone folder to give it a good crisp edge.
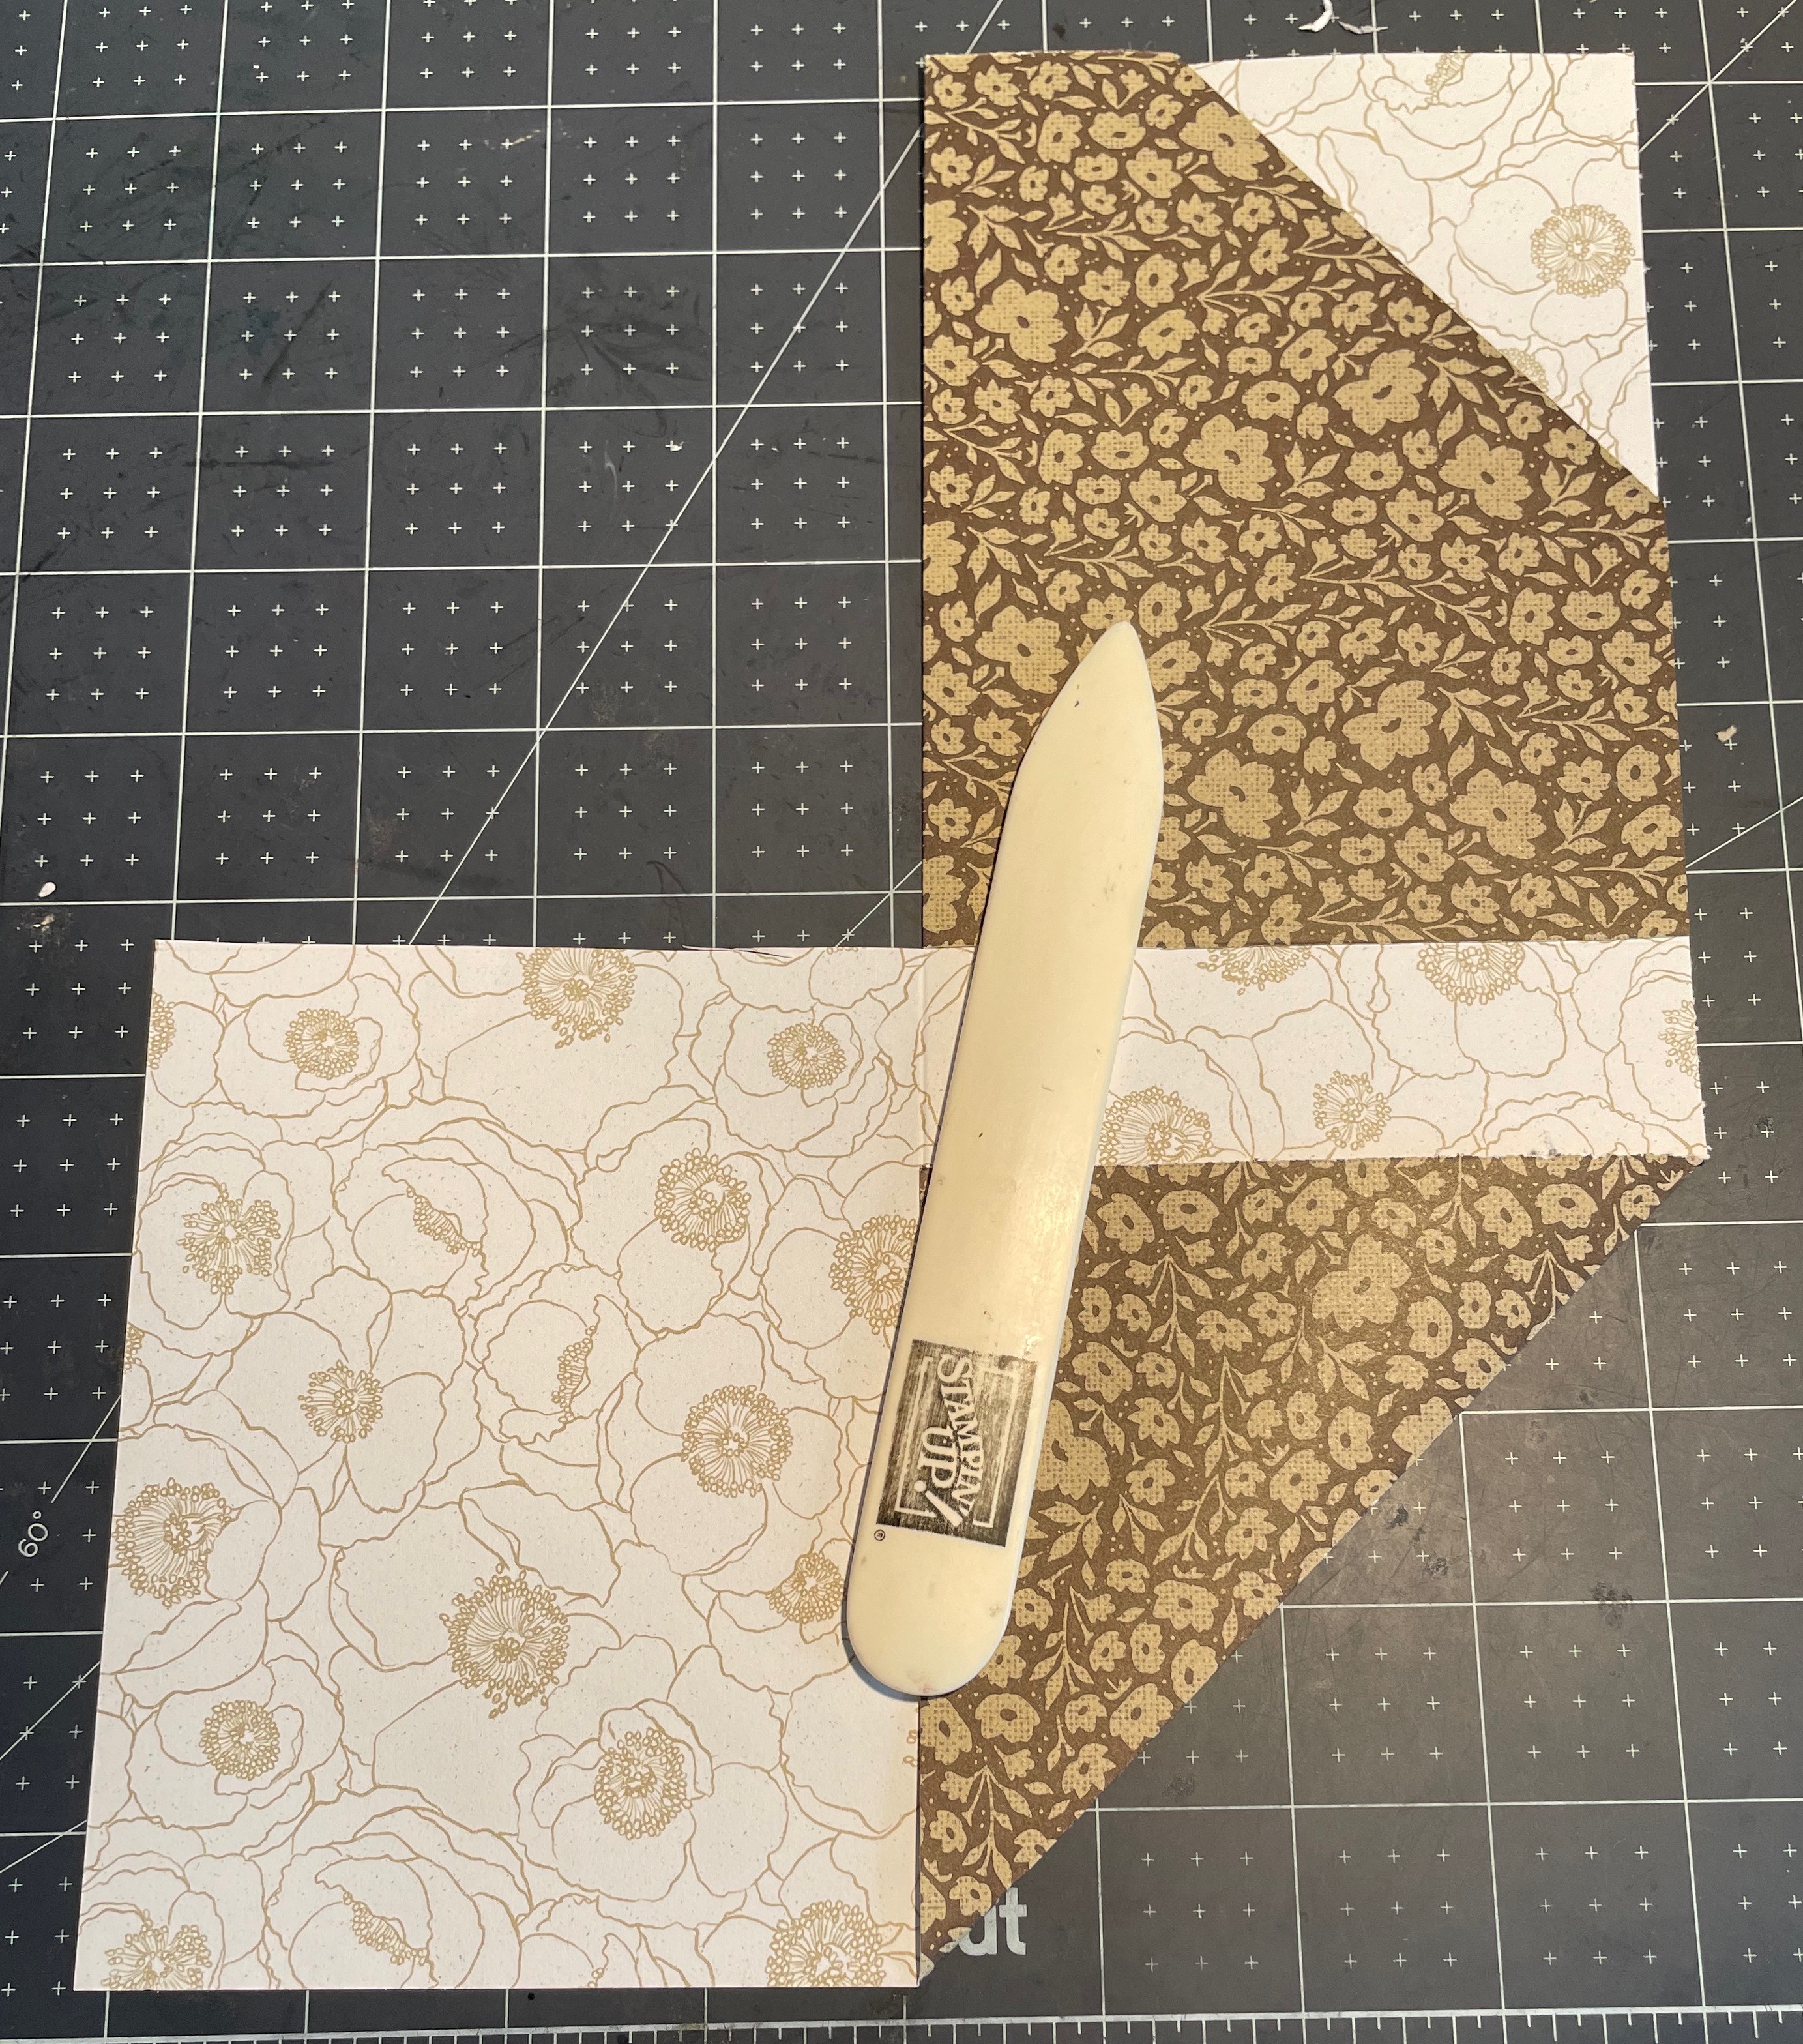
Now fold the top right section of the paper across at the score line but do not glue yet.
Fold the bottom right side underneath the folded corner. Now fold the piece showing inwards so it sits on top of the other folded triangle.
Again burnish your fold lines, which help keep it all closed and lying flat.
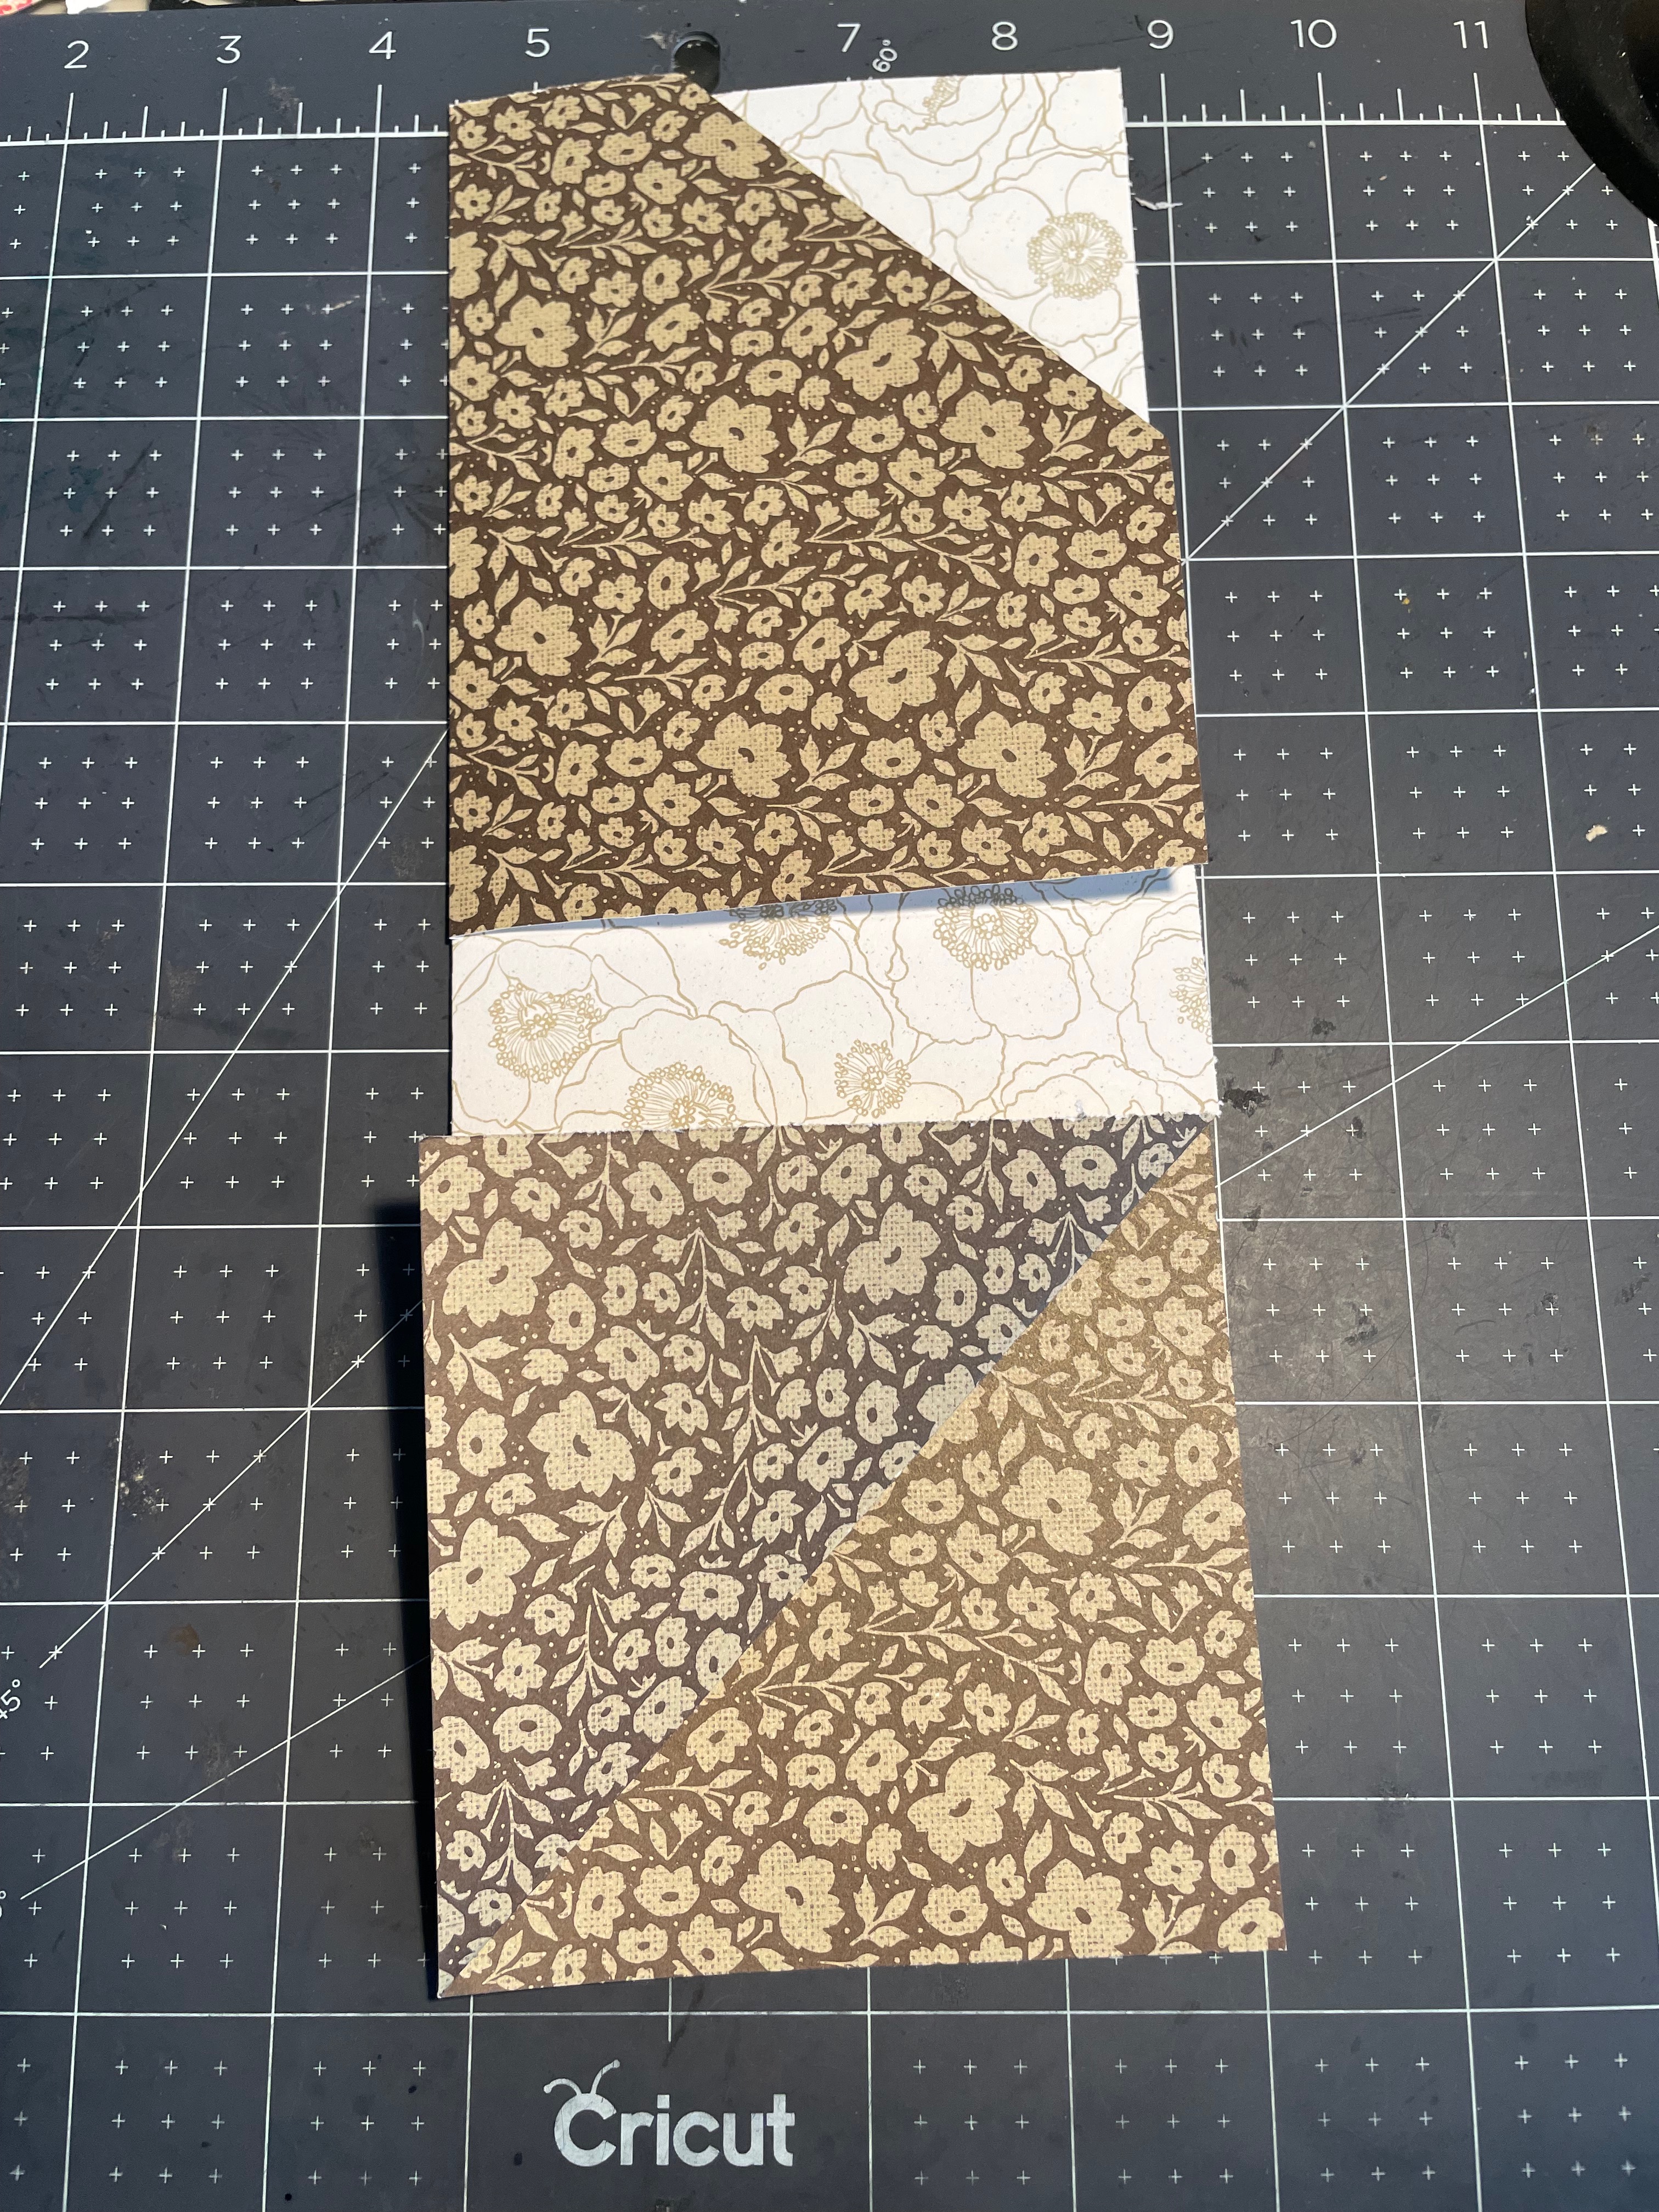
Now open it up again and add Tear and Tape along the side of the top piece. Add another strip right across the horizontal score line. Lastly, add strips to both sides of the bottom piece, taking care not to add any adhesive to the diagonal pieces. I marked the tape with a pen before removing the strips so you can see it a little better in the picture.

Once you fold in the top portion it creates the first pocket, then fold up the bottom portion and that will create the second pocket. I really like how the reverse side of the paper shows through in the middle for contrast.
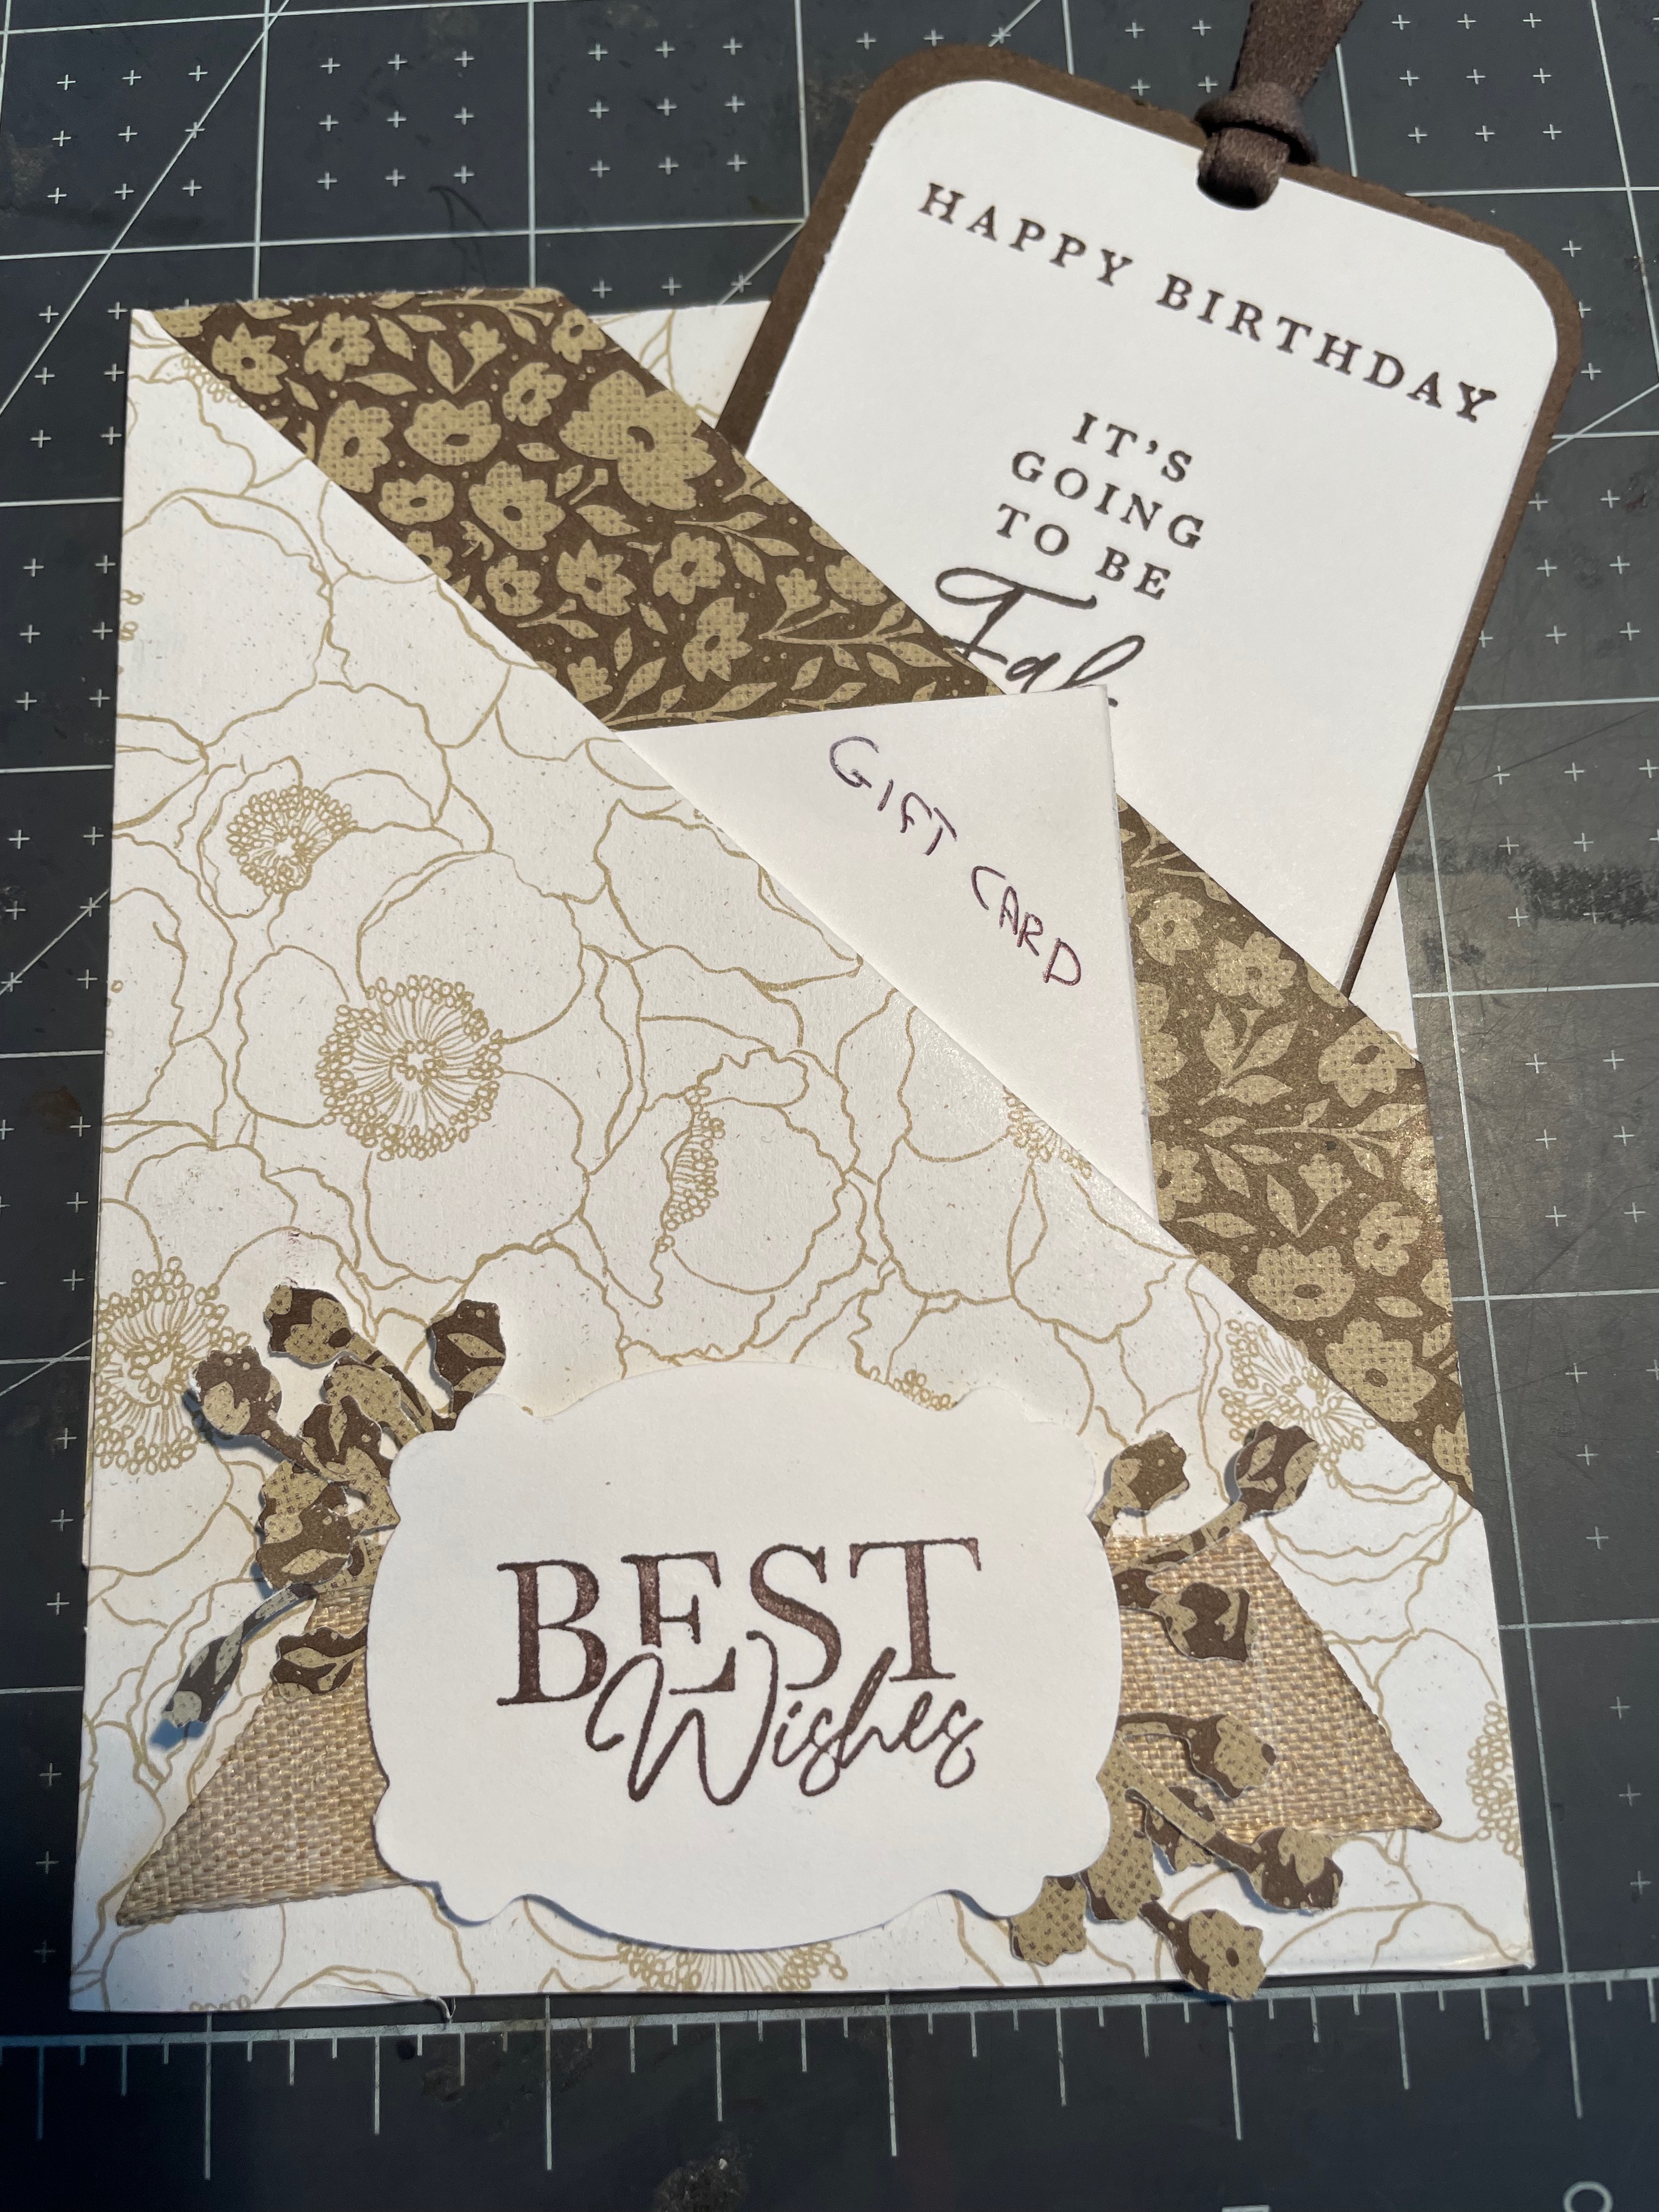
As you can see, the first pocket will easily fit a tag for your greeting while the front pocket will hold your gift card. For my tag greeting I stamped it on basic white card stock then adhered it to the matting before punching the hole. This way they line up perfectly. I added some early espresso ribbon to the top as it provides a hint to the recipient to pull it out.
For the front of the card, I used the Lasting Label punch for my greeting and the Bough punch for the sprigs. It is the same paper so it matches the middle strip perfectly. I added a strip of the Natural Finish Textured ribbon along the bottom before adhering the greeting/sprigs with dimensional’s.
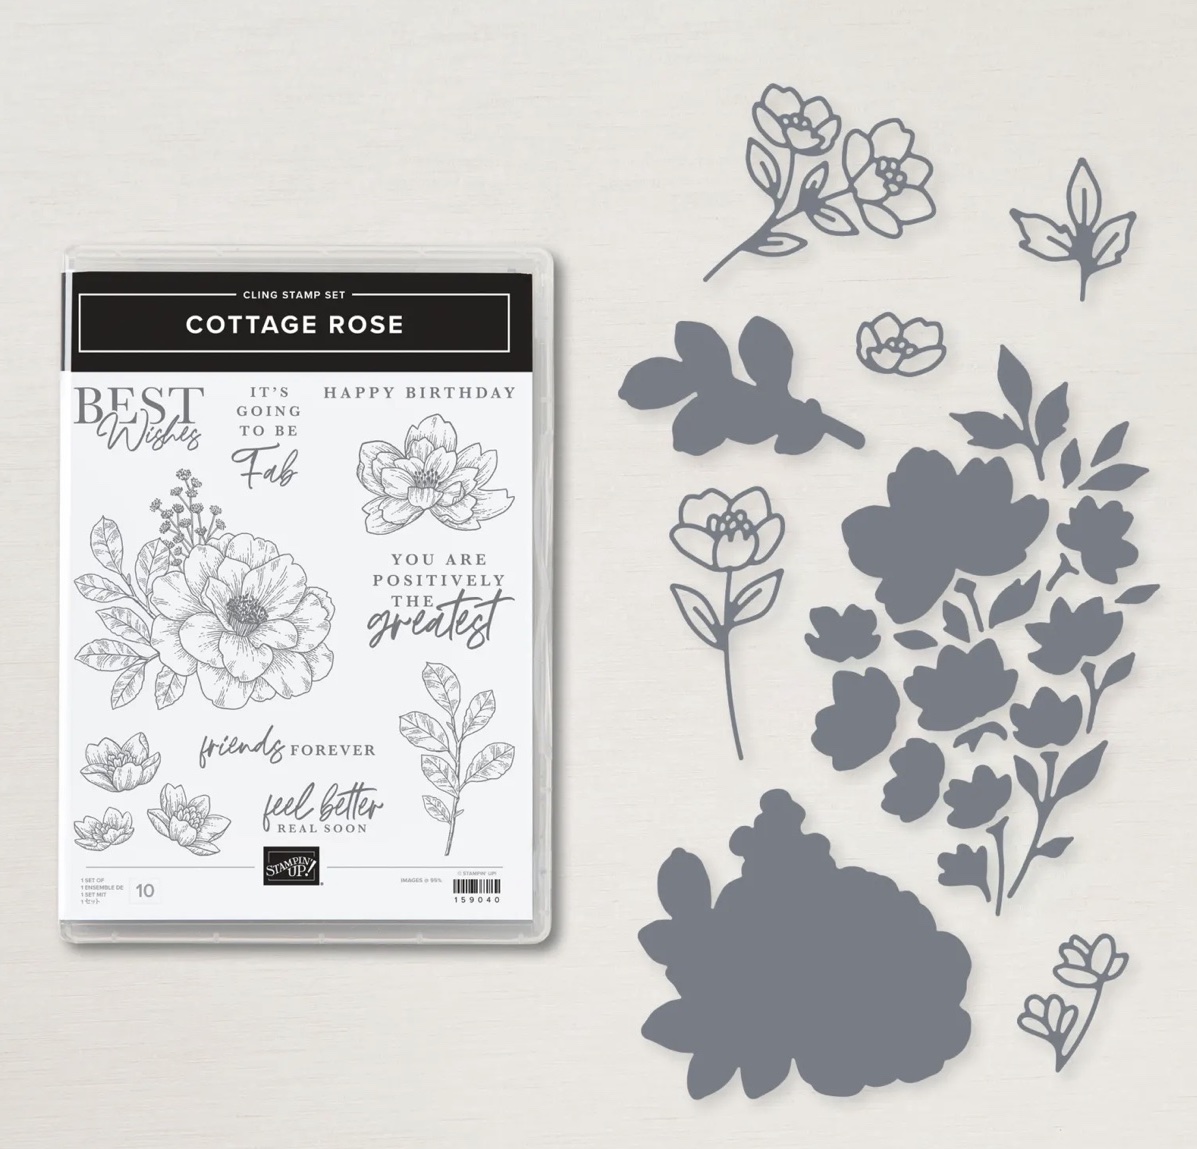
Both the Abigail Rose Designer Series paper and the Cottage Rose Bundle work beautifully together. The stamp has some beautiful images and the dies match up perfectly with the stamped images.
I cannot wait to make more of these cards for Christmas using some of the adorable Christmas paper Stampin’ Up! offers. They are a perfect way to tuck in a coffee card along with a thank you for friends, teachers, hairdressers or well… anyone!
Should you wish to purchase any of the other products listed above, I invite to you visit my online store by CLICKING HERE. Please use my current HOST CODE X2JN3VRY on any orders under $200.00. If your order is over $200, do not use the host code as you will earn your own rewards. I appreciate your business so for anyone who shops with me, I will send your a gift and thank you card from me.
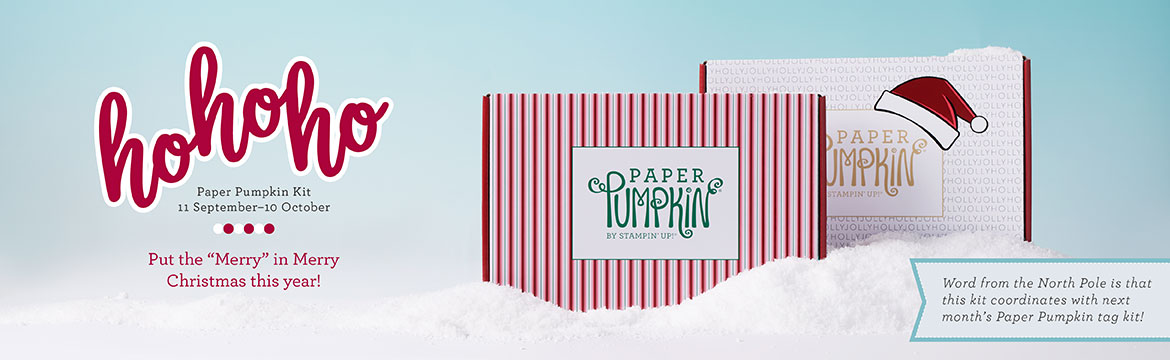
It’s time to get your Christmas crafting started and what better way than with the HO HO HO Paper Pumpkin kit. Each contains whimsical designs of Santa and his reindeer in a classic Christmas colour palette and they will look great on mantles everywhere. Each kit contains enough supplies to create 9 festive cards (3 each of 3 different designs) along with 9 coordinating envelopes. These kits are a fun way to to craft with friend & family of all ages because everything is included!
SPOILER ALERT!
Word from the North Pole is that this kit will also coordinate with next month’s Paper Pumpkin Gift Tag kit AND there’s even a special add-on product! With so much coordination between products, you’ll have a breeze at creating a cohesive look for all your holiday gifting needs. Make this season the most wonderful time of the year for your loved ones—and for yourself!
To receive this kit you must subscribe by October 10 and you have two options
1 – CLICK HERE to subscribe monthly and you will receive your monthly kit automatically.
2 – CLICK HERE to purchase a pre-paid kit (or two) for 1, 3, 6 or 12 months.

When shopping, who doesn’t love a deal, right? Well during the month of September, Stampin’ Up! is offering weekly deals but they only last for 7 days so check it out.
Details;
- New products added each week on 1, 8, 15, and 22 September.
- Promotion ends 28 September.
- Product options and discounts vary based on inventory availability.
- All order types qualify for this promotion (customer, demonstrator, workshop, and online).
- Discounted items can be added to a Starter Kit.
- Get the most up-to-date product information on the online store
I hope you have enjoyed this post….
- Whenever you need crafting supplies, just CLICK HERE – You’ll be redirected to my Stampin’ Up! shopping page!
- Thank you for using my Current Host code XHQUPCPF when your order is under $200.00. All orders placed with me, will receive a gift from me as a thank you. I appreciate your support.
- Be inspired, CLICK HERE! to see even more crafting projects
- Shop the CLEARANCE RACK with discounts up to 60%
- Contact me to receive my Monthly Newsletter, CLICK HERE

Susan Beale
Independent Stampin’ Up! Demonstrator
Ontario Canada
Email: sjbeale@canadianstamper.com
- Website: https://canadianstamper.com
- Facebook: https:facebook.com/canadianstamper
- Instagram: http://www.instagram.com/canadianstamper


Leave a Reply