Hi everyone, Christmas is just 13 days away, are you panicking yet? I have been busy wrapping up presents and am so happy that all my big presents have been purchased. I only have a few little stocking stuffers left to get then I am onto baking. While wrapping, I made up a few small gift boxes and wanted to share how I made them. You can make several of these gift boxes all at the same time. They are so quick to do and you can even make them taller with just a slight change to the dimension’s.
To make up these gift boxes
First, take a piece of 6″ x 11″ piece of card stock and score at 2 5/8″, 5 1/4″, 7 7/8″ and 10 1/2″ along the long side of the paper. Turn your paper clockwise and score on the shorter side at 2″.
Hint: To make a taller gift box, use a piece of 8″ x 11″ piece of card stock and score the same way.
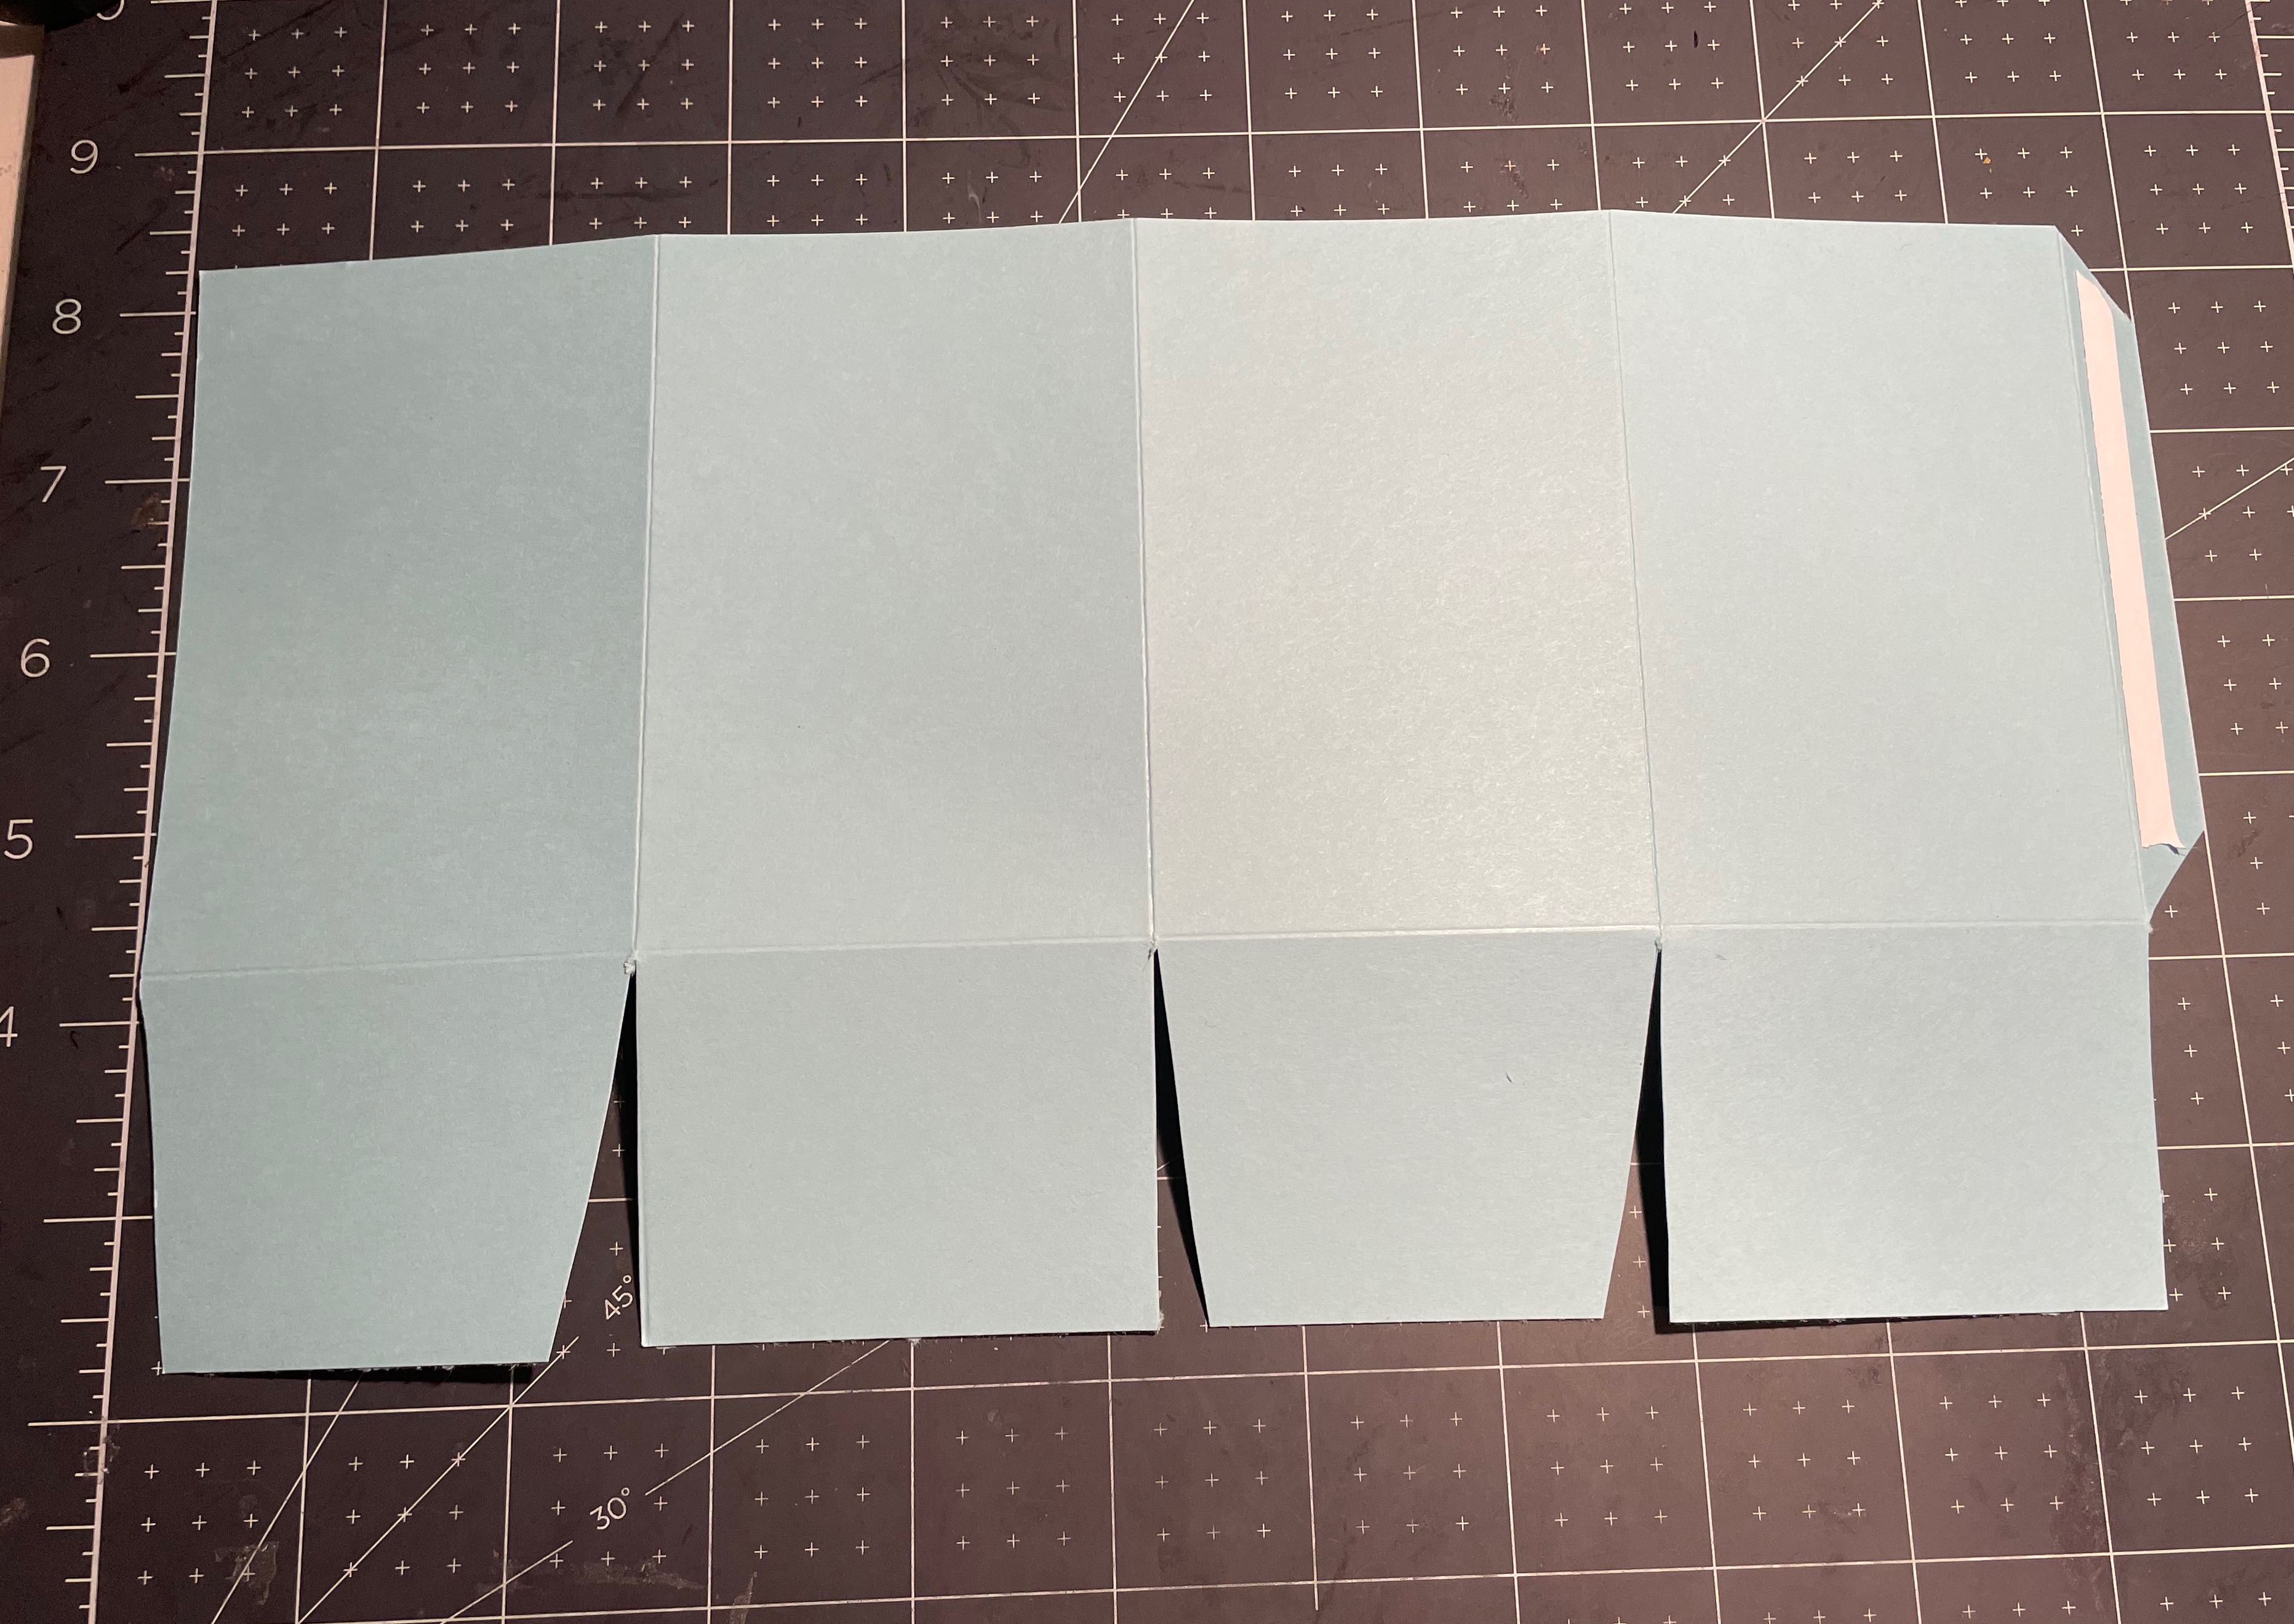
Fold and burnish all the score lines, giving them a good crease with your bone folder. With the small piece on the right, trim as shown.
Cut up the vertical score lines on the bottom to create flaps, I cut out wedges (a little large) on the first and third flaps on the bottom, leaving the other two flaps straight. I also trimmed the smaller tab on the right hand side. Trimming removes some of the bulk when you close it all up. I then added a strip of tear and tape to the flap then folded in my card stock to create the box shape. I then added adhesive to my bottom flaps and seal up the box. Simple right?
For my lid, I chose a piece of 6″ x 6″ white glitter paper. You could also use a colourful piece of designer series paper for a more festive look.
I scored all four sides at 1 5/8″. After folding and burnishing all the score lines, I cut up the vertical score lines on both the top and bottom to create my corner flaps. I then wedged those as shown
I then added liquid adhesive to each corner flap and folded them to the inside, making sure to square off the corners.

Note: Tear and Tape doesn’t stick to glitter paper very well so use liquid adhesive. It also takes longer to adhere so hold each flap in place a little longer.

Once you have both the box and lid done, fill the box and add your lid.
It takes about 36″ of ribbon to wrap as shown. I folded my ribbon in half across the top, flipped if over and criss crossed on the bottom before bringing the ends back to the top and tied my bow. If preferred you could just add a bow to the top instead of wrapping it.
I love how this looks. I haven’t added a tag yet, but will tie it to the top of the ribbon once I decide who to give this box to as a gift. I think it makes a great little hostess gift when invited to someone’s house for dinner.
NOTE: I see in the picture that the ribbon end has frayed a little. To stop this from happening, trim the ribbon, and run a lighter over the end very quickly to melt the ribbon a bit and stop the fraying. This works really well and doesn’t leave any burn marks if you do it quickly.

As mentioned before, you can make these gift boxes up pretty quickly and here are three I made up using designer series paper for the lids. I also tied a cute tag using the Decorative Circle Punch.
The greeting was from the Santa’s Delivery Stamp set but any suitable greeting will work.
The finished box size is 4″ high and measures 2 5/8″ x 2 5/8″ around.
Note: If you chose to make a taller box using an piece of 8″ x 11″ piece of card stock, the box will be 6″ high and the same size around when completed
You can purchase any of the supplies needed to make up this gift box by visiting my ONLINE STORE. When shopping, please add my current HOST CODE – QGWMSZ9 before closing your order, if your order is under $200.00. If your order is over $200, do not use the host code as you will earn your own rewards. I appreciate your business so for anyone who shops with me, I will send you a gift and thank you card from me.
9f235f95d85c”>tams# 77157
 Glimmer Paper")


Leave a Reply