Today I want to share with you how to make a card that looks like an open book. Can you believe this card will fit into a standard envelope? I know, right? Although it may not be an every day sort of card, I think it would be perfect for a major event, such as a milestone birthday, a christening, a graduation or retirement. I think this would also be a perfect card (decorated differently) for a wedding or special event where guests would normally sign in. This card could sit behind the open guest book for some added pizazz.
While this card may look difficult to make, it is much easier than I first thought it would be and the finished card makes it worthwhile. For this Card I used the Beautiful World Bundle and the World of Good Specialty Designer Series paper. You can view both products along with all the other amazing products on my online store by clicking here. If you choose to make a purchase, please use my March Host Code – 3JTVASQ6 to be eligible for the monthly draw.
This card is made in stages. First take your main Card base and score it at 2 1/8″ and 4 1/4″. Fold the card in half as you would a normal card. Fold the outer scored piece toward the fold to create a flap. Make sure you give both folds a good crease with your bone folder so the card will stand up well. Line up and adhere the Designer Series Paper panels to the flap on the left and the inside edge of your card on the right.
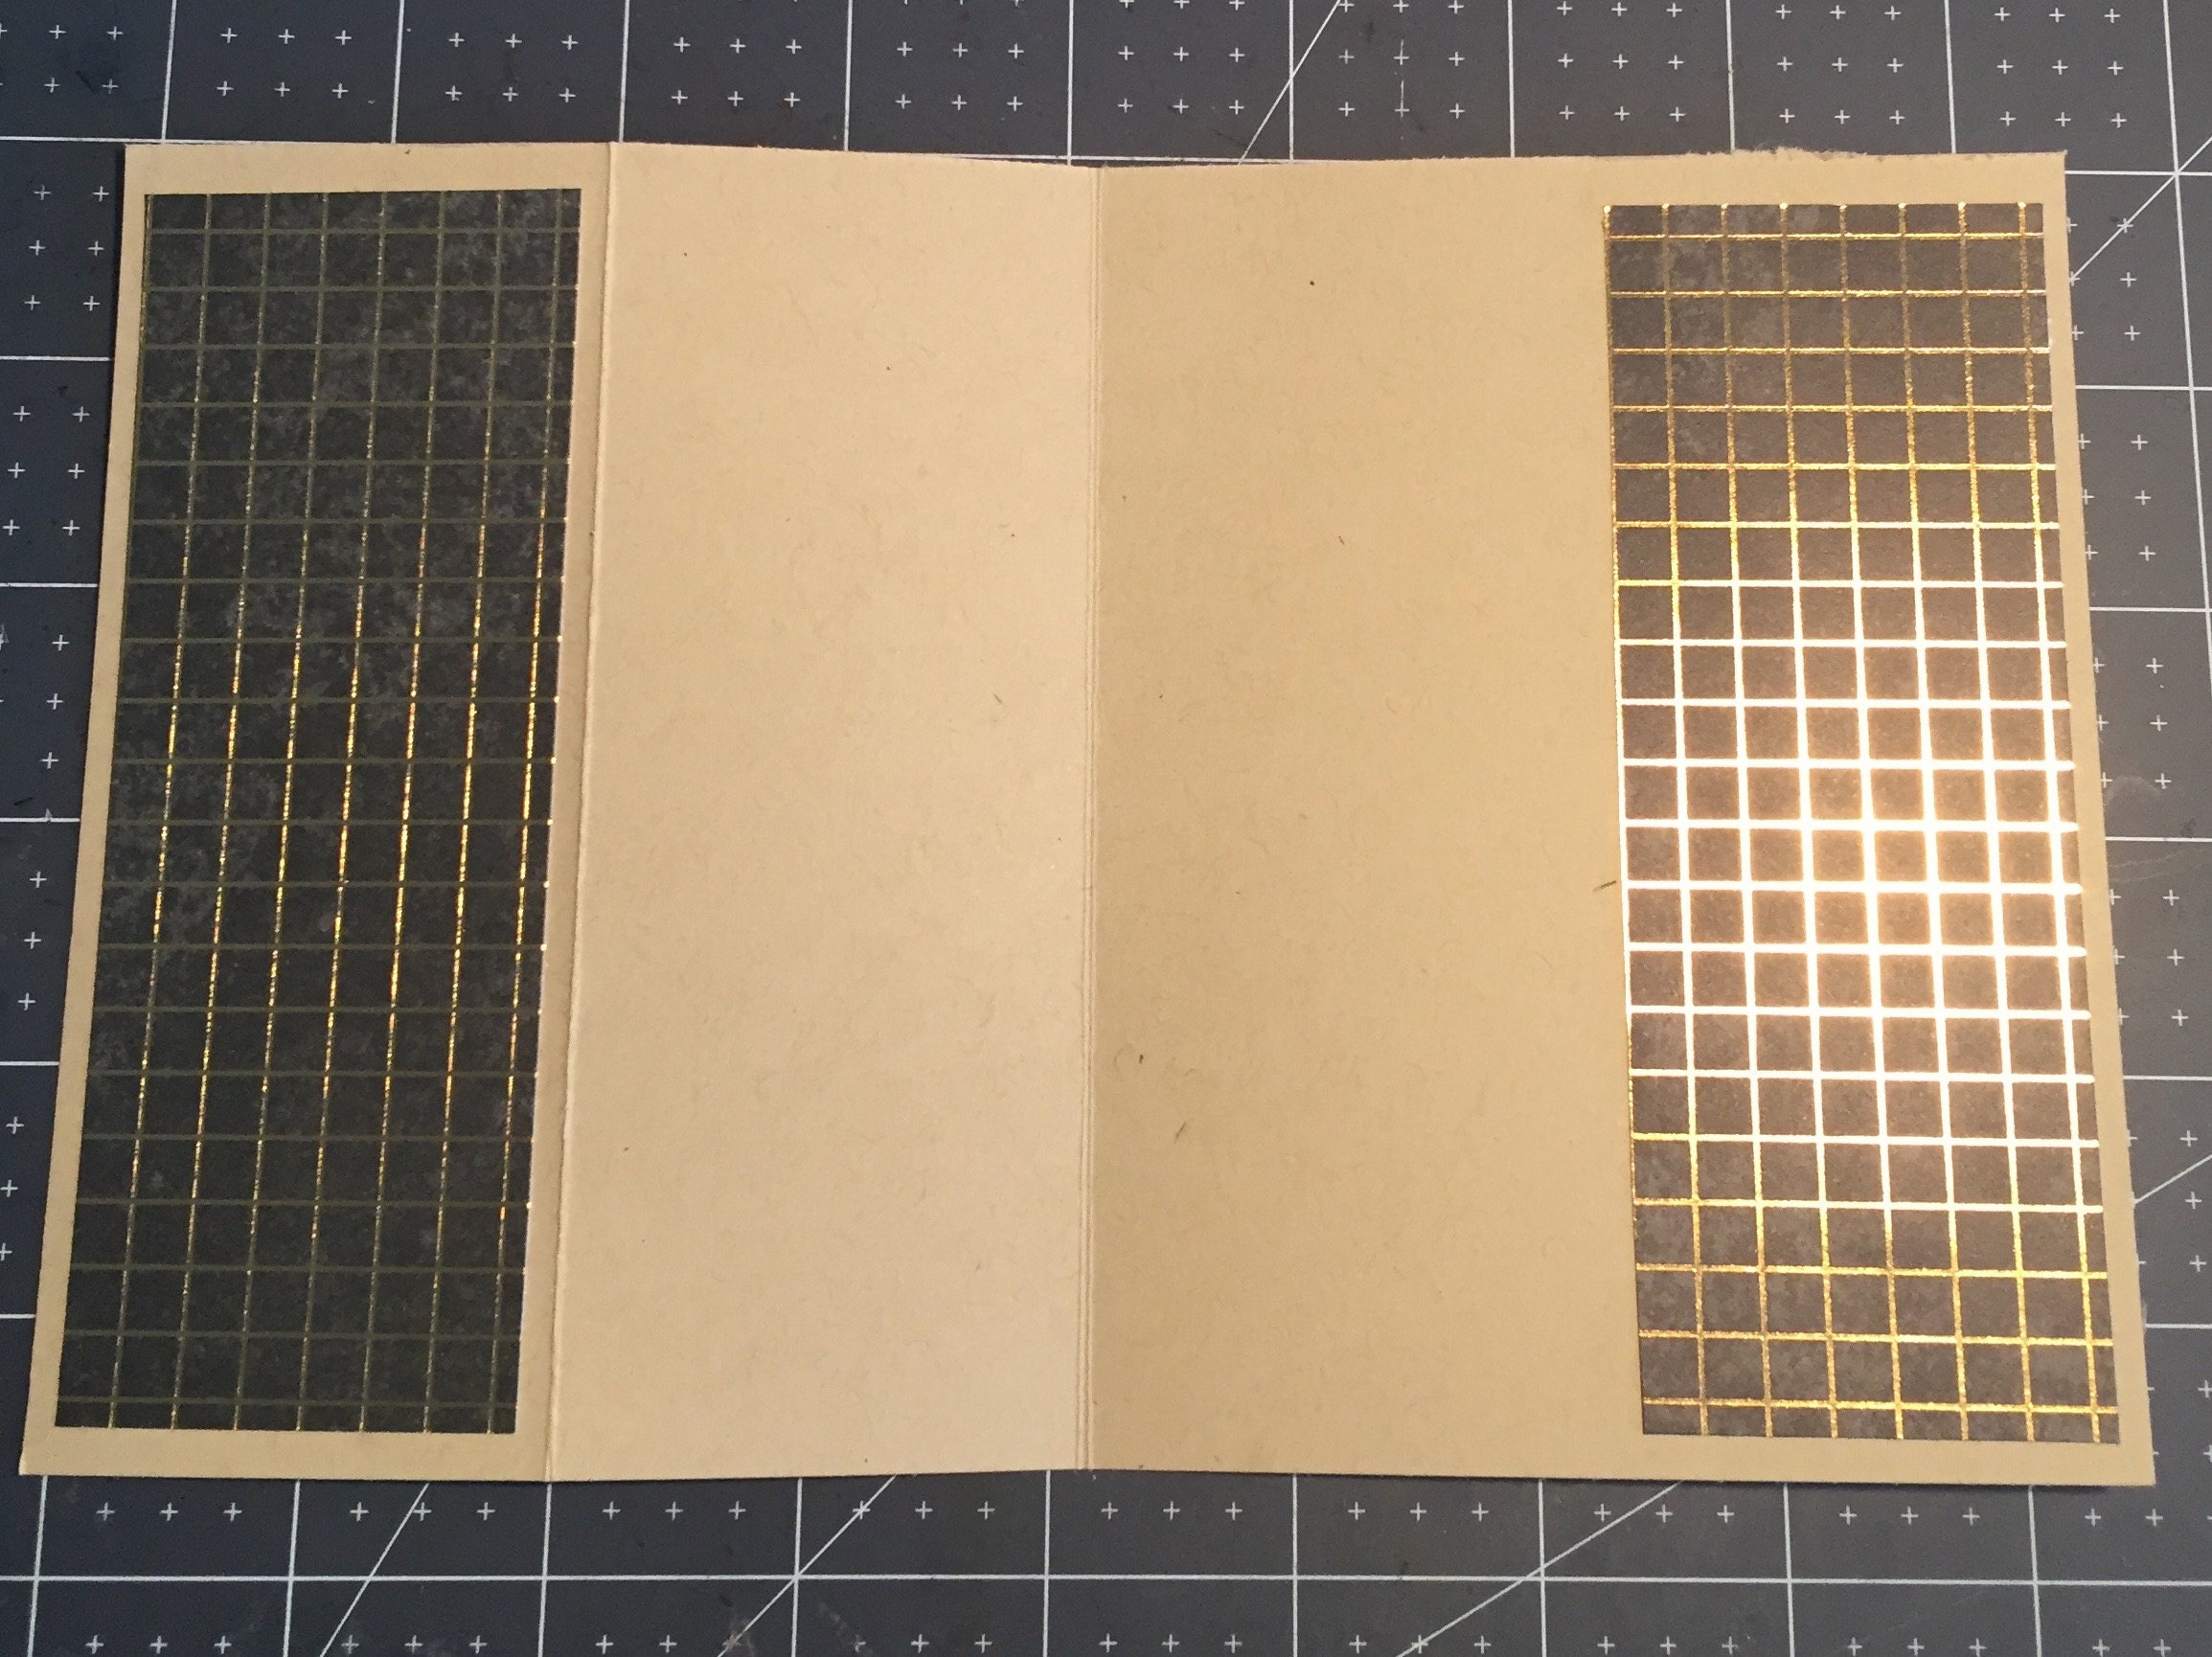
It should look like this. you can set this aside for now.
To create the easel strip, for the front of the card, Stamp your sentiment on the Very Vanilla card stock and adhere to the Crumb Cake strip. You can set this aside for now as well.
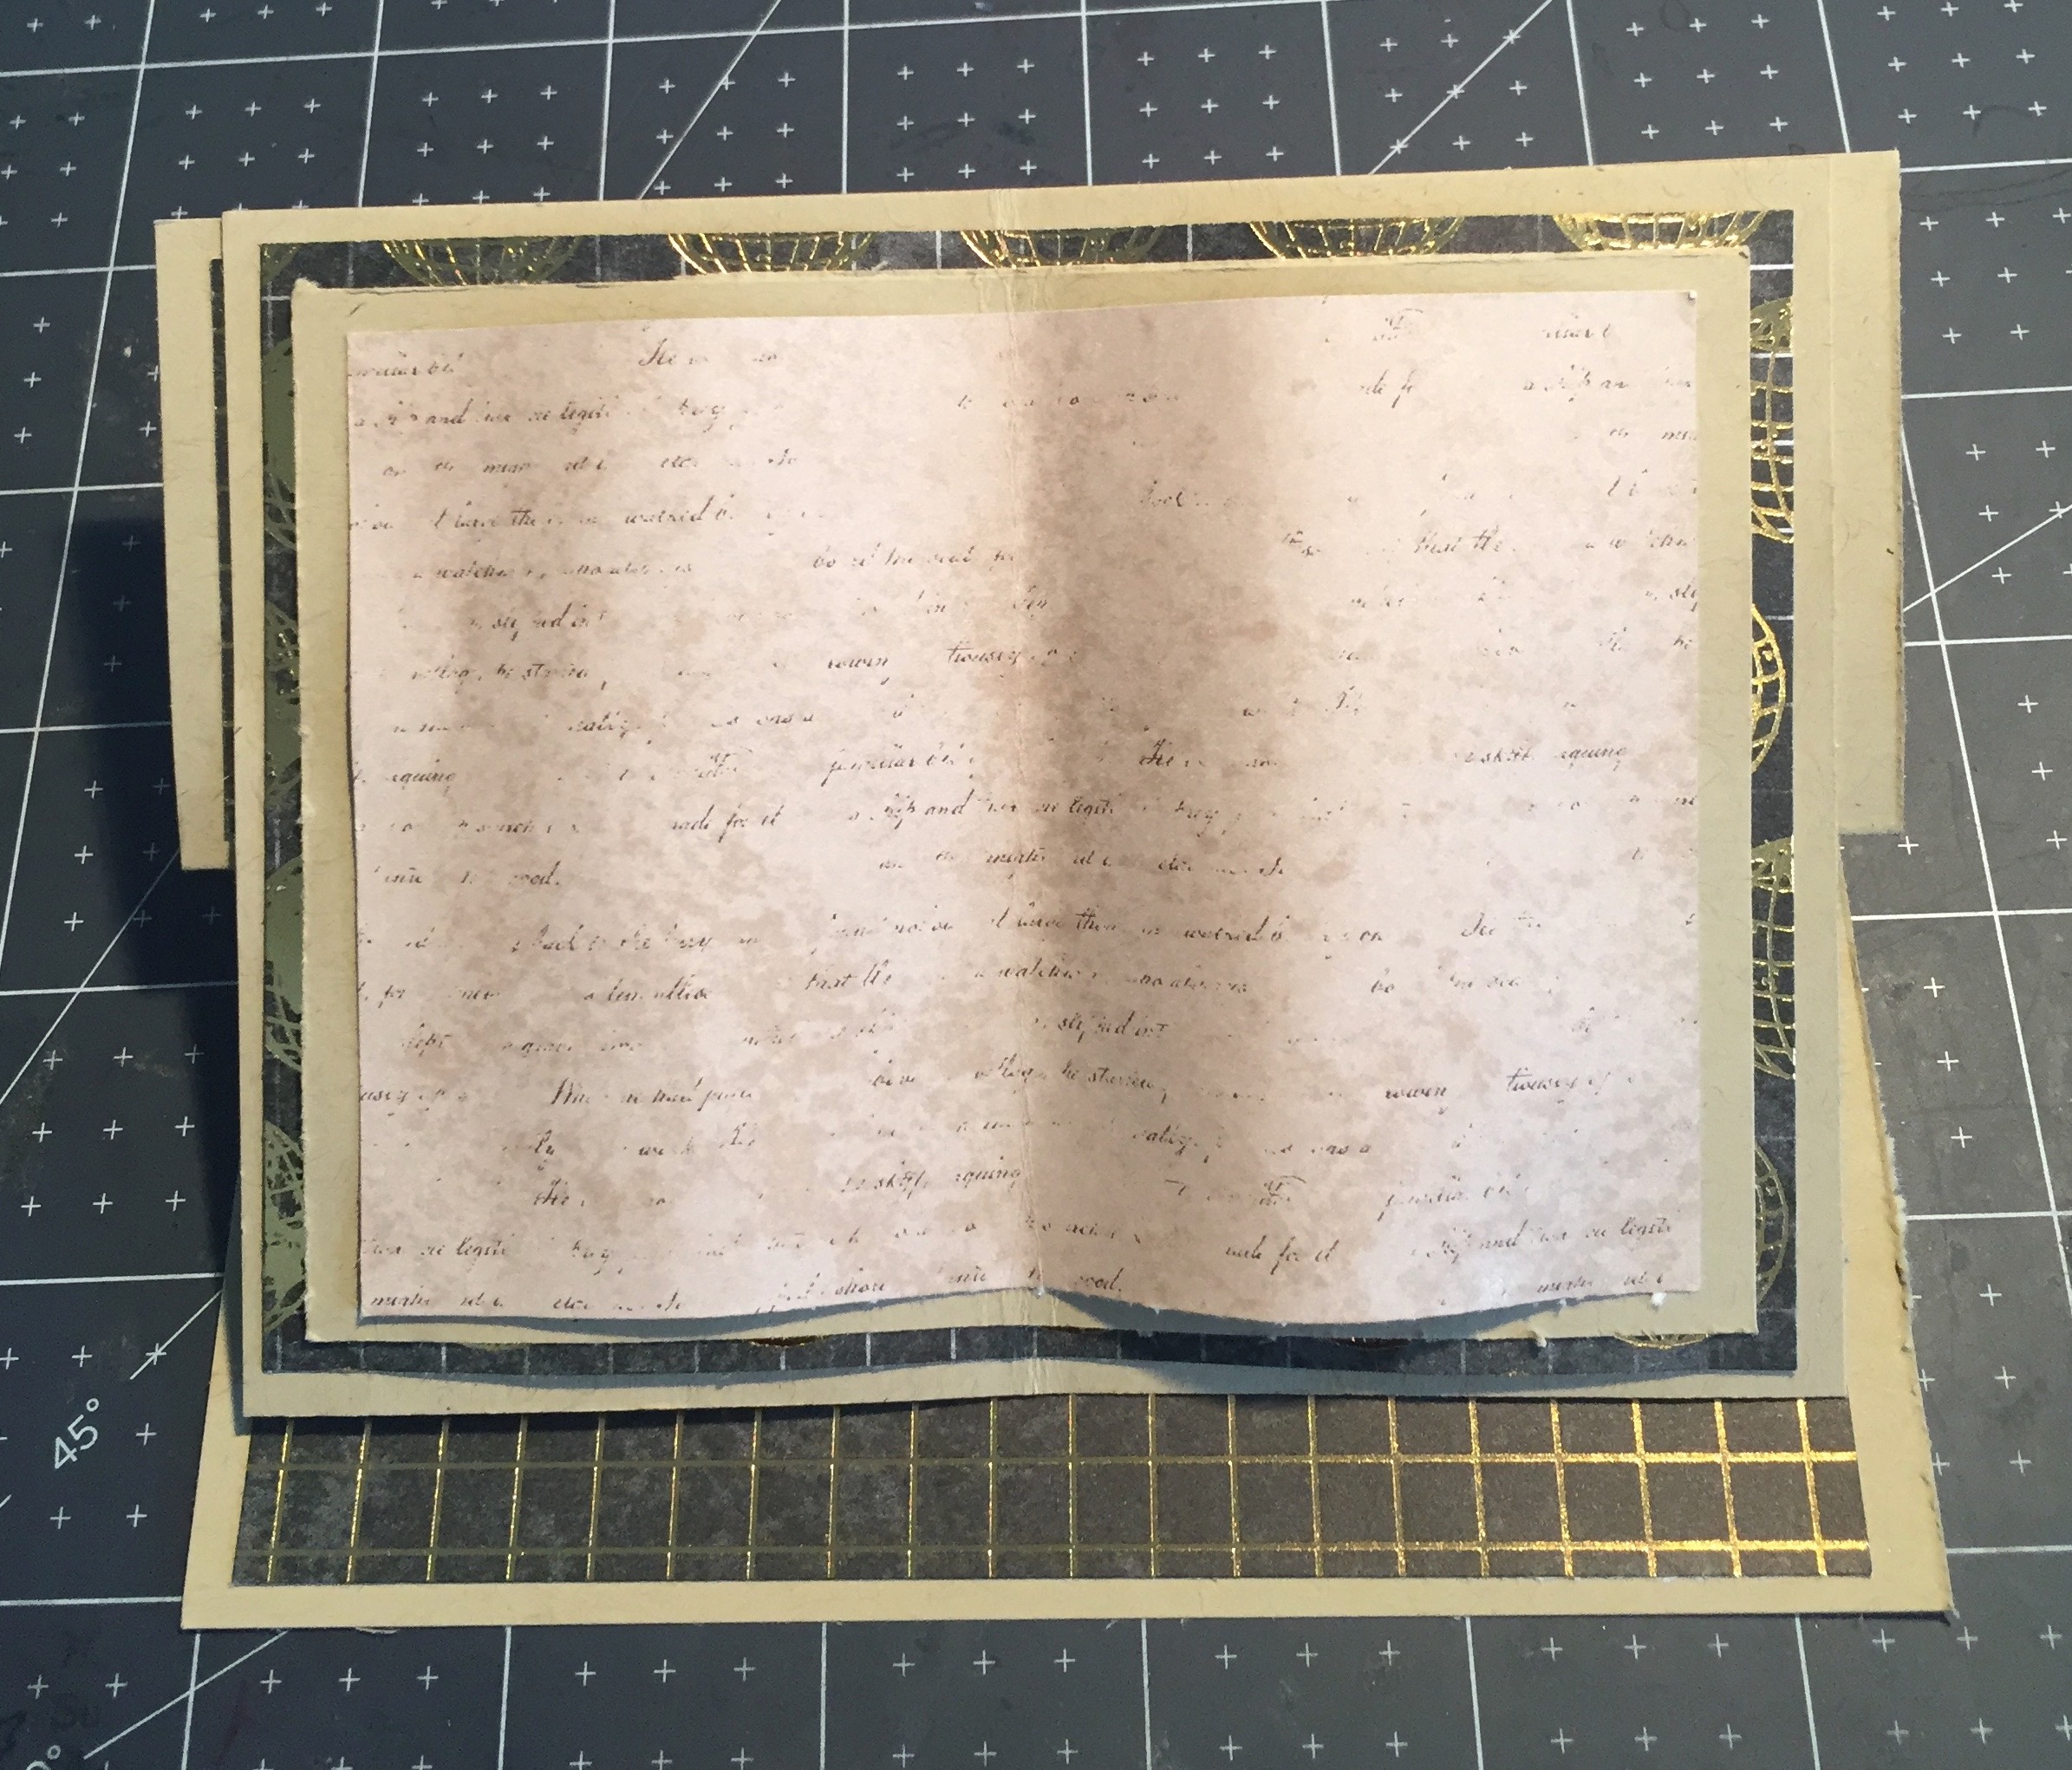
Now it’s time to create the book pages. Start with your larger book page then repeat with the smaller book page.
First fold both the card stock and DSP in half. Gently roll the DSP piece around your take your pick tool (or a pencil if you don’t have that tool) from the edge of the paper to the middle fold to create the curved pages. It should be just a soft curve. Ok, now add a strip of Tear and Tape or Stampin’ Seal+ along the back centre fold of the curved DSP page. (It’s a stronger adhesive and will help the pages stay together) Place the glued strip on the inside fold line of the card stock page. Gently add pressure down the middle to give it a good “stick” with your bone folder. Are you beginning to see the open book? Place three glue dots to the back of the DSP outside edges adhere to just the inside of the card stock edge ensuring there is a slight gap between them

It should look like an open page and you should see both the card stock and the DSP together. You should also see a gentle curve on your DSP which helps make it look like a page. If you need to, gently run your finger between the card stock and the DSP to add a little more curve if needed.

Create the smaller book page the same way as the larger book page and then you can put them together. Add T&T to the back of the cardstock for the smaller page and line it up and adhere to the larger book page and add the glue dots to hold in place just inside the edge so it curves up as well. You should see both pages of card stock and the DSP as well. Once you have both pages assembled together, you book is complete.
Option: if you want to, now is the time to add a ribbon down the middle of the book as a bookmark. Secure it with a glue dot to the back.
To add the book to your card base.
On the back of your book, at the top, place approximately 2 ” of Tear & Tape or Stampin’ Seal! Plus down each page side and down the centre. You only want to adhere the top of book to the flap. Align and centre your book before pressing to adhere the pages to your card base along the top folded flap of your card base
You now have your easel open book card. Remember that strip you put aside? Add dimensionals to the back of that strip and place on the inside panel (bottom of card). The added dimensionals will give just enough added height to support the open book so it stands up.

Stamp the sentiment for the front of the book and again, gently curve it so it lines up on the page. Stamp the quill pen/holder and adhere them to the front of the book. I chose to use glue dots for this.
I also chose to emboss them in gold but you could just stamp them in a colour to suit the colour scheme, such as Early Espresso, or Crumb Cake.
Supplies used
- Main Card Base
- Crumb Cake Card Stock – 8 ½” x 5 ½”
- Panels (for the front Flap and inside of the card)
- World of Good Designer Series paper
- Cut two pieces at 5 1/8” x 1 7/8”
- World of Good Designer Series paper
- Easel Strip (for the Front bottom of card)
- Crumb Cake Card stock – 5 1/8″ x 7/8″
- Very Vanilla Card Stock – 4 7/8″ x 5/8″
- Large Book Page
- Crumb Cake Card Stock – 5 1/8″ x 3 7/8″
- World of Good Designer Series paper
- Cut at 4 7/8″ x 3 5/8″
- Smaller Book Page
- Crumb Cake Card Stock – 4 5/8″ x 3 3/8″
- World of Good Designer Series paper
- Cut at 4 3/8″ x 3 1/8″
- Scrap paper for decorating
- Ribbon (optional) for the centre of the book

This is another card I made using supplies from my February Paper Pumpkin kit. Although made the exact same way, you can see how different it looks just by changing the decorations and colour scheme. A totally different look.
Paper Pumpkin is a monthly subscription service that offers fun, and easy paper craft projects for crafters of any skill level!

Each month has a different theme; You will receive pre-cut paper pieces, embellishments, ink, and an exclusive stamp set. As the subscription continues, you will have a collection of cards and other creations for a variety of occasions, in addition to a stockpile of supplies! if you would like to receive these kits, click here before March 10 and you will also receive four stencils and a sponge to create beautiful backgrounds for your cards.
I hope you have enjoyed this post, please like and follow my blog to see future posts. As always, I welcome your feedback and so please leave a comment. I invite you to try your hand at making this card and I would love to see a picture of your creation.
Would you like to be added to my email newsletter? please provide your contact information here
Leave a Reply